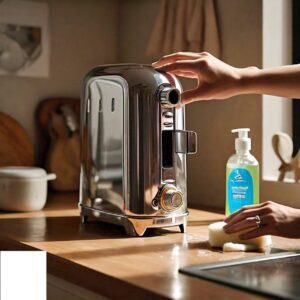
We all love that perfectly crisp slice of toast in the morning, but how often do we think about the inner workings of the appliance that delivers it? Your trusty toaster is a champion of breakfast convenience, but like any kitchen essential, it requires some tender loving care (TLC). This means regular cleaning and maintenance to keep it functioning safely, efficiently, and toast-tastic! Without proper TLC, your bread toaster can accumulate crumbs, burnt food particles, and grease. This can lead to issues, from fire hazards and uneven toasting to unpleasant odours and a diminished lifespan for your appliance. Taking a few minutes to clean your toaster regularly is a simple investment that will ensure you continue to enjoy perfectly browned toast for years to come.

Why Cleaning Your Bread Toaster is Important
1. Ensures Optimal Performance
Over time, crumbs and food particles can accumulate inside your toaster, affecting its performance. This debris can cause uneven toasting, making your bread burn or not toast enough. Regular cleaning helps maintain even heat distribution and optimal toasting.
2. Prevents Fire Hazards
A buildup of crumbs and debris in your toaster can become a serious fire hazard. If crumbs collect at the bottom and catch fire, it could lead to a dangerous situation. Keeping your toaster clean minimizes the risk of fire.
3. Prolongs the Lifespan
Regular maintenance can significantly extend the lifespan of your toaster. By removing accumulated debris, you prevent damage to the heating elements and internal components, ensuring your toaster lasts longer.
4. Maintains Hygiene
Food particles left in the toaster can attract pests and cause unpleasant odours. Regular cleaning prevents this, ensuring your toaster remains hygienic and safe to use.
5. Ensures Quality of Toast
A clean toaster ensures that your bread is toasted evenly and to perfection. Any leftover crumbs or grease can affect the taste and quality of your toast, leading to inconsistent results.

How to Clean a Bread Toaster: Step-by-Step Guide
Step 1: Unplug and Cool Down
Before you start cleaning your toaster, always unplug it and let it cool down completely. This ensures your safety and prevents any electrical hazards.
Step 2: Remove and Clean the Crumb Tray
Most modern toasters come with a removable crumb tray. Slide it out and dispose of any crumbs. Wash the tray with warm soapy water, rinse thoroughly, and let it dry completely before reinserting it.
Step 3: Shake Out Crumbs
Turn the toaster upside down over a sink or trash can and gently shake it to dislodge any remaining crumbs. You can also use a soft brush to reach inside and sweep out any stubborn particles.
Step 4: Clean the Interior
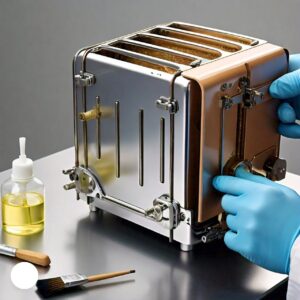
Use a pastry brush or an old toothbrush to carefully clean the interior of the toaster. Be gentle to avoid damaging the heating elements. Never use water or any liquid inside the toaster, as this can cause electrical damage and potential hazards.
Step 5: Clean the Exterior
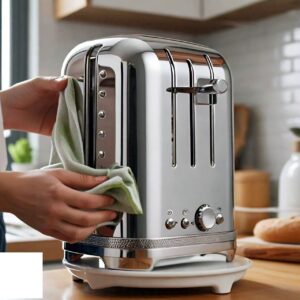
Wipe down the exterior of the toaster with a damp cloth. For stubborn stains, use a mild dish soap or a mixture of baking soda and water. Avoid using abrasive cleaners or scouring pads, as these can scratch the surface of your toaster.
Step 6: Clean the Toaster Slots
To clean the slots, use a soft brush or a thin tool like a wooden skewer wrapped in a damp cloth. This helps remove any crumbs or debris that are stuck inside. Be careful not to damage the internal components.
Step 7: Dry Thoroughly
Make sure all parts of the toaster are completely dry before plugging it back in and using it. Moisture can cause electrical issues and damage the toaster.
Step 8: Reassemble and Test
Reassemble any parts you removed, such as the crumb tray, and plug in the toaster. Run a test cycle without bread to ensure it’s working properly and to remove any cleaning residues.

Pro Tips for Toaster Maintenance
1. Clean Regularly
Make it a habit to clean your toaster once a week, or more frequently if you use it daily. This prevents buildup and makes each cleaning session quicker and easier.
2. Avoid Sticky Substances
Avoid toasting items with sticky substances, as these can melt and drip inside the toaster, making it harder to clean. If you must toast sticky items, use a toaster bag to contain the mess.
3. Use the Right Bread Size
Ensure you use bread slices that fit easily into the toaster slots. Forcing oversized bread into the slots can damage the toaster and cause crumbs to accumulate.
4. Regular Inspections
Regularly inspect your toaster for any signs of wear or damage. Check the cord for fraying and make sure the controls and levers are working smoothly.
5. Avoid Using Metal Objects
Never use metal objects like knives or forks to retrieve stuck toast or clean the toaster. This can damage the heating elements and pose a serious electrical hazard.
Frequently Asked Questions
1. How often should I clean my bread toaster?
Ideally, you should clean your bread toaster once a week if you use it daily. This prevents excessive buildup of crumbs and ensures it stays in good working condition.
2. Can I submerge my toaster in water?
No, you should never submerge your toaster in water or any other liquid. This can damage the electrical components and pose a serious safety risk.
3. What should I do if my toaster smells bad?
If your toaster has an unpleasant odour, it may be due to accumulated crumbs or food particles. Clean the interior thoroughly, and ensure the crumb tray is emptied regularly to prevent odours.
4. Can I use a vacuum cleaner to clean my toaster?
Yes, you can use a vacuum cleaner with a nozzle attachment to remove crumbs from your toaster. Make sure the toaster is unplugged and cool before doing so.
Maintaining a clean toaster is not just about keeping your kitchen looking tidy—it’s essential for ensuring the appliance functions safely and efficiently. By following the best ways to clean a bread toaster outlined in this guide, you can enjoy delicious, perfectly toasted bread while prolonging the life of your appliance. Regular cleaning and maintenance will keep your toaster in optimal condition, providing you with years of reliable service.

