ILIFE A12 Pro Robot Vacuum and Mop Combo

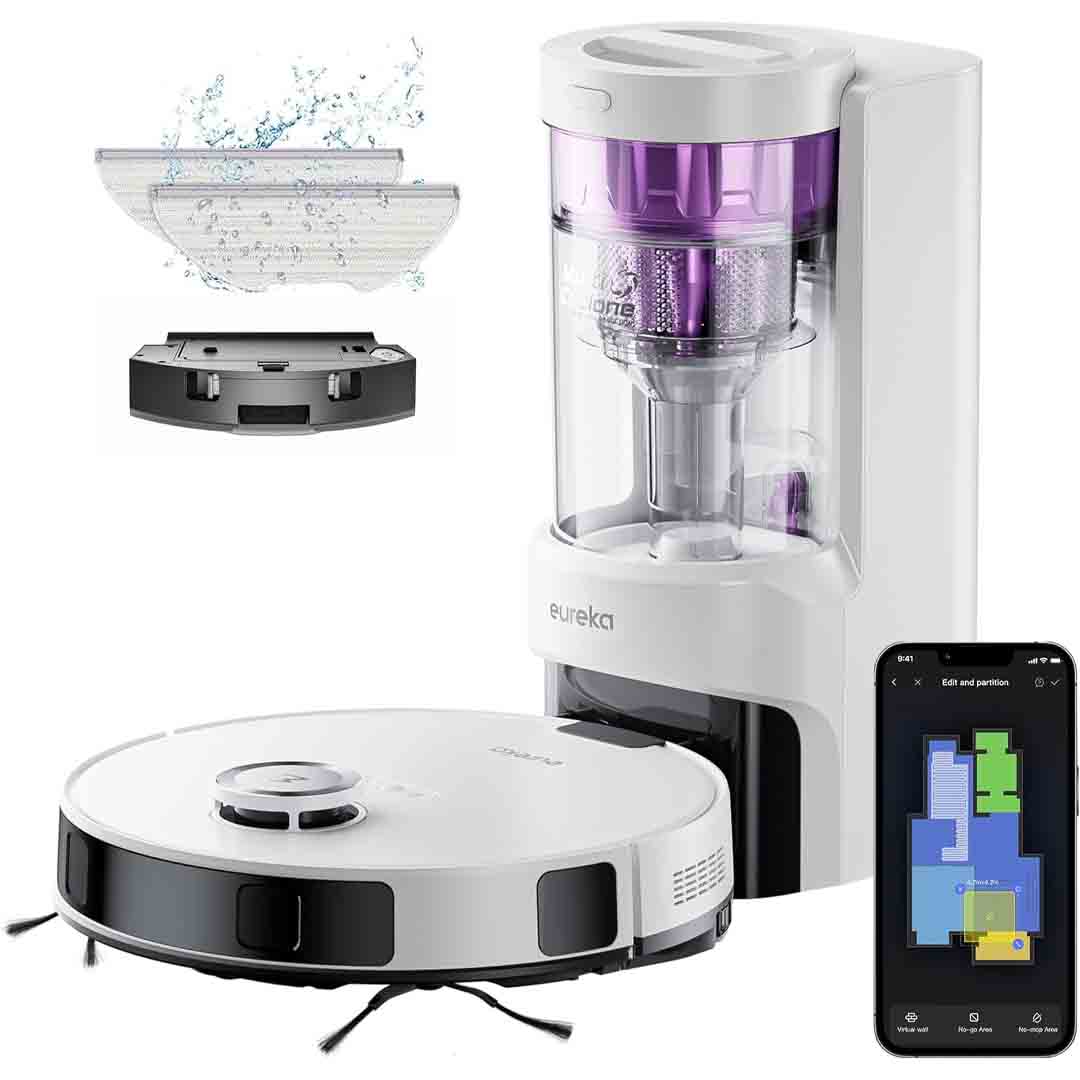
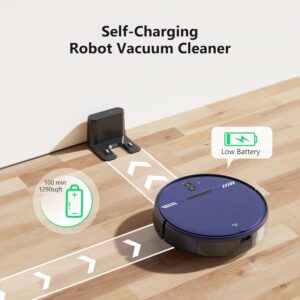
The ILIFE A12 Pro Robot Vacuum and Mop Combo offers an impressive blend of automation and smart technology for modern, busy homes. It comes with a self-emptying base that can store up to around 60 days’ worth of dust and debris, reducing the need for frequent manual maintenance. Equipped with advanced LiDAR navigation, it accurately scans and maps your home, allowing it to create custom room layouts, define restricted areas, and establish no-mop zones for precise, efficient cleaning.

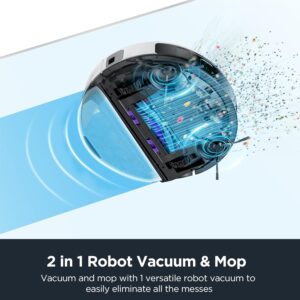
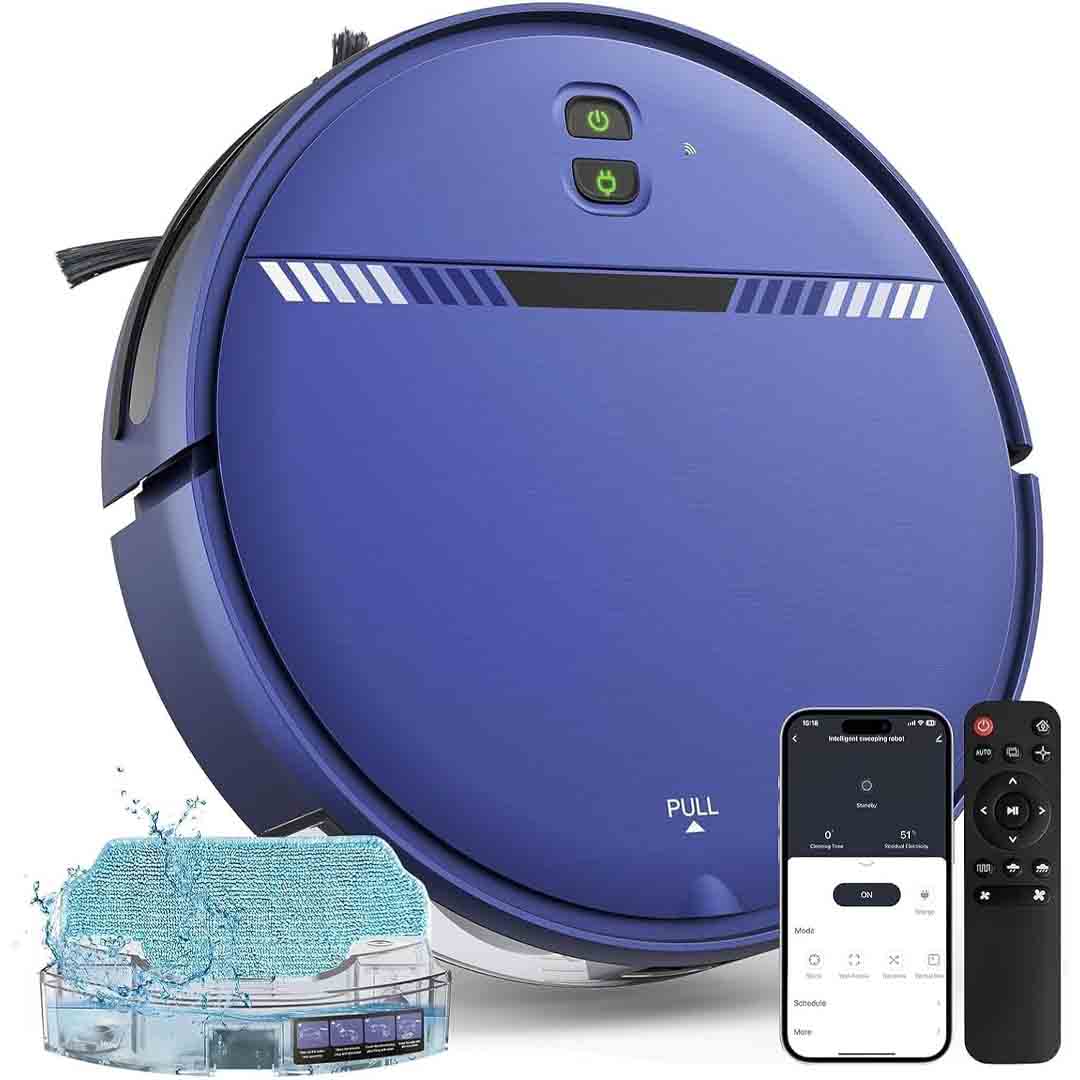
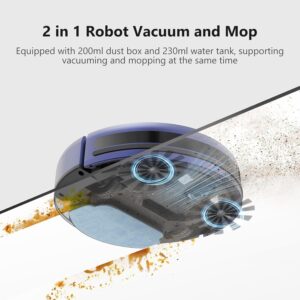
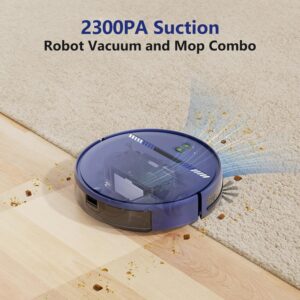
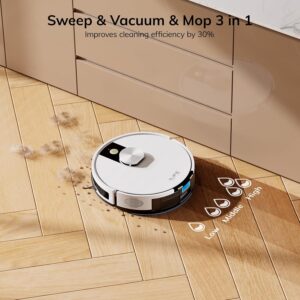
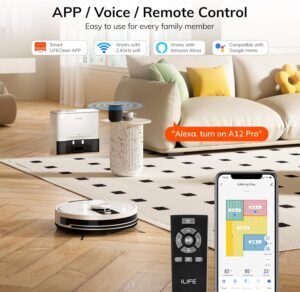
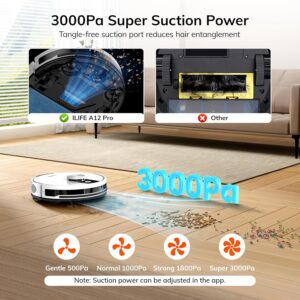
When operating, the A12 Pro performs vacuuming and mopping simultaneously thanks to its integrated 2-in-1 dustbin and water tank, which enables it to sweep, suction, and mop hard floors without changing attachments. Delivering up to 3,000 Pa of suction power, it effectively removes dust, dirt, and pet hair from hard surfaces with minimal effort. You can conveniently manage and schedule cleaning through the mobile app, voice assistants like Alexa or Google, or the included remote control.

Like most robotic vacuums, the A12 Pro performs best on hard flooring and in open areas where it can move freely; its cleaning depth may be less effective on thick or high-pile carpets. It’s also important to note that certain smart and docking features—such as the automatic dust collection system and replaceable dust bags—require access to compatible accessories and operation on the appropriate power supply (e.g., 110V for this model). For those seeking a hands-free, hassle-free cleaning companion for hardwood, tile, or low-pile surfaces, this model is an excellent choice.

Specification

Here are the key specifications for the ILIFE A12 Pro Robot Vacuum & Mop Combo (Self-Emptying Station) as provided by the manufacturer:

Dimensions & physical

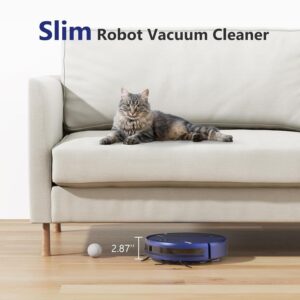
  • Robot body: Approx. 315 × 315 × 93 mm.

  • Self-empty station: Approx. 284 × 133 × 253 mm.

  • Dust-bag capacity (station bag): ~2.5 L.

Performance & cleaning features

  • Maximum suction: ~3,000 Pa.

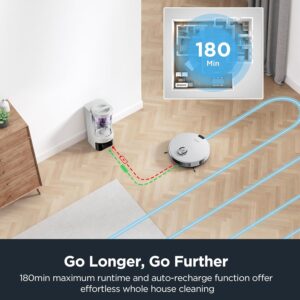
  • Runtime: Up to approx. 140 minutes in standard conditions.

  • 2-in-1 vacuum + mop: Robot has combined dustbin & water-tank capacity 200 mL + 200 mL as per manufacturer.

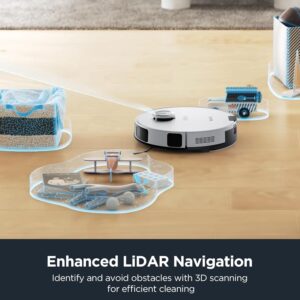
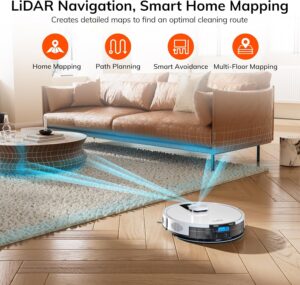
  • Navigation: LiDAR (LDS) laser navigation + SLAM algorithm for mapping.

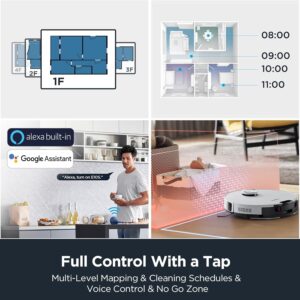
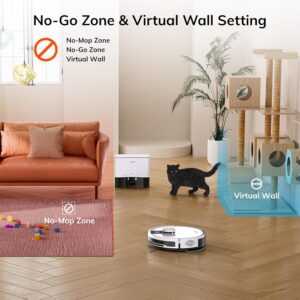
  • Smart features: Home mapping, multi-floor support, no-go zones / no-mop zones.

Connectivity, power & compatibility

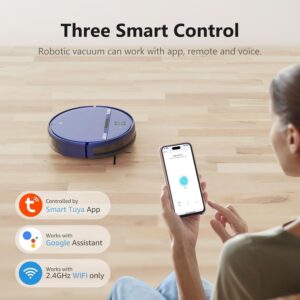
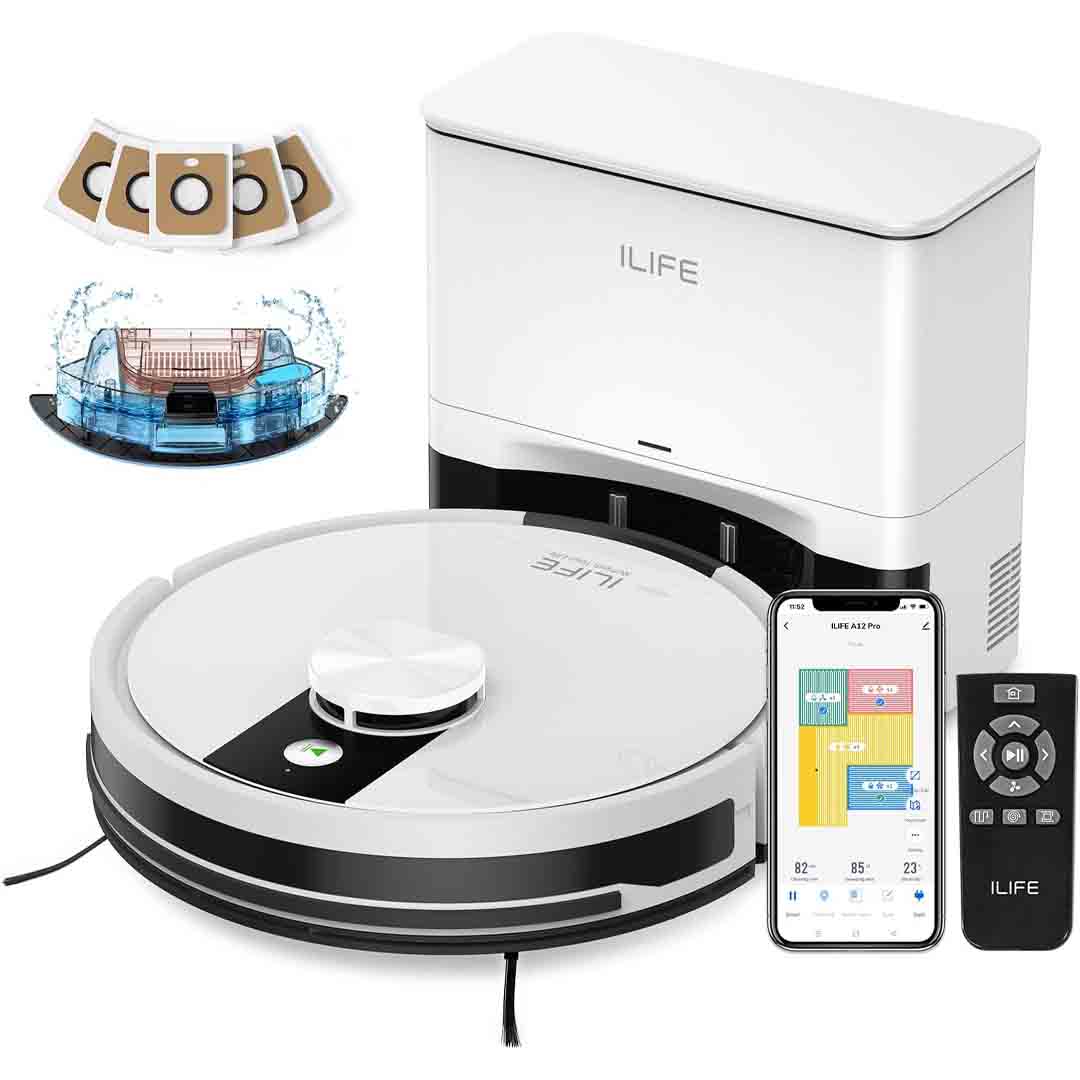
  • Supports 2.4 GHz WiFi, control via smartphone app (“ILIFEClean”), voice control (Alexa / Google Assistant), and physical remote control.

  • Voltage: Although some product listings mention “for Hard Floors, 110 V” in specific markets, the official user manual (for select regions) specifies an input voltage of 220–240 V~ 50/60 Hz for the charging base.

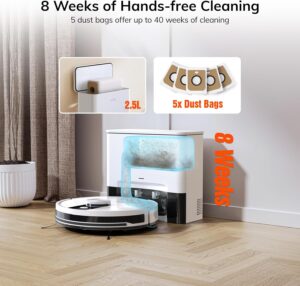
  • Dust-bag autonomy: The self-emptying base includes five disposable dust bags, each designed to last approximately eight weeks, providing up to forty weeks of low-maintenance, hands-free cleaning, depending on usage frequency.

Key Features

Here are some of the key features of the ILIFE A12 Pro Robot Vacuum & Mop Combo — a high-end smart floor-cleaning system designed for hands-free operation:

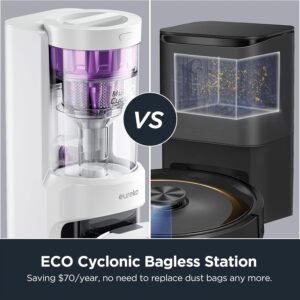
1. Self-Emptying Base Station

One of the most notable features is the self-emptying base, which automatically transfers dust and debris from the robot’s onboard bin into a large-capacity collection bag after every cleaning cycle. As stated by the manufacturer, the base employs a powerful cyclone suction system (≈13,000 Pa) to thoroughly clear the robot’s dust compartment and includes five 2.5-liter dust bags—each designed to last up to eight weeks, offering roughly forty weeks of maintenance-free operation. This feature is particularly convenient for users who prefer a hands-off cleaning experience and wish to avoid the hassle of frequently emptying the dustbin.

2. LiDAR Navigation & Smart Mapping

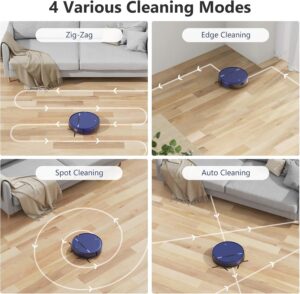
The A12 Pro features an advanced LiDAR (LDS) laser navigation system combined with SLAM-based intelligent mapping. It analyzes its surroundings, creates a detailed layout of your home, and strategically plans optimized cleaning routes for greater efficiency. Using the companion mobile app, you can set virtual boundaries like no-go and no-mop zones, assign specific rooms or sections for targeted cleaning, and store multiple floor maps for multi-level homes. This technology makes the robot far smarter and more precise than older models that rely on random movement patterns.

3. Hybrid Vacuum + Mop + Smart Controls

The A12 Pro integrates a 2-in-1 dustbin and water tank system (200 mL each), enabling it to vacuum and mop simultaneously without the need to change attachments or run multiple cleaning cycles. It features 2.4 GHz Wi-Fi connectivity for app-based operation through the ILIFEClean mobile app, as well as voice assistant compatibility with Alexa and Google Assistant, plus a handheld remote control for added convenience. Additionally, it provides several adjustable suction levels, including a maximum power mode of around 3,000 Pa, ideal for deep or heavy-duty cleaning tasks.

How to use the ILIFE A12 Pro Robot Vacuum and Mop Combo

Here’s a simple step-by-step guide on how to use the ILIFE A12 Pro Robot Vacuum and Mop Combo — from setup to daily operation:

1. Setup & Installation

  1. Unpack the robot unit, self-emptying dock, power adapter, side brushes, dust collection bags, mopping pad, and water reservoir.

  2. Assemble the parts: Connect the side brushes to the bottom of the robot and place a dust bag inside the self-emptying station.

  3. Place the charging dock on a level, hard floor, leaving at least 1.5 feet of space on each side and 4 feet of open area in front.

  4. Connect the dock to a power outlet, ensuring the voltage matches your region’s standard (typically 110 V or 220 V).

  5. Set the robot onto the charging base and allow it to fully charge before using it for the first time (this usually takes 4–6 hours).

2. Connect & Map Your Home

  1. Download the “ILIFEClean” app from the App Store or Google Play.

  2. Connect to Wi-Fi (2.4 GHz only) and pair the robot with your smartphone using the in-app instructions.

  3. After connecting, begin the initial cleaning run — the robot will automatically use its LiDAR sensors to scan your home and generate a precise floor map.

  4. In the app, you can now:

    • Set no-go zones and no-mop zones

    • Divide rooms or label areas

    • Save multiple floor maps if you have more than one level

3. Vacuuming & Mopping

  1. Vacuum mode: For vacuum-only cleaning, attach the dustbin and choose a suction mode — quiet, standard, or max (around 3000 Pa).

  2. Mop mode: Fill the water tank (around 200 mL) with clean water, attach the mop cloth, and choose either “mop” or “vacuum + mop” mode in the app.

  3. Automatic emptying: After every cleaning session, the robot returns to its dock and automatically empties debris into the 2.5 L self-emptying bag, which can hold up to about 60 days’ worth of dust.

  4. Control options: You can start, pause, or schedule cleaning using the mobile app, voice commands through Alexa or Google Assistant, or the supplied remote control.

4. Maintenance Tips

  • After mopping, drain the water tank and clean the mop pad regularly.

  • Change the dust bag once it’s full — typically every 6 to 8 weeks.

  • Clean the sensors and brushes once a week to avoid blockages and maintain performance.

  • Update the firmware via the mobile app to gain the latest performance enhancements.

Tips suitable for the ILIFE A12 Pro Robot Vacuum and Mop Combo

Here are some practical tips to get the best performance, longevity, and cleaning results from your ILIFE A12 Pro Robot Vacuum and Mop Combo:

Before Cleaning

  1. Tidy up the area — Clear the floor of small items, cables, socks, and loose rugs that could get caught in the brushes or obstruct the sensors.

  2. Keep the base station clear — Place the self-emptying dock on a flat, level surface with enough open space around it to let the robot dock smoothly.

  3. Check the dust bag — Confirm that a dust bag is securely installed in the self-emptying station before starting each cleaning cycle.

  4. Avoid dark or reflective floors — Dark carpets or glossy black tiles may interfere with the cliff sensors and cause navigation errors.

During Cleaning

  1. Use mapping first — Allow the robot to finish a full mapping cycle before you set up no-go or no-mop zones.

  2. Choose the right mode:

    • Quiet mode for light dust or nighttime cleaning.

    • Standard mode for everyday cleaning.

    • Max mode (≈3000 Pa) for pet hair or heavy dirt.

  3. Adjust water flow in the app when mopping — Use low water or suction levels for laminate and wooden floors, and medium to high settings for tile or stone surfaces.

  4. Monitor the app occasionally — You can monitor cleaning progress, create schedules, and label rooms for more precise cleaning.

After Cleaning & Maintenance

  1. Drain the water tank after every mopping session to avoid mold or unpleasant smells.

  2. Clean the mop pad frequently and allow it to air dry completely.

  3. Wipe the sensors and camera carefully with a dry cloth to keep navigation accurate.

  4. Check the main and side brushes every week, removing any hair or debris to keep suction strong.

  5. Change the filters, brushes, and mop pads as advised — typically every 2–3 months, depending on usage.

  6. Update the firmware via the ILIFEClean app to enhance mapping and navigation accuracy.

Cleaning Guide

Here’s a complete, easy-to-follow guide on how to clean and maintain your ILIFE A12 Pro Robot Vacuum and Mop Combo to keep it performing efficiently and extend its lifespan:

1. Cleaning the Dustbin and Filter

  1. Remove the dustbin — Press the release latch on the robot and remove the dustbin.

  2. Dispose of the collected debris in a trash bin.

  3. Clean the filter — Lightly tap it to shake off dust; for a more thorough clean, rinse it under cold water if it’s the washable type.

  4. Dry completely: Allow it to dry for a minimum of 24 hours before reinstalling — never insert a damp filter.

  5. Place the dustbin back into the robot and ensure it’s firmly seated.

Tip: Clean the filter once a week and replace it every 2–3 months to maintain strong suction.

2. Cleaning the Water Tank and Mop Pad

  1. Remove the 2-in-1 dustbin and water tank from the robot.

  2. Drain any leftover water from the tank after every use to prevent mold formation.

  3. Rinse the tank thoroughly with clean water; avoid using soap or cleaning agents.

  4. Detach the mop cloth and hand-wash it with mild soap, then air dry.

  5. Reinstall the mop pad only after it has fully dried.

Tip: Do not leave water sitting in the tank overnight or keep the robot stored with a damp mop pad attached.

3. Cleaning the Brushes and Wheels

  1. Power off the robot and gently turn it upside down.

  2. Main brush:

    • Click  the locks to detach the brush guard.

    • Remove the main roller brush and clear away any tangled hair or dirt.

    • Use the included cleaning brush or a pair of scissors to trim off any tangled strands.

  3. Side brushes:

    • Carefully remove them and wipe clean with a dry cloth.

    • Replace the brush if the bristles are bent or worn.

  4. Wheels:

    • Clean each wheel with a damp cloth to remove accumulated dirt.

    • Make sure the wheels rotate freely without any blockage.

Tip: Clean the brushes weekly (or more often if you have pets).

4. Cleaning Sensors and Charging Contacts

  1. Wipe all cliff sensors, wall sensors, and the LiDAR dome with a dry microfiber cloth.

  2. Use a dry cloth to clean the charging contacts on both the robot and dock to ensure efficient charging.

  3. Do not apply water or cleaning sprays directly to the sensors.

Tip: Clean sensors every 1–2 weeks to prevent navigation errors.

5. Cleaning the Self-Emptying Station

  1. Switch off the power before cleaning the station.

  2. Inspect the dust bag and replace it when it’s full, typically every 6–8 weeks.

  3. Clean the air inlet and base surface using a dry or lightly dampened cloth.

  4. Do not pour water into the station’s suction port.

Tip: Always use genuine ILIFE dust bags for proper fit and suction efficiency.

What to avoid when using the ILIFE A12 Pro Robot Vacuum and Mop Combo

Here are the most important things to avoid when using your ILIFE A12 Pro Robot Vacuum and Mop Combo — to prevent damage, ensure safety, and keep it running smoothly:

1. Avoid Misuse and Improper Handling

  • Don’t lift or move the robot while it’s cleaning — This may interfere with its LiDAR navigation and affect mapping accuracy.

  • Never submerge The robot, dustbin, or charging dock should not be immersed in water.

  • Avoid using harsh chemicals or cleaners in the water tank — Use solely clean water when mopping.

  • Don’t block the LiDAR sensor (the round top dome) with stickers or covers; this can impact navigation accuracy.

  • Do not use outdoors or on wet surfaces — It is intended for indoor use on dry floors only.

2. Avoid Charging and Power Mistakes

  • Don’t use an incompatible voltage — Ensure you select the correct 110 V or 220 V version according to your region.

  • Do not connect the dock to unstable power sources, such as extension cords or multi-outlet adapters without surge protection.

  • Don’t leave the robot unplugged for long periods — The battery may fully discharge and its lifespan could be reduced.

  • Keep charging contacts dry and clean; Moisture can lead to charging problems or corrosion.

3. Avoid Navigation and Cleaning Obstacles

  • Avoid operating the robot in areas with wires, toys, or clothes, as these can tangle the brushes or obstruct sensors.

  • Stay clear of high thresholds or thick rugs taller than 0.8–1 inch, as the robot may become stuck.

  • Keep the self-emptying base station unobstructed — allow at least 1.5 ft on each side and 4 ft in front.

  • Stay away from dark or glossy floors, as these can confuse the cliff sensors and be mistaken for stairs.

4. Avoid Maintenance Mistakes

  • Never put a wet filter or mop pad back in; always ensure they are fully dry first.

  • Do not force open any parts or alter the robot, as this could void the warranty or lead to malfunction.

  • Do not skip firmware updates in the ILIFEClean app, as they frequently fix bugs and enhance mapping.

  • Do not use the robot with missing or damaged brushes or filters, as this lowers suction and may damage the motor.

In conclusion, the ILIFE A12 Pro Robot Vacuum and Mop Combo is a powerful, hands-free cleaning solution that combines strong suction, smart LiDAR navigation, and a 60-day self-emptying system. It efficiently vacuums and mops hard floors while minimizing maintenance. Ideal for busy households or pet owners, it offers convenience, precision, and reliability — making it a smart investment for effortless home cleaning.

Eureka 2 in 1 Robotic Vacuum and Mop Combo Vacuum Cleaner

The Eureka E10s is an innovative hybrid appliance engineered for both vacuuming and mopping, ideal for homes with a mix of flooring surfaces such as tiles, hardwood, and carpets. It boasts a 2-in-1 cleaning system that performs vacuuming and mopping simultaneously, along with a bagless self-emptying dock that stores debris for weeks—eliminating the need for frequent manual emptying. Equipped with LiDAR navigation, it intelligently maps your space, optimizes cleaning routes, and efficiently avoids obstacles.

In terms of performance, Eureka reports a suction power of up to 4,000 Pa, which is impressive for its class and allows the E10s to effectively capture dust, hair, and everyday debris. It also includes an auto-lifting mop pad, which raises automatically when the robot moves over carpets or rugs to prevent moisture transfer. The bagless self-emptying dock can store debris for roughly 45–60 days before requiring manual disposal. Through the Eureka mobile app, users can schedule cleanings, create no-go or no-mop zones, and connect the device with Amazon Alexa or Google Assistant for easy voice control.

Despite its strong positioning in the mid-range segment, the Eureka E10s demonstrates certain operational compromises. While suction performance is commendable, its mopping system is primarily designed for maintenance cleaning, lacking the scrubbing force needed for ingrained stains. Reports indicate that the self-emptying dock may occasionally leave residual debris in the bin, necessitating manual clearing, and that LiDAR navigation can encounter challenges in confined or low-clearance areas. Users seeking rotating mop pads or enhanced obstacle detection may prefer higher-tier alternatives, but as a dual-function cleaner for routine maintenance, the E10s remains a solid performer.

Specification

Here are the key specifications for the Eureka E10s Robot Vacuum (also styled “NER E10s”) — a 2-in-1 vacuum + mop combo with a bagless self-emptying station:

Specifications

  • Suction Power: approximately 4,000 Pa.

  • Runtime (single charge): up to 180 minutes (in ideal/lower power mode).

  • Dustbin (on the robot unit): ~ 0.2 L (200 ml) capacity.

  • Self-emptying dock capacity: ~ 2 L (or “45-60 days” between manual emptying, depending on usage) of debris collected in the base.

  • Filtration: HEPA / sponge filter (manufacturer lists filter type).

  • Navigation & sensors: LiDAR navigation (top-mounted LiDAR sensor) + features like mapping, zone/room cleaning, no-mop/no-go zones, auto-mop lift when on carpet.

  • Mopping: Mop pad with automatic lift when moving onto carpet (to avoid wetting carpet) and multiple mop intensity levels (“Dry / Low / Standard / High”). The water tank for mopping is onboard (not large) ~200 ml.

  • Dimensions & Weight: The robot is ~13.8 in × 13.8 in footprint and about 3.9 in in height. Weight around ~23.6 lb listed by manufacturer.

  • Noise: On highest suction mode approx ~67 dB measured in tests.

  • Suction Modes: Multiple power levels (Gentle, Quiet, Standard, Turbo) according to TechRadar specs.

Notes / Considerations

  • The mopping function is best for routine upkeep rather than deep cleaning, as it uses a modest-sized water tank and a basic mop pad structure.

  • The self-emptying dock uses a bagless design, eliminating the need for disposable bags, though the base container still requires manual emptying once it’s full. The manufacturer estimates a 45–60 day capacity, but real-world results may differ depending on use.

  • Although the LiDAR-based navigation and mapping perform well for its price range, some reviewers observed that its obstacle avoidance and precision in tight corners lag behind higher-end models.

Key Features

Here are the key features of the Eureka E10s robot vacuum and mop combo:

  • Bagless Self-Emptying Base: The E10s includes a self-emptying base station that automatically clears the robot’s dustbin and, importantly, operates without disposable bags. Reviewers praise this as a significant convenience feature, minimizing the need for manual upkeep.

  • 2-in-1 Vacuum & Mop System: The E10s performs vacuuming and mopping simultaneously, with the mop pad attached during operation. Users can adjust the mopping intensity through the app, selecting from Dry, Low, Standard, or High settings.

  • Auto-Lifting Mop Pad: When the robot senses carpeted areas or transitions from hard flooring, the mop pad automatically lifts to prevent moisture from contacting the carpet. This feature is especially useful for homes with mixed flooring types.

  • High Suction (Up to ~4,000 Pa): The E10s delivers up to 4,000 Pa of suction power in turbo mode, an impressive figure for its category that enables effective debris removal from both hard floors and carpets.

  • LiDAR Navigation & Mapping: The robot employs LiDAR (laser-based) navigation to scan and map your home, generate multi-level floor plans, set no-go and no-mop zones, and execute methodical cleaning paths.

  • Carpet Boost & Multi-Floor Support: When operating on carpeted surfaces, the E10s automatically boosts suction power for deeper cleaning. It also supports multiple saved maps for multi-level homes and allows users to set virtual boundaries through the app.

  • App Control + Voice Assistant Integration: The robot can be controlled through a smartphone app, allowing you to set cleaning schedules, modes, and zones. It also offers voice control compatibility with Amazon Alexa and Google Assistant for hands-free operation.

Why These Features Matter

  • The self-emptying, bagless base significantly reduces the need for manual maintenance, unlike models that require frequent bin emptying or dust bag replacements.

  • The 2-in-1 vacuum and mop system provides greater versatility for homes with both hard floors and carpets, delivering a comprehensive clean in a single pass.

  • Automatic mop lifting is a thoughtful design for carpets: This ensures textiles and carpets remain protected, as the robot prevents moisture transfer when transitioning from hard floors to rugs.

  • With 4,000 Pa of suction power, it’s well-suited for daily cleaning tasks and can easily handle moderate debris, not just surface dust.

  • LiDAR-based navigation ensures more precise coverage, minimizes missed spots, and allows you to define restricted areas to keep the robot away from cluttered zones like toys or cables.

  • App and voice control provide added convenience, allowing you to start or schedule cleanings remotely and customize routines based on your home’s layout and needs.

Some Considerations

  • Although 4,000 Pa of suction is impressive for its price range, reviewers note it falls short of high-end models in removing deeply embedded debris.

  • The mopping feature performs well for routine upkeep and light cleaning, but it’s not intended for deep scrubbing or tough, set-in stains.

  • Some users reported that the self-emptying system doesn’t always fully clear the dustbin, meaning occasional manual emptying may still be necessary. 


How to use the Eureka 2 in 1 Robotic Vacuum and Mop Combo Vacuum Cleaner

Here’s a simple, step-by-step guide on how to use the Eureka E10s Robot Vacuum and Mop Combo — from setup to daily cleaning and maintenance:

1. Setup and Charging

  • Unbox and assemble: Unpack the unit completely, ensuring that all protective films and packaging materials are removed from both the robot and the self-emptying base.

  • Position the base station on a level surface close to a power outlet, ensuring at least 1.5 feet of clearance on both sides and 4 feet of open space in front for proper docking.

  • Attach the dust container (bagless bin) to the station and connect it in.

  • Set the robot on the base — It will start charging automatically once docked. Let it reach a full charge—typically within 4 to 6 hours—before initiating the first cleaning cycle.

2. Connect to the App

  • Download the Eureka App (available on iOS and Android).

  • Follow the in-app instructions to connect the robot to your Wi-Fi (ensure your phone is on a 2.4 GHz network, as most robots don’t support 5 GHz).

  • Once connected, the app will let you:

    • View and edit your home map.

    • Set cleaning schedules and zones.

    • Adjust suction power or water flow level.

    • Create no-go and no-mop zones.

    • Access firmware updates and cleaning history.

3. Start Cleaning

  • Start the initial mapping run without enabling the mop function—this allows the LiDAR system to create an accurate layout of your home.

  • Once mapping is complete, you can:

    • Select specific rooms or zones to clean.

    • Choose “Vacuum only,” “Mop only,” or “Vacuum + Mop” modes.

  • The robot automatically raises its mop pad upon detecting carpet, allowing for safe cleaning across mixed flooring types.

  • After completing a cleaning cycle, the robot automatically returns to its base, empties the onboard dustbin into the self-emptying station, and begins recharging.

4. Refilling and Maintenance

  • For mopping: Use only clean water when filling the tank — do not add detergents, vinegar, or cleaning agents unless explicitly approved by Eureka.

  • After cleaning, detach and rinse the mop pad, then let it air-dry.

  • Empty the base’s bagless dust container approximately every 45–60 days, depending on how often the robot is used.

  • Clean sensors and brushes weekly:

    • Wipe LiDAR and cliff sensors gently with a soft, dry cloth.

    • Remove hair or debris from the main brush and side brushes.

    • Clean or replace the filters regularly according to the manufacturer’s recommendations in the manual.

5. Optional: Voice & Smart Controls

  • Link the Eureka App with Alexa or Google Assistant to start or stop cleaning hands-free using voice commands like:

    • “Alexa, start cleaning with Eureka E10s.”

    • “Hey Google, tell Eureka to return to the dock.”

Tips suitable for the Eureka 2 in 1 Robotic Vacuum and Mop Combo Vacuum Cleaner

Here are some useful tips for getting the best results and longer lifespan from your Eureka E10s Robot Vacuum and Mop Combo:

Setup & Navigation Tips

  • Place the base station smartly — Select a flat, open spot with at least 1.5 ft of space on both sides and 4 ft in front to allow the robot to dock smoothly.

  • Let it map your home first — Before starting the first full clean, run a mapping-only cycle without the mop attached to generate an accurate floor layout.

  • Keep floors tidy — Clear away cords, clothing items, and small objects that could interfere with sensors or wrap around the brush.

  • Use proper lighting — LiDAR navigation performs optimally in moderate lighting—avoid pitch-dark rooms or highly reflective surfaces during mapping.

Vacuuming & Mopping Tips

  • Vacuum before mopping for best results — This helps stop dirt from spreading once water is used.

  • Use clean water only in the water tank — Do not add detergents, vinegar, or bleach unless specifically approved in the manual.

  • Adjust mop water flow via the app based on your floor type:

    • Low flow for laminate or sealed wood floors.

    • Standard flow for tile or vinyl floors.

  • Remove the mop pad Use vacuum mode only on carpets to avoid dampness or moisture buildup on rugs.

  • Enable “auto-lifting mop” so the pad lifts automatically when crossing carpets.

Maintenance & Care Tips

  • Clear out the base station’s dustbin every 45–60 days, or more often if you own pets.

  • Clean the main and side brushes once a week to remove hair or debris buildup and keep suction strong.

  • Rinse the mop pad and dustbin after every use, then allow them to air dry completely before putting them back.

  • Carefully wipe the sensors and LiDAR dome with a soft, dry microfiber cloth to ensure accurate navigation.

  • Replace the filters every 2–3 months, or according to the manufacturer’s recommendation, to maintain optimal airflow.

  • Use the app to keep the firmware updated, as updates can enhance mapping accuracy and fix bugs.

Usage & Safety Tips

  • Avoid storing the robot unplugged for long periods — Leave the robot on its dock to maintain a full battery.

  • Do not lift or move the robot mid-cleaning — This may disrupt its sensors and cause it to lose its mapped location.

  • Monitor the robot during the initial runs to spot potential problem areas such as high-pile rugs or door thresholds.

  • Set “no-go” or “no-mop” zones in the app to protect sensitive areas such as pet bowls, cords, or rugs.

  • Run it regularly —Regular, light cleaning sessions work better than infrequent deep cleans.

Cleaning Guide

Here’s a clear, step-by-step guide on how to clean your Eureka E10s Robot Vacuum and Mop Combo — including the robot itself, the mop, and the self-emptying base station:

1. Empty and Clean the Robot Dustbin

Although the E10s features a self-emptying dock, the robot’s dustbin should be cleaned regularly to maintain optimal suction.
Steps:

  1. Take out the dustbin from the robot, typically located at the back or beneath the top cover.

  2. Dispose of any remaining dirt and debris into a trash bin.

  3. Wash the dustbin using warm water.

  4. Let the dustbin air dry fully before putting it back, as moisture could clog filters or harm electronics.

2. Clean the Self-Emptying Base

The E10s comes with a bagless self-emptying base, which requires manual emptying every 45–60 days depending on usage.
Steps:

  1. Disconnect the base from power.

  2. Remove the main dust container from the back or top of the station.

  3. Dispose of all dirt and dust into a trash bag.

  4. Clean the container with a dry or lightly damp cloth, avoiding harsh cleaning agents.

  5. Reinsert the container firmly before reconnecting the base to power.

Tip: Periodically inspect the suction port inside the base and remove any debris with a soft brush or vacuum hose.

3. Clean the Mop Pad and Water Tank

To keep the mopping function efficient and hygienic:

  1. Detach the mop pad from its bracket after every mopping session.

  2. Rinse it well under running water using mild soap, avoiding bleach or harsh detergents.

  3. Allow it to air-dry fully before using it again.

  4. Drain any leftover water from the tank after every use to prevent mold or unpleasant smells.

  5. If residue accumulates in the tank, rinse it with warm water, avoiding any chemical cleaners.

4. Clean the Brushes and Wheels

Hair and debris can tangle around the brushes, reducing performance.
Steps:

  • Main brush: Press the release tab and detach it. Remove any hair or threads, then wipe with a dry cloth.

  • Side brushes: Gently pull out the brushes, clean the bristles, and reinsert them securely.

  • Wheels: Clean the brushes and rotate them by hand to make sure they spin smoothly.

Tip: Perform this weekly if your floors have pet hair or long strands of hair.

5. Clean Filters and Sensors

  • Filters: Gently tap the filter over a trash bin to dislodge dust. Do not wash unless marked “washable.” Replace the filter every 2–3 months to maintain optimal airflow.

  • Sensors & LiDAR dome: Gently clean with a soft, dry microfiber cloth and avoid using wet cloths or sprays.

  • Charging contacts: Clean the gold contacts on both the robot and dock with a dry cloth to maintain proper charging.

6. General Maintenance Tips

  • Always power off or pause the robot before performing any maintenance.

  • Do not immerse the robot or charging station in water.

  • Ensure all components are fully dry before putting them back together.

  • Inspect regularly to ensure all components—brushes, wheels, and filters—are securely attached.

  • Keep the robot in a cool, dry location, avoiding hot or humid areas.

What to avoid when using the Eureka 2 in 1 Robotic Vacuum and Mop Combo Vacuum Cleaner

Here’s a helpful guide on what to avoid when using your Eureka E10s Robot Vacuum and Mop Combo — to keep it running smoothly and extend its lifespan:

1. Avoid Using Harsh or Incompatible Cleaning Agents

  • Avoid pouring detergents, bleach, vinegar, or alcohol into the water tank, as they may damage internal components and block the nozzles.

  • Use only plain water unless the manufacturer specifically allows a gentle cleaning agent.

  • Avoid using oily or soapy water, since it can leave streaks and harm the mop pad.

2. Avoid Wet or Hazardous Environments

  • Avoid running the robot in puddles, bathrooms, or outside — it is not water-resistant.

  • Do not use on wet carpets or moist floors until mopping mode is turned on.

  • Place the charging base away from water, sinks, and direct sunlight.

3. Avoid Interfering During Operation

  • Avoid lifting, moving, or turning the robot during cleaning — it can disrupt LiDAR navigation and cause mapping errors.

  • Do not cover the sensors with stickers, dirt, or ornaments.

  • Keep children and pets away from the robot — playing or riding it may harm the device or create safety hazards.

  • Avoid manually moving or dragging the robot; always control it through the app or onboard buttons.

4. Avoid Poor Maintenance Habits

  • Do not leave the robot disconnected for long stretches, as this can drain the battery and reduce its lifespan.

  • Do not neglect regular cleaning of brushes, filters, and sensors — accumulated dirt can lower suction and disrupt navigation.

  • Avoid reinstalling wet parts (dustbin, filter, mop pad), as moisture can harm the robot’s electronics.

  • Do not allow the self-emptying bin to become too full — empty it at least every 45–60 days, or more often if you have pets.

5. Avoid Using in Unsuitable Areas

  • Avoid placing the robot near loose cords, fringe rugs, or long drapes that might get caught.

  • Do not put the base station on uneven or carpeted surfaces — it requires a flat, stable area to dock properly.

  • Avoid letting the robot cross thresholds or uneven surfaces higher than 0.8–1 inch.

6. Avoid Ignoring App and Firmware Updates

  • Do not ignore firmware prompts in the Eureka App, as updates can fix errors and improve navigation or cleaning efficiency.

  • Do not reset or erase maps unless required — doing so will remove custom room layouts and no-go zones.

In conclusion, the Eureka E10s Robot Vacuum and Mop Combo is a smart, powerful, and low-maintenance cleaning solution ideal for busy homes. With its bagless self-emptying base, auto-lifting mop, and 4000 Pa suction, it offers efficient, hands-free cleaning on both hard floors and carpets. While its mopping is best for light maintenance rather than deep cleaning, proper care and regular maintenance will keep it performing at its best. Overall, it’s a reliable, user-friendly choice for effortless everyday floor cleaning.

Robotic 2 in 1 Robot Vacuum and Mop Combo Vacuum Cleaner

The 2-in-1 Robot Vacuum and Mop Combo has become a popular choice for effortless home cleaning, performing both vacuuming and mopping in one unit. Equipped with WiFi, app, and voice control, it allows you to start, stop, or schedule cleaning sessions directly from your phone or through voice commands. Most models also offer auto-scheduling, enabling you to set daily or weekly cleaning plans so it can tidy up even while you’re away. When the battery runs low, the robot automatically returns to its dock, recharges, and continues cleaning once ready.

A key feature of this robotic cleaner is its two-in-one functionality, combining a dustbin for vacuuming with a water tank for mopping. In vacuum mode, it effectively picks up dust, dirt, and pet hair, while in mop mode, it evenly releases water to wipe and refresh your floors. Certain models come equipped with intelligent sensors or “no-mop zones” that automatically deactivate mopping on carpeted areas. Its slim and compact design allows it to glide smoothly under furniture and into narrow spaces that standard vacuums often can’t reach.

These robotic cleaners are particularly beneficial for homes with hard flooring, mixed surfaces, or pets, where keeping floors free from dust and hair can be a daily struggle. On wood, tile, vinyl, or laminate floors, the mopping feature helps preserve a brighter, spotless finish. For low-pile carpets, the vacuum mode efficiently lifts dirt, debris, and pet hair. With self-charging, app, and voice control, this 2-in-1 cleaner offers a smart, convenient, and time-saving solution for modern households looking to simplify everyday cleaning.

Specification

Here is a specifications for a robot vacuum & mop combo (2-in-1) device with features like vacuuming + mopping, WiFi / app / voice control, scheduling, water tank + dustbin, self-charging, slim design, suitable for hard floors and pet hair:

Cleaning & operation

  • Vacuum suction + mop / wet cleaning in one pass.
  • Dual water tank or combined dustbin + water tank compartments.
  • Dustbin capacity maybe ~200-300 mL (or more depending on model).
  • Water tank capacity might be ~300-350 mL.
  • Capable of mopping hard floors and vacuuming carpets or pet hair; certain models automatically lift the mop or disable mopping when on carpet.

Navigation & intelligence

  • Use LiDAR or distance / light / structured light / camera sensors for mapping, obstacle detection.
  • Multi-level / multi-floor mapping, virtual zones / no-mop zones.
  • Scheduling features via app or voice control (via home assistant).

Power / battery & charging

  • Battery is typically lithium-ion.
  • Runtime can last up to 2–3+ hours (around 200 minutes) on a full charge, depending on the cleaning mode and power settings.
  • When the battery runs low, the robot automatically returns to its charging dock to recharge.

Dimensions / form factor

  • Features a slim profile, allowing it to clean under furniture; many models are around 3.6 inches (≈9 cm) tall.
  • Compact size allows it to navigate easily through tight or low-clearance areas.

Accessories / extras

  • Includes mop pads made of microfiber or soft mop cloth material.
  • Some models feature self-washing and self-drying docking stations that clean and dry the mop pads or automatically refill the water tank.
  • Features an interchangeable dry dustbin or combined mop-and-dust container.

Key features

Here are some key features that are commonly found (or ideal) in a good 2-in-1 Robot Vacuum & Mop Combo with WiFi/App/Voice/Schedule/Self-Charging etc.:

  1. Dual Cleaning Modes (Vacuum + Mop)

    • Vacuum for dry debris: picks up dust, pet hair, crumbs etc.

    • Mop function (wet/damp mop): for wiping away stains, spills, sticky residues.

    • Some models have mop-lifting or mop-retracting to avoid wetting carpets.

  2. Strong Suction + Adjustable Water Flow

    • Powerful motor/suction to handle carpets and dense dirt.

    • Features adjustable or intelligent water flow control to ensure the mop stays at the right moisture level — ideal for hardwood and delicate floors.

  3. Smart Mapping / Navigation / Sensors

    • LiDAR or camera or SLAM-based navigation to map rooms, plan routes, avoid obstacles.

    • Edge & corner detection, cliff sensors to avoid stairs, obstacle detection for cords, pet bowls etc.

  4. App, WiFi & Voice Control

    • Control via a mobile app: start/stop, choose cleaning modes, set schedules, see map of what’s cleaned.

    • Voice assistant support (Alexa, Google Assistant, Siri etc.) for hands-free commands.

  5. Scheduling & Smart Automation

    • Allows users to schedule cleaning sessions — daily, weekly, or by specific rooms.

    • Automatically returns to the charging dock when the battery is low and resumes cleaning from where it stopped once recharged.

  6. Good Dustbin & Water Tank Capacities

    • Comes with a large dustbin capacity, reducing how often you need to empty it.

    • Includes separate clean and dirty water tanks, or at least a large-capacity water tank that supports multiple mopping sessions without frequent refills.

  7. Slim Profile & Build Designed for Accessibility

    • Low-profile design allows the robot to clean easily under furniture, beds, and sofas.

    • Features durable wheels, edge-reaching side brushes, and a wide mop pad for maximum floor coverage.

  8. Filtration & Hygiene Features

    • Uses HEPA or multi-stage filtration systems to capture fine dust, allergens, and pet dander effectively.

    • Premium models feature self-cleaning or self-washing mop pads with auto-drying functionality to help prevent mildew and odors.

  9. Pet-Friendly Features

    • Equipped with anti-tangle brush rolls engineered to minimize hair entanglement and maintain consistent suction performance.

    • Offers stronger suction power or a carpet boost mode for deeper cleaning on rugs and carpets

  10. Safe Operation & Quietness

    • Sensors for drop/stairs, bumpers to avoid damaging furniture.

    • Moderate noise levels ensure cleaning remains quiet and unobtrusive.

How to use the Robotic 2 in 1 Robot Vacuum and Mop Combo Vacuum Cleaner

Here’s a simple step-by-step guide on how to use the Robot Vacuum and Mop Combo (2-in-1) — whether you’re using it for the first time or setting up regular cleaning routines:

1. Initial Setup

  • Unbox and assemble: Remove all packaging materials, and securely connect the side brushes and detachable mop pad before use.

  • Charge fully before first use: Position the robot on the charging dock and connect the dock to a wall outlet. Allow it to charge for 4–6 hours, or until the indicator light confirms a full charge.

  • Download the mobile app: Use your smartphone to scan the QR code in the instruction manual, or manually search for the corresponding app (e.g., Tuya, Roborock, Ecovacs Home) in the App Store or Google Play.

  • Connect to WiFi: Follow the app’s on-screen setup guide to connect the robot to your 2.4 GHz WiFi network. Note that most models are not compatible with 5 GHz networks.

2. Preparing for Cleaning

  • Clear the floor: Pick up cables, toys, clothes, or obstacles that might block the robot.

  • Fill the water tank (for mopping): Use clean, room-temperature water (no bleach or detergent unless specified).

  • Install the mop cloth/pad if you plan to mop.

  • Make sure to empty the dustbin if debris remains from the previous cleaning.

3. Starting a Cleaning Cycle

  • Start cleaning through the mobile app or by pressing the button on the robot.

  • Voice control is available on compatible models—simply say commands like “Alexa, start vacuuming.”

  • Select cleaning mode: Auto, Edge, Spot, or Room-specific (depending on model).

  • When mopping, select the desired water flow setting (low, medium, or high) in the app.

  • The robot autonomously moves around, cleans, and steers clear of obstacles or stairs with its integrated sensors.

4. During and After Cleaning

  • When the battery gets low, the robot goes back to its charging dock on its own.

  • After recharging, the robot continues cleaning from the point it stopped.

  • Once cleaning is complete, remove and empty the dustbin, then wash the mop pad with warm water and gentle soap.

  • Top up or drain the water tank according to your upcoming cleaning session.

  • Periodically clean the sensors and the robot’s bottom using a soft, dry cloth.

Pro Tips

  • Set up automated cleaning schedules via the app—choose daily, weekly, or custom times.

  • Set up “no-go zones” or “virtual barriers” in the app to prevent the robot from entering certain areas.

  • For optimal suction, clean the filter and brushes once a week.

  • Change the filters and mop pads periodically according to the manufacturer’s guidelines.

Tips suitable for the Robotic 2 in 1 Robot Vacuum and Mop Combo Vacuum Cleaner

Here are some useful tips to help you get the best performance and longer lifespan from your Robot Vacuum and Mop Combo (2-in-1):

1. Keep It Clean and Maintained

  • Clear the dustbin every few uses, as a full bin can lower suction performance.

  • After every mopping, rinse the mop pad to prevent unpleasant smells or mold growth.

  • Weekly, clean the filter using a soft brush or by gently tapping out dust; replace it every 2–3 months.

  • Clean the sensors and charging contacts with a dry or lightly damp cloth to maintain precise navigation and efficient charging.

2. Optimize Cleaning Performance

  • Remove small objects and cords from the floor before cleaning to avoid tangles and disruptions.

  • Set up “no-go zones” in the app to block areas you don’t want the robot to clean, such as pet bowls or crowded corners.

  • Choose the right mode: Select Auto mode for overall cleaning, Spot mode for localized messes, and Edge mode for walls and baseboards.

  • Use the app to set suction and water flow according to floor type: low for hardwood, higher for carpets or tough spots.

3. Take Care of the Battery

  • Ensure the robot is fully charged before starting each cleaning session to maintain consistent runtime.

  • Place the charging dock in a well-ventilated area, away from heat, water, or direct sunlight.

  • Do not leave the robot idle with a low battery; recharge it every few weeks to maintain battery health

4. Smart Use of Scheduling & Mapping

  • Program the robot to clean while you’re away to keep your home tidy every day with minimal effort.

  • Store maps for each floor (if multi-map is supported) to speed up cleaning across different rooms.

  • Keep the app and firmware up to date to benefit from enhanced navigation and manufacturer bug fixes.

5. Pet and Home-Friendly Practices

  • Regularly remove pet hair from the rollers and side brushes to avoid tangles.

  • Activate carpet boost mode for rugs or areas heavily covered with pet hair.

  • Do not put detergents or vinegar in the water tank unless specified by the manual—use only plain water to protect internal components.

  • Keep children and pets away while the robot is running to avoid collisions or sensor interference.

Cleaning guide

Here’s a clear, step-by-step guide on how to clean your Robot Vacuum and Mop Combo (2-in-1) to keep it performing efficiently and hygienically:

1. Clean the Dustbin

  • Take out the dustbin from the robot, typically found at the rear or top depending on the model.

  • Dispose of all dirt and debris into a waste bin.

  • Wash the dustbin with water if the instructions permit, and ensure it is fully dry before putting it back.

  • Clean the dustbin area inside the robot using a dry cloth to lift any fine dust.

2. Clean the Water Tank and Mop Pad

  • Carefully remove the water tank and empty any leftover water.

  • Wash it with warm, clean water — avoid using detergents or bleach.

  • Dry the outside with a soft cloth before adding water.

  • Take off the mop pad and wash it well with warm water and gentle soap.

  • Allow the pad to dry fully in the air before reattaching to avoid mildew or odors.

3. Clean the Main Brush and Side Brushes

  • Carefully flip the robot onto its back or side.

  • Detach the main roller brush; many models include clips or latches to simplify this.

  • Use the provided cleaning accessory or scissors to remove tangled hair and debris.

  • If the brush is washable (per the manual), rinse it and allow it to dry fully before putting it back.

  • Clean the side brushes using a damp cloth, and replace them if they are bent or worn.

4. Clean the Filter

  • Lift the dustbin and take out the HEPA or mesh filter.

  • Lightly tap it to shake off dust over a trash bin.

  • If washable, rinse with cold water only, avoiding soap or chemicals.

  • Allow it to air dry for at least 24 hours before reinstalling.

  • Change the filter every 2–3 months to maintain optimal performance.

5. Clean Sensors and Charging Contacts

  • Use a soft, dry microfiber cloth to gently wipe:

    • Cliff sensors (underside)

    • Bumper sensors (front)

    • Charging contacts (both on the robot and dock)

  • Prevent moisture around sensors, as water can lead to malfunction or harm.

6. Routine Cleaning Schedule

  • After every use: Clear out the dustbin and wash the mop pad.

  • Weekly: Clean brushes, filters, and sensors.

  • Monthly: Thoroughly clean the water tank and check the wheels for debris.

What to avoid when using the Robotic 2 in 1 Robot Vacuum and Mop Combo Vacuum Cleaner

Here’s a helpful list of things to avoid when using your Robot Vacuum and Mop Combo (2-in-1) — these precautions will help prevent damage, extend lifespan, and ensure safe operation:

1. Avoid Using Harsh Chemicals

  • Do not pour bleach, ammonia, vinegar, or detergent into the water tank, as they may damage internal components and the mop system.

  • Only use clean water, or approved cleaning solutions if the manufacturer specifies.

2. Don’t Use on Wet or Uneven Surfaces

  • Do not operate the robot on wet floors, thick carpets, or uneven surfaces — it may slip, get stuck, or harm the wheels.

  • Avoid using the device outdoors, on balconies, or in bathrooms with standing water.

3. Avoid Blocking the Charging Dock

  • Ensure there’s at least 3 feet (1 meter) of clear space around the charging base.

  • Avoid placing the robot near stairs, heaters, or under furniture, as it may struggle to locate the charging station.

4. Don’t Let It Fall or Get Stuck

  • Keep doors to staircases or deep-drop areas closed.

  • Set up virtual walls or no-go zones in the app to prevent the robot from entering dangerous areas.

  • Periodically check whether it’s caught on cords, curtains, or long-fringe rugs.

5. Don’t Neglect Maintenance

  • Do not operate the robot with a full dustbin or clogged filters — this can weaken suction and lead to overheating.

  • Avoid letting hair or debris accumulate on the brushes or wheels — it can overwork the motor.

  • Wipe the sensors regularly to help the robot navigate accurately and prevent collisions.

6. Avoid Improper Charging Habits

  • Avoid storing or charging the robot in areas that are humid, hot, or dusty.

  • Don’t leave the robot unplugged for extended periods — the battery may fully discharge and lose capacity.

  • Use only the charger and dock provided with your device.

7. Avoid Misuse

  • Avoid picking up or moving the robot during operation — it may disrupt its sensors.

  • Keep children and pets from riding or playing with the robot.

  • Avoid tampering with or disassembling the robot, as it may lead to malfunction or loss of warranty.

In conclusion, the Robot Vacuum and Mop Combo (2-in-1) offers a convenient, hands-free way to keep your floors clean. With smart controls, strong suction, and mopping capability, it saves time and effort. Regular maintenance, proper use, and avoiding harsh chemicals ensure long-lasting performance. Overall, it’s a reliable, efficient, and modern cleaning solution for any home.