
Motion sensor LED lights are a brilliant addition to any home, boosting security, saving energy, and adding modern convenience to your front porch, driveway, or backyard. But like any hardworking fixture, they can act up over time.
Maybe your sensor light won’t turn on at night, flickers randomly, or stays stuck in the “on” position no matter what you do. While it’s tempting to assume it’s broken beyond repair, the truth is that most common problems can be fixed without buying a brand-new light.
In this comprehensive guide, you’ll learn exactly how to fix a faulty motion sensor LED light without replacing it. With a few simple tools and some practical steps, you can solve most issues yourself, saving money and keeping your home safely lit.
Why Motion Sensor LED Lights Malfunction
Before you start fixing anything, it helps to know what you’re dealing with. Motion sensor LED lights rely on a small electronic sensor—usually passive infrared (PIR)—that detects heat and movement. Over time, several factors can interfere with its performance:
- Dust and debris: Dirt, bugs, or cobwebs can block the sensor.
- Weather exposure: Heavy rain, moisture, and extreme temperatures can cause wear.
- Incorrect settings: The sensitivity or timer may need readjusting.
- Wiring issues: Loose or corroded connections can disrupt power flow.
- Aging parts: While LEDs last for years, the motion sensor’s circuit might not.
Luckily, most of these problems are fixable with a little troubleshooting.
1. Confirm There’s Power
Start simple. Many “faulty” lights aren’t broken at all—they’re just not getting power.
- Check that the wall switch controlling the light is on.
- Inspect the circuit breaker to see if it has tripped.
- If the light uses a replaceable bulb, check if it’s burned out.
- Plug another device into the same circuit to confirm it’s working.
If the power source is fine, move on to the next steps.

2. Clean the Motion Sensor
Outdoor sensor lights gather grime surprisingly fast. A dirty lens can block the sensor’s “vision,” making it act like it’s not working.
How to clean it:
- Switch off the power at the breaker.
- Gently wipe the sensor lens with a soft cloth or microfiber cloth.
- Use mild soap and water if needed, but avoid harsh chemicals.
- Dry the lens completely.
This quick clean often solves the problem right away.
3. Adjust the Settings
Most motion sensor lights have adjustable controls for sensitivity, range, and how long they stay on.
- Find the small control dials on the fixture—usually under a protective cover.
- Increase the range if the light isn’t detecting you soon enough.
- Adjust the time dial so the light stays on longer or shorter, depending on your needs.
- Test the light by walking through its detection zone to fine-tune the settings.
Small tweaks here can make a big difference.
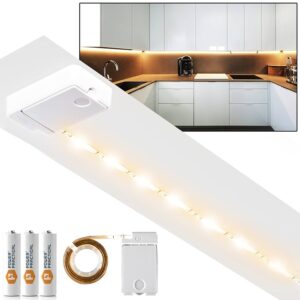
Top Amazon Brands for Motion Sensor Cabinet Lights To Consider
- EZVALO 5 Pack Under Cabinet Lighting, Rechargeable Motion Sensor Light
- BLS LED Closet Light, T401 Super Bright Wireless Under Cabinet Motion Sensor Light
- AIBOO Under Cabinet Lighting, Dimmable 12 inch Under Counter Lights
- EShine Hand Wave Activated Under Cabinet LED Lighting
- LEPOTEC Under Cabinet Motion Sensor Light
4. Inspect Wiring and Connections
Outdoor lights face wind, rain, and temperature swings, which can loosen or corrode wiring over time.
To check safely:
- Turn off the power at the breaker.
- Carefully open the fixture’s back or base.
- Look for any loose wires, rusted screws, or corrosion.
- Tighten loose connections and gently clean corrosion with a wire brush.
- Use weatherproof wire connectors to reseal and protect the connections.
If you’re not comfortable working with electrical wiring, consider calling a licensed electrician. Safety first!
5. Eliminate Physical Blockages
Sometimes the issue isn’t the light at all. New bushes, fences, or parked cars can block the sensor’s line of sight. Even seasonal changes—like growing trees—can interfere.
Walk around the area and look for anything that might obstruct the sensor. Trim branches or reposition obstacles to clear the detection path.
6. Reset the Fixture
Motion sensor lights can sometimes get “stuck” due to glitches or power surges. Resetting the unit can restore normal function.
Reset steps:
- Switch off the power at the breaker or wall switch for at least 30 seconds.
- Switch the power back on.
- Test by moving through the detection zone.
Many sensor lights also have a manual override mode that can disable the sensor entirely. Double-check your user manual to ensure the light is set to auto mode.
7. Test in Different Conditions
Some sensors are more sensitive in certain weather. For example, extreme cold can reduce detection range, while direct sunlight may confuse it during the day.
Test your light at night and during the day. Adjust the angle or settings if it behaves differently in various conditions.
8. Replace the Sensor Module (If Possible)
If you’ve tried everything and the light still won’t work properly, see if your model has a replaceable sensor module. Many modern fixtures allow you to swap out the sensor without replacing the entire unit.
Search online for your fixture’s make and model. A replacement sensor is often much cheaper than a whole new light and only requires basic tools to install.
When Replacement Is the Better Option
If the fixture is physically cracked, the LED is dim or dead, or you can’t find compatible parts, a replacement may be the smarter option. Today’s LED motion sensor lights are highly energy-efficient and affordable. Sometimes, a fresh start is the simplest fix.
A faulty motion sensor LED light doesn’t always mean you need a new one. Most issues, from dirty lenses to loose wires, are easy to fix yourself. With this step-by-step guide, you can extend your light’s life, improve home safety, and save money all at once.
So next time your motion sensor light gives you trouble, remember: a little cleaning, adjusting, or reconnecting could be all it takes to get it shining bright again.
Top Amazon Brands for Motion Sensor Cabinet Lights To Consider
- EZVALO 5 Pack Under Cabinet Lighting, Rechargeable Motion Sensor Light
- BLS LED Closet Light, T401 Super Bright Wireless Under Cabinet Motion Sensor Light
- AIBOO Under Cabinet Lighting, Dimmable 12 inch Under Counter Lights
- EShine Hand Wave Activated Under Cabinet LED Lighting
- LEPOTEC Under Cabinet Motion Sensor Light