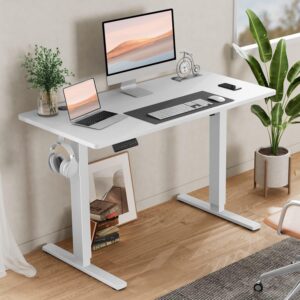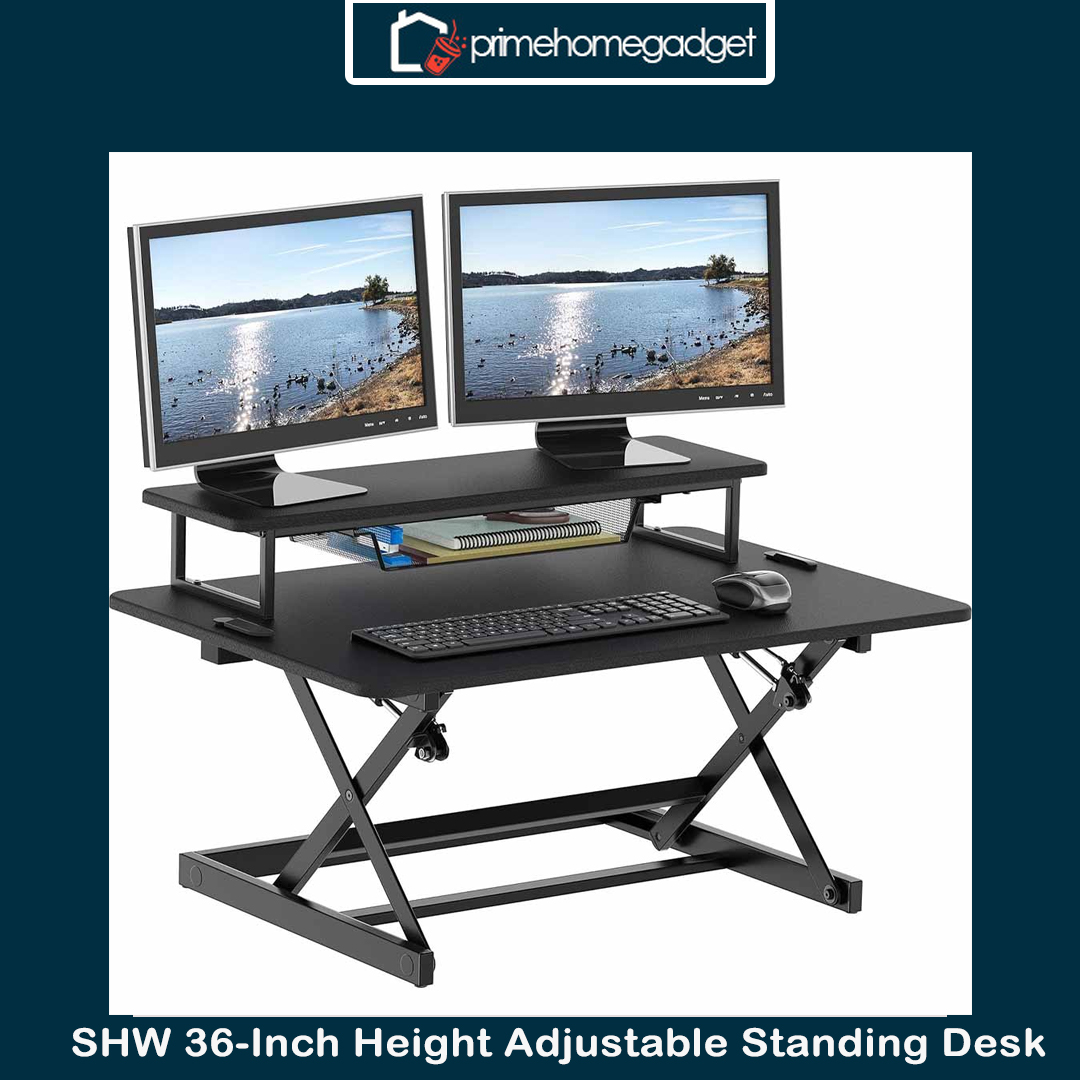
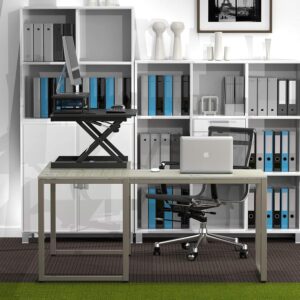
The SHW 36-Inch Adjustable Height Standing Desk Riser Converter is built to upgrade any conventional desk into a versatile, ergonomic workspace. Featuring a generous 36-inch platform, it offers sufficient space for dual monitors, a laptop, and essential peripherals, making it suitable for both remote and corporate environments. Its refined black finish integrates smoothly with most interior designs, while the robust steel frame delivers lasting strength and stability. The sit-to-stand mechanism enables users to switch between seated and upright positions during the day, helping to ease back discomfort and encourage healthier posture.
This desk converter incorporates a seamless gas-lift system that allows for effortless height changes, helping you achieve the most comfortable working posture with ease. Its multi-level layout includes a spacious primary platform and a dedicated lower keyboard shelf, maintaining an ergonomic typing position whether you’re standing or seated. Anti-slip pads on the base enhance stability while safeguarding your current desk surface from scuffs or damage. The SHW riser arrives pre-assembled, enabling immediate use without the inconvenience of complex installation.
Perfect for office professionals, students, and home-based workers, the SHW 36-Inch Sit-to-Stand Riser Converter is an effective way to enhance comfort and versatility in your workspace. Its height-adjustable structure promotes regular movement during the day, potentially improving focus, productivity, and overall energy. The expansive work area and solid construction make it adaptable for multiple activities, including typing, graphic design, and virtual meetings. Whether you’re upgrading a standard desk or refining your home workstation, this standing desk riser delivers a practical, space-efficient solution to elevate your work environment.
Specifications
Specifications – SHW 36-Inch Height Adjustable Standing Desk Sit to Stand Riser Converter (Black)
- Brand / Model: SHW – 36-Inch Sit to Stand Riser Converter
- Type: Height adjustable desk converter / workstation
- Color: Black
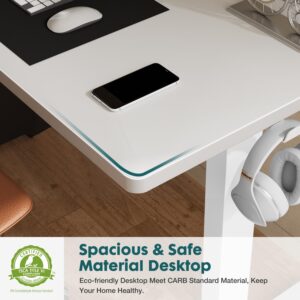
- Material: Steel frame with MDF desktop
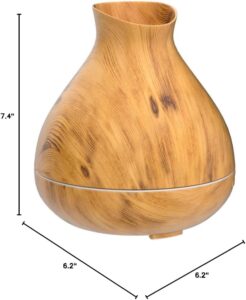
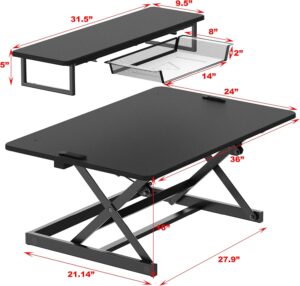
- Main Surface Dimensions: 36” (W) × 22” (D) – accommodates dual monitors or monitor + laptop setup
- Keyboard Tray Dimensions: 35” (W) × 12” (D) – fits full-size keyboard and mouse
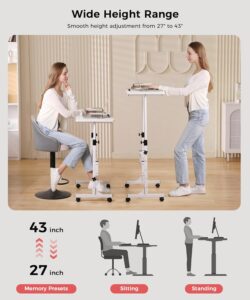
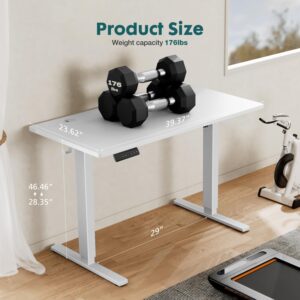
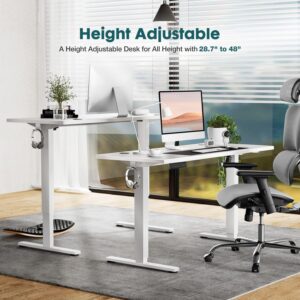
- Height Adjustment Range: Approximately 4.5” to 16.3”
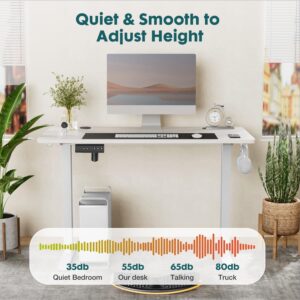
- Adjustment Mechanism: Gas-spring lift for smooth, controlled movement
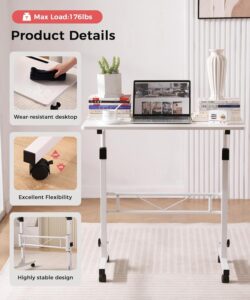
- Load Capacity: Up to 30–35 lbs (combined weight of monitors, laptop, and accessories)
- Base Design: Anti-skid cushioning to safeguard the desktop and keep the unit securely in place
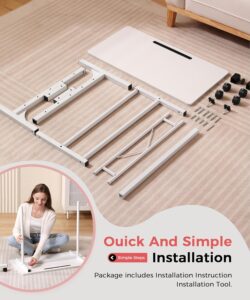
- Assembly: Fully assembled – ready to use out of the box
- Weight: Around 35–40 lbs (varies slightly by batch)
Key Features
Key Features – SHW 36-Inch Height Adjustable Standing Desk Sit to Stand Riser Converter (Black)
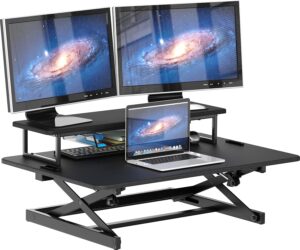
- Spacious 36-Inch Work Surface – Accommodates two monitors or a monitor–laptop combination, plus space for files and essentials
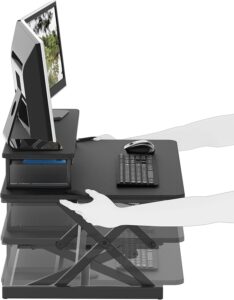
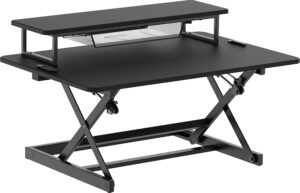
- Two-Tier Design – Features a dedicated lower keyboard shelf to maintain comfortable typing alignment in both seated and standing positions
- Smooth Gas-Spring Lift – Facilitates easy, strain-free adjustment of working height
- Wide Height Adjustment Range – Adjusts from 4.5″ to 16.3″ to suit a wide range of user heights
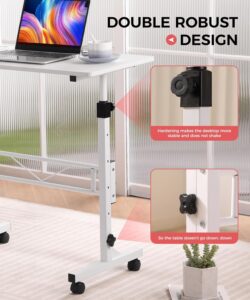
- Sturdy Steel Frame – Provides reliable stability and enduring strength for everyday use
- Non-Slip Base Pads – Safeguard your desktop from damage while maintaining riser stability during height changes
- Fully Assembled – Pre-assembled and ready to go, eliminating the need for extra setup
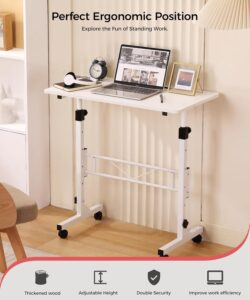
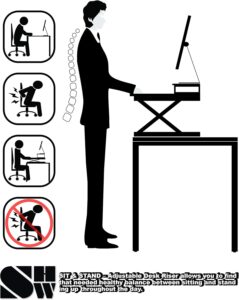
- Ergonomic Design – Promotes switching between seated and upright positions for better comfort and less tiredness
- Versatile Use – Perfect for residential offices, business environments, and online study areas
How to use the SHW 36-Inch Height Adjustable Standing Desk
Here is a step by step guide on how to use – SHW 36-Inch Height Adjustable Standing Desk Sit to Stand Riser Converter (Black)
- Place on Your Existing Desk – Place the riser on a level, sturdy surface with adequate space for its base and height adjustment. Center it to maintain balance.
- Arrange Your Setup – Arrange your monitors, notebook, keyboard, and mouse on their assigned levels. Position heavier equipment near the center to maintain balance.
- Adjust the Height – Grip the side handles to activate the gas-lift system. Smoothly raise or lower the riser to your desired height, whether seated or standing. Let go of the handles to secure it.
- Switch Between Positions – Switch between seated and standing positions during the day to minimize fatigue. Modify the riser so your screen is at eye height and your elbows form a right angle.
- Maintain Clear Surroundings – Keep cords organized and slack enough to prevent pulling or snagging when moving the desk up or down.
- When Not in Use – Reduce the riser to its minimum height for a tidy profile that merges with your workstation.
Tips suitable for the SHW 36-Inch Height Adjustable Standing Desk
Tips for Best Use – SHW 36-Inch Height Adjustable Standing Desk Sit to Stand Riser Converter (Black)
- Find Your Optimal Height: While standing, position your screen at eye height and maintain a 90-degree arm bend to minimize neck and wrist discomfort.
- Alternate Regularly: Alternate between seated and standing positions every 30–60 minutes to stay comfortable and prevent tiredness..
- Use an Anti-Fatigue Mat: When standing for extended durations, an anti-fatigue mat can ease strain on your feet and legs.
- Manage Your Cables: Secure cables with clips or ties to maintain tidiness and avoid pulling or knotting during height changes.
- Distribute Weight Evenly: Position heavier items, such as monitors, near the center to maintain riser stability.
- Mind the Lift Mechanism: Use the designated side handles when adjusting the desk to safeguard the gas-lift mechanism.
- Keep the Keyboard Tray Clear: Avoid loading the keyboard tier with weighty objects to preserve its structural integrity.
Cleaning guide
Here is a guideline on how to Clean – SHW 36-Inch Height Adjustable Standing Desk Sit to Stand Riser Converter (Black)
- Turn Off and Unplug Devices: Before wiping, make sure monitors, laptops, and other electronics are powered down and unplugged.
- Dust Regularly: Gently wipe the work surface and keyboard tray with a microfiber cloth to clear dust, using a small duster or air spray for hard-to-reach sections.
- Wipe with Mild Cleaner: Moisten a cloth slightly with water or a gentle soap solution. Wipe surfaces carefully, keeping excess liquid away from seams or edges.
- Dry Thoroughly: Use a soft, dry cloth to remove any residual dampness and protect surfaces from spotting or bending.
- Clean the Frame: Clean the steel frame with a slightly damp cloth to remove fingerprints, then dry promptly to avoid rusting.
- Avoid Harsh Chemicals: Do not use harsh solvents, bleach, or abrasive materials to maintain the integrity of the surface coating.
- Check Moving Parts: Regularly check the lift system for dust accumulation and clean it to ensure smooth functioning.
What to avoid when using the SHW 36-Inch Height Adjustable Standing Desk
What to Avoid When Using – SHW 36-Inch Height Adjustable Standing Desk Sit to Stand Riser Converter (Black)
- Overloading the Surface: Do not surpass the maximum load (approximately 30–35 lbs) to prevent stress on the lift system and loss of stability.
- Uneven Weight Placement: Avoid positioning heavy items on just one side, which could lead to tipping or uneven stress.
- Using Without Clearance: Maintain a clear space around the desk to avoid monitors or devices bumping into walls, shelves, or other objects when adjusting height.
- Forcing Adjustments: Do not move the riser by pushing or pulling it; always use the side handles to avoid harming the gas-lift mechanism.
- Resting Body Weight: Avoid sitting or leaning on the riser, as it is intended solely for devices and work materials.
- Exposing to Moisture: Avoid putting drinks on the desktop without protection, and ensure the workstation stays away from moisture to prevent damage or rust.
- Neglecting Cable Management: Unsecured cables may catch, tug, or hinder smooth height adjustments, so keep them organized.
In conclusion, the SHW 36-Inch Sit to Stand Riser Converter is a durable, ergonomic, and space-efficient way to upgrade any desk. Its smooth height adjustment, sturdy build, and roomy two-tier design make it ideal for improving posture, comfort, and productivity in both home and office setups.