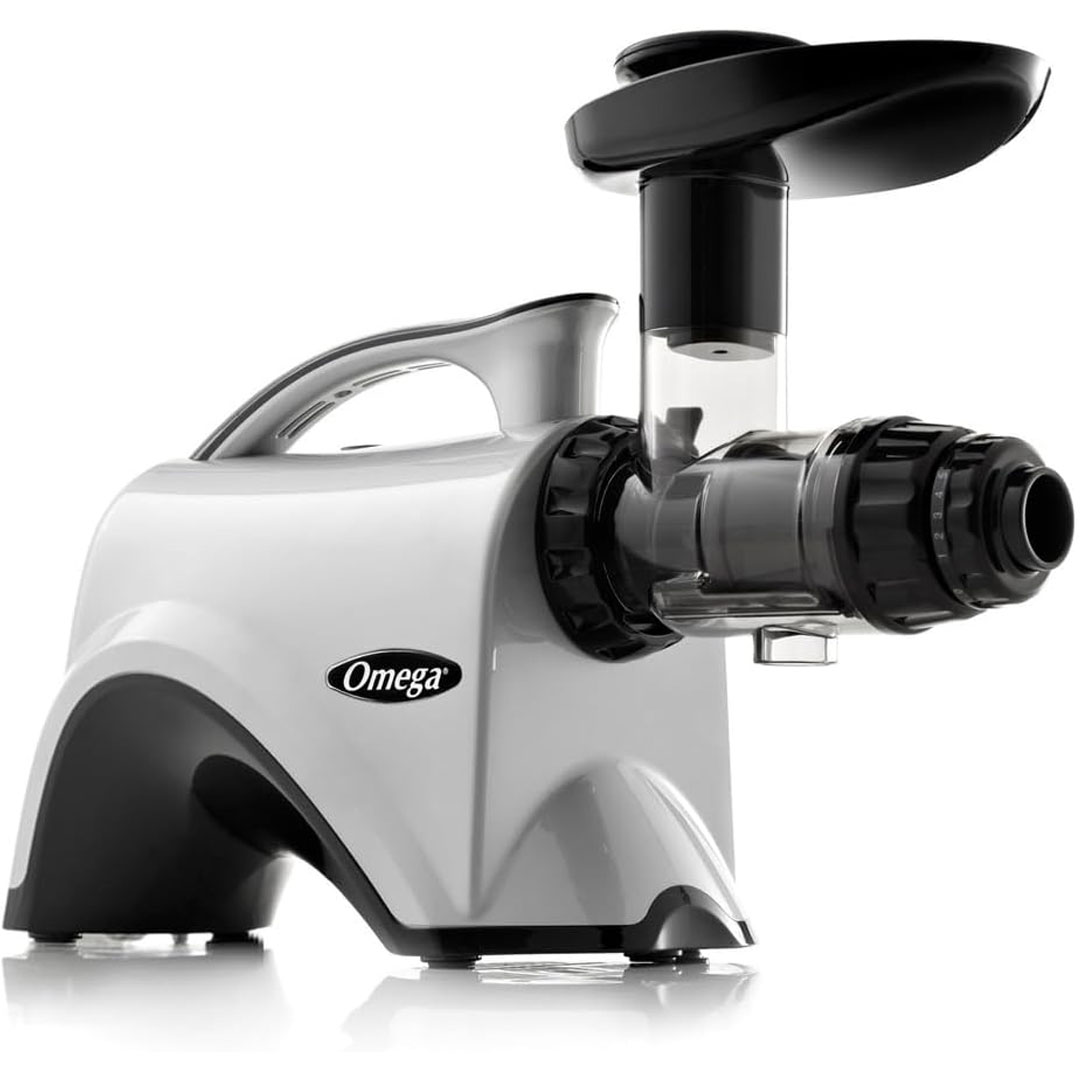
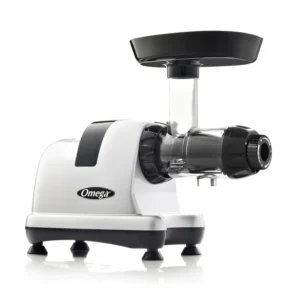
Unveiling the Omega NC800HDS: Your Gateway to Cold-Pressed Nutrition!
Are you ready to unlock the full possibilities of fruits and vegetables? Look no further than the Omega NC800HDS Cold Press Juicer Machine! This multifunctional kitchen powerhouse goes beyond ordinary juicers, offering a nutrient-rich, flavor-packed experience that will revamp your health journey.
The Power of Cold Press
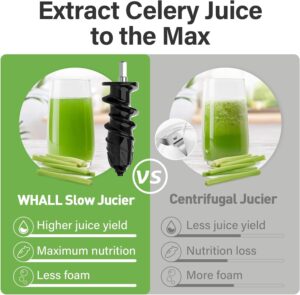
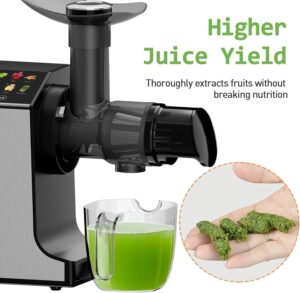
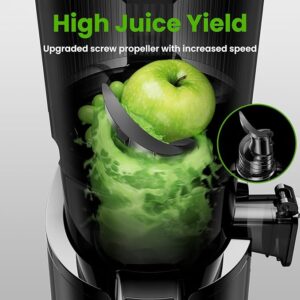
Unlike traditional centrifugal juicers that generate heat and discord, the NC800HDS applies a slow masticating process. This gentle extraction method decreases oxidation, preserving the vital enzymes, vitamins, and minerals that are often destroyed by high-speed juicing. The outcome? Richer, more vibrant juices bursting with the natural goodness of your favorite produce.
Beyond Juicing: A Nutritional Powerhouse
The NC800HDS isn’t just a juicer – it’s a complete nutritional system. With different kind of attachments, you can transform your kitchen into a health haven:
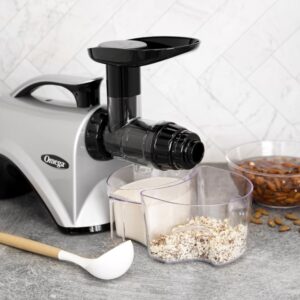
Nut butters: Create fresh, delicious nut butters from almonds, cashews or peanuts, without added sugar or oils!
Pasta: Try-out with healthy homemade pasta options using the included pasta former attachment.
Frozen treats: Whip up refreshing sorbet and frozen desserts using frozen fruits.
Baby food: Prepare nutritious and smooth baby food with ease, ensuring your little one gets the best possible taste.
Built to Last
The NC800HDS brags a durable design with a powerful yet quiet 150-watt motor. The long lasting construction guarantees longevity, while the automatic pulp ejection facilitates cleanup. Plus, with an industry-leading 15-year warranty on the motor and 10-year warranty on parts, you can allocate your health with confidence.
Unleash Your Inner Chef
The NC800HDS opens a world of cuisine possibilities. Explore healthy recipe options, from energizing green juices to filtering veggie blends. With its modifiable end cap and multiple settings, you can customize your juice to your desired taste or preference.
Investing in Your Health
The Omega NC800HDS is more than just an appliance; it’s an investment in your well-being. By adding fresh, cold-pressed juices into your nutrition plan, you can experience a lot of benefits:
- Increased energy levels
- Boosted immunity
- Improved digestion
- Enhanced nutrient intake
- Weight management support
Ready to embark into the world of cold-pressed goodness? The Omega NC800HDS is the perfect buddy for your health journey. With its multi functional, long-lasting, and commitment to preserving nutrients, this juicer enables you to unlock the full potential of every fruit and vegetable.
So, what are you waiting for? Start juicing your way to a healthier, happier you.
Here are some additional things you can consider including:
- User reviews and ratings of the Omega NC800HDS.
- A comparison of the NC800HDS with other popular cold press juicers on the market.
- Links to helpful resources, such as recipes and cleaning tips.
- High-quality images of the juicer and the different assemblies.
- A call to action, encouraging readers to purchase the NC800HDS or learn more about it.
By adding these elements, you can create a detailed and informative blog post that will intrigue readers to explore the world of cold-pressed juicing with the Omega NC800HDS.
Specification
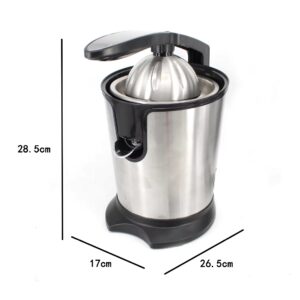
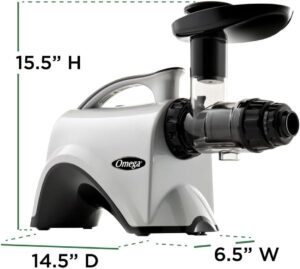
Dimensions & Build
-
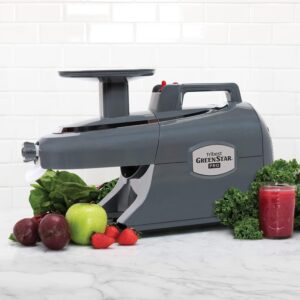
Model: Omega NC800HDS (6th generation horizontal single-gear Nutrition Center)
-
Dimensions (W × D × H): ~6.5″ × 14.5″ × 15.5″ (approx. 165 × 370 × 394 mm)
-
Weight: ~18.7 lb (≈ 8.5 kg)
-
Materials: Stainless steel and FDA‑approved Ultem/plastic components, BPA‑free parts
Motor & Performance
-
Motor power: 150 W gear‑reduction induction motor, equivalent to ~2 HP torque
-
Operating speed: ~80 RPM (range 75–85 RPM) for low heat and oxidation preservation
-
Noise level: Very quiet operation; noticeably quieter than vertical models such as Omega VSJ843
Juicing & Adjustment
-
Extraction type: Dual‑stage slow masticating (auger presses produce fibrous base then squeezing stage)
-
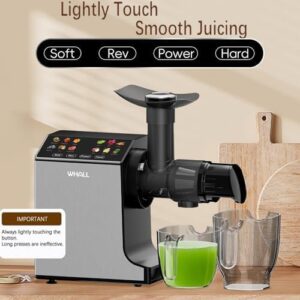
Adjustable end cap: 5 pressure settings to optimize extraction across soft/hard produce (higher pressure for leafy greens, lower for soft fruits)
-
Automatic pulp ejection: Continuous juicing without frequent stops to empty pulp container
-
Feed chute/hopper: Redesigned larger feed tray compared to earlier Omega 8000 series; still horizontal auger-style, requires manual pushing with plunger
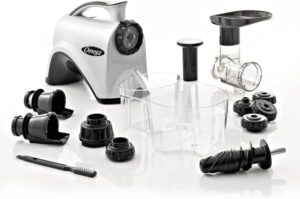
Included Attachments & Capabilities
-
Juicing screen: One stainless‑steel juicing screen included
-
Processing (homogenizing) screen: For food processing tasks
-
Nozzles: Six total (e.g. round noodle, flat noodle, breadstick shapes) for extrusion tasks
-
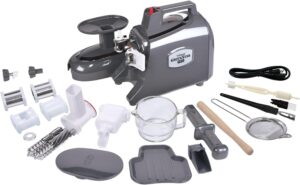
Attachments included: Juice screens, processing screen, six nozzles, auger, drum, drum cap, adjustable cap, cleaning brush, food pusher, containers, locking clip
Electrical & Safety
-
Voltage: 110–120 V (60 Hz); for North America markets
-
Fuse specification: 65TL 250 V 8 A
-
Certification: UL‑listed for safety standards
Warranty & Support
Key Components
The Omega NC800HDS boasts a complex design, offering more than just juicing capabilities. Let’s dig into the key components that make this appliance a multifunctional powerhouse in your kitchen:
1. Masticating Mechanism:
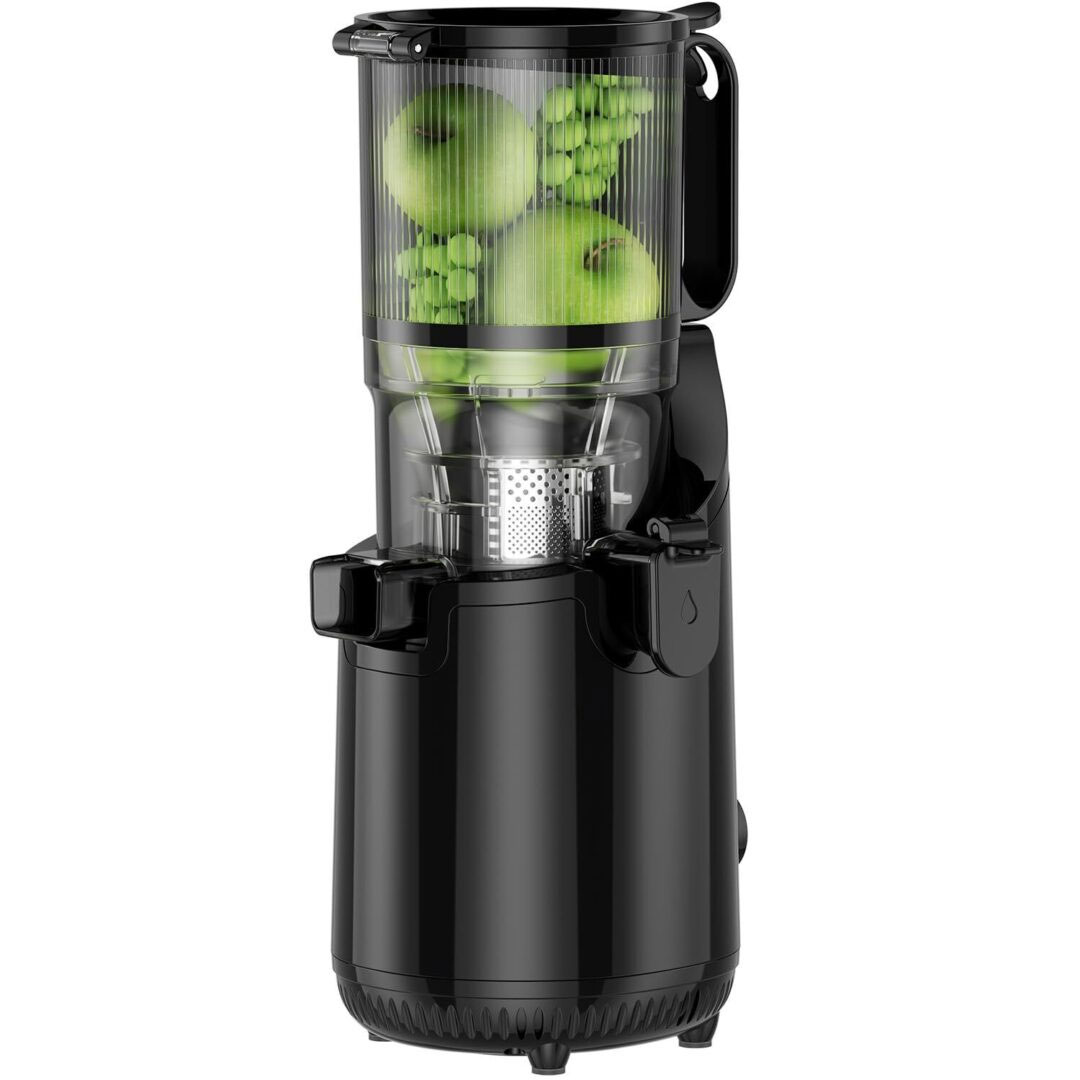
Auger: This is the heart of the juicer. It’s a spiral-shaped component that crushes and squeezes fruits and vegetables, extracting the highest amount of juice.
Straining Screen: This fine mesh screen separates the extracted juice from the pulp.
Adjustable End Cap: This allows you to control the amount of pulp in your juice, creating a smoother or more pulpy consistency depending on your desired preference.
2. Multifunctionality through Attachments:
Nut Butter Attachment: This attachment transforms the juicer into a nut butter maker, allowing you to create healthy nut butters from scratch.
Pasta Extruder Attachment: Experiment with fresh, homemade pasta selections using this attachment.
Blank Cone: This cone replaces the juicing screen when using the nut butter or pasta accessory.
3. User Experience Features:
150-Watt Motor: This powerful yet quiet motor ensures effective juicing without creating too much noise.
Automatic Pulp Ejection: This feature automatically separates the pulp from the juice, refine the juicing procedure and cleanup.
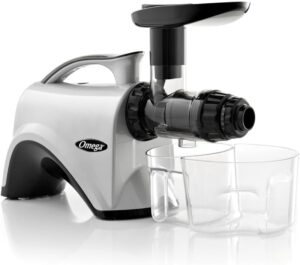
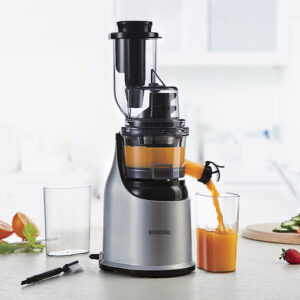
Hopper/Drum: This is the compartment where you feed the fruits and vegetables into the juicer.
Juice Container: This BPA-free container collects the freshly extracted juice.
Pulp Container: This container collects the leftover pulp after juicing.
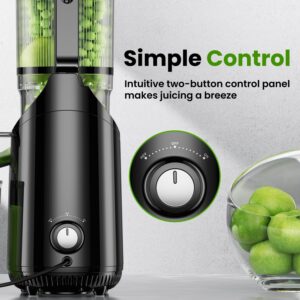
Control Panel: This partl allows you to turn the juicer on and off, and may have additional settings depending on the model.
4. Additional Notes:
Durable Construction: The NC800HDS is built with high-quality materials, guaranteeing durable performance.
Easy Cleaning: Many components are dishwasher-safe for easy cleaning.
Warranty: The NC800HDS comes with an industry-leading 15-year warranty on the motor and 10-year warranty on parts, providing peace of mind for your investment.
By understanding these key components, you’ll be prepared to apply the full potential of the Omega NC800HDS and set out on a rewarding journey towards a healthier lifestyle.
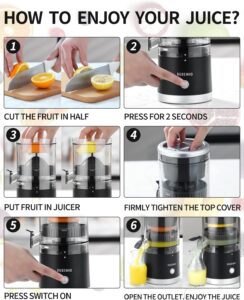
How to Use Your Omega NC800HDS Cold Press Juicer
The Omega NC800HDS empowers you to transform fresh produce into nutrient-rich juices and explore a world of dietary creations. Here’s a comprehensive guide to using your juicer and unlocking its full potential:
Preparation:
Wash Your Produce: Wash your fruits and vegetables thoroughly under the tap to remove any dirt or debris.
Cut Produce into Manageable Pieces: Pre-cut your fruits and vegetables into bits that will suit comfortably into the juicer’s feed chute. This ensures efficient juicing and prevents jamming.
Read the Manual: While this guide provides a general overview, it’s always recommended to check the user manual for your specific Omega NC800HDS model for specific instructions and safety precautions.
Juicing Process:
Assembly: Ensure all the components are properly assembled following the instructions in the manual. Make sure the hopper is securely locked and the juice container is in place.
Power On: Plug in the juicer and turn it on using the control panel.
Feeding the Produce: Feed the prepped fruits and vegetables slowly into the juicer’s feed chute. Use the pusher to gently guide the yield towards the drill without applying extreme force.
Pulp Control: The NC800HDS features an modifiable end cap that allows you to control the quantity of pulp in your juice. Turn the cap clockwise for a clearer juice with less pulp, or counter-clockwise for a thicker, pulpier coherence.
Juice Extraction: The juicer will extract the juice from the produce, separating it from the pulp. The juice will collect in the juice container, while the pulp will be deposited in the pulp container.
Turn it Off: Once you’ve finished juicing, turn the juicer off and unplug it from the power outlet.
Additional Functions:
Nut Butters: For homemade nut butters, replace the juicing screen with the empty cone and the drill with the nut butter attachment. Follow the instructions in the manual for processing nuts.
Pasta Extruding: To create fresh pasta, use the pasta pushing attachment following the specific instructions provided with the attachment.
Tips for Optimal Performance:
Alternate Soft and Hard Produce: Alternate between juicing softer and harder fruits and vegetables for a more effective juicing process.
Process Leafy Greens Separately: Leafy greens are best juiced on their own or with other soft ingredients.
Don’t Overload: Do not overload the feed chute, as this can lead to jamming.
Enjoy Immediately: Freshly squeezed juices are best enjoyed right away for utmost nutrient content.
Cleaning Up:
Check the cleaning guide mentioned previously for step-by-step instructions on dismantle, cleaning, and reconstruct your Omega NC800HDS.
With this guide and a little practice, you’ll be a juicing pro in no time! Explore different recipes, experiment with flavor mixtures, and embark on a journey of healthy living with your Omega NC800HDS.
A Step-by-Step Guide to Cleaning Your Omega NC800HDS
Maintaining a clean Omega NC800HDS is essential for ideal performance and longevity. The good news is that this juicer is designed for easy cleaning! Here’s a step-by-step guide to keep your appliance sparkling:
Before You Begin:
- Unplug the juicer from the power outlet before dismantling and cleaning.
- Wash your hands thoroughly with soap and warm water.
Disassembly:
Remove the Hopper and Drum: Twist the locking ring counter-clockwise and lift the hopper straight up.
Separate the Straining Screen and Auger: Gently pull the straining screen away from the drill.
Remove the Pulp Container and Juice Container: Lift the containers straight up to detach them from the base.
Cleaning the Parts:
Straining Screen and Auger: These parts can be rinsed under warm running water. You can use a soft brush to remove any stubborn pulp remnant.
Hopper, Drum, Pulp Container, and Juice Container: Wash these parts with warm, soapy water. You can use a light dish soap and a soft sponge or dishcloth.
Motor Base: Wipe down the motor base with a damp cloth. Do not deep the base in water or use harsh chemicals.
Optional: Deep Cleaning
For a deeper clean, you can frequently soak the following parts in a solution of warm water and baking soda (1 tablespoon per cup of water) for 30 minutes:
- Straining Screen
- Auger
- Pulp Container
- Juice Container
Drying
- After cleaning, dry all components with a clean dish towel thoroughly before reconstructing.
Reassembly:
- Insert the Auger into the Drum.
- Place the Straining Screen onto the Drum.
- Reassemble the Hopper and secure it with the locking ring.
- Reassemble the Pulp Container and Juice Container.
Additional Tips:
- To remove any residual odors, you can occasionally run the juicer with a few slices of lemon or grapefruit.
- The brush included with the juicer can be helpful for cleaning the nooks and crannies of the strainer screen.
- If you notice any stain on the plastic parts, you can try using a solution of water and white vinegar (equal parts) to gently wipe them down.
- Check the user manual for your specific Omega NC800HDS model for any additional cleaning instructions.
By following these simple steps, you can ensure your Omega NC800HDS remains clean and hygienic, ready to deliver fresh, delicious juices for years to come.

Delicious Recipe Ideas for Your Omega NC800HDS
The Omega NC800HDS goes beyond ordinary juicing, offering a platform to explore different kinds of flavorful and healthy concoctions. Here are some recipe ideas to get you started:
Classic Green Juices:
Green Glow: Kale, spinach, cucumber, celery, apple, lemon
Tropical Punch: Pineapple, mango, ginger, lime
Superfood Slam: Spinach, banana, berries, chia seeds (add chia seeds after juicing)
Vegetable Powerhouses:
Beet It!: Beetroot, carrot, apple, ginger
Spicy Surprise: Carrot, cucumber, jalapeño, lime
Garden Delight: Zucchini, cucumber, celery, tomato (remove seeds before juicing)
Fruity Delights:
Citrus Burst: Orange, grapefruit, ginger
Berry Bliss: Strawberries, blueberries, raspberries, banana
Melony Magic: Watermelon, cantaloupe, lime
Beyond Juices:
Nut Butters: Experiment with cashews, almonds, or peanuts to create creamy homemade nut butters.
Frozen Treats: Turn your favorite fruits into refreshing sorbet or frozen yogurt using frozen fruit chunks.
Healthy Pasta: Craft colorful and nutritious pasta varieties using the pasta dispenser attachment. Experiment with vegetable and herb infused dough.
Tips for Recipe Success:
Fresh is Best: Use fresh, ripe produce for the most flavorful and nutritious juices.
Start Simple: Begin with basic recipes and gradually mix new ingredients as you become more comfortable.
Adjust to Taste: Don’t be afraid to experiment and adjust the ingredients in recipes to fit your preferences.
Safety First: Always check the user manual before using any attachments and ensure they are properly attached.
With a little creativity and these recipe tips, you can transform your Omega NC800HDS into a culinary powerhouse, creating delicious and healthy beverages and treats for yourself and your loved ones. Remember, juicing is a journey, so have fun exploring and discover your desired flavor combinations!
What to Avoid While Using Your Omega NC800HDS
Even the mighty Omega NC800HDS has its limitations. To ensure smooth process and ideal performance, here’s what to avoid while using your juicer:
Ingredient Selection and Preparation:
Unripened Produce: Unripe fruits and vegetables tend to be harder and less juicy. Choose ripe produce for maximum yield and flavor.
Large Chunks: Feeding large chunks of produce can bog down the juicer and lead to jamming. Pre-cut your ingredients into manageable bits for effective juicing.
Fibrous Fruits: Fruits with high fiber content, like bananas and mangoes, can be difficult for the juicer to process. These are better suited for blending.
Pits and Seeds: Avoid juicing fruits and vegetables with large pits or seeds, as these can damage the juicer. Remove them before feeding the produce into the juicer.
Overfeeding: Don’t overload the feed chute. Feed the produce slowly and consistenly to prevent jamming.
Operational Cautions:
Continuous Operation: The NC800HDS isn’t designed for continuous juicing. Take breaks every 30 minutes to allow the motor to cool down and prevent overheating.
Wrong Attachments: Ensure you’re using the correct attachment for the desired function. Don’t attempt to juice with the nut butter attachment or vice versa.
Forcing Ingredients: If the juicer struggles to process something, don’t force it. Turn off the juicer, clear any blockages, and cut the ingredients into smaller bits.
Improper Cleaning: Not cleaning your juicer properly can lead to build-up, mold growth, and dull blades. Follow the cleaning instructions drafted in the manual for optimal performance.
Putting Hot Liquids in the Juicer: The NC800HDS is not designed to handle hot liquids. Only use it for juicing cold fruits and vegetables.
Warranty Woes:
Misuse: Using the juicer for anything other than its intended purpose can null the warranty.
Electrical Issues: Never attempt to repair electrical problems yourself. If you experience electrical issues, contact an authorized Omega repair service provider.
By following these simple guidelines, you can avoid common dangers and ensure your Omega NC800HDS continues to process smoothly for years to come. Remember, a little care goes a long way in increasing the lifespan and performance of your juicer.
In conclusion, the Omega NC800HDS is more than just a juicer, it’s a multifunctional appliance for a healthier you. It offers cold-pressed juices, nut butters, and even fresh pastas. This long lasting and user-friendly machine is built to last. With a little know-how, you can avoid common juicing mistakes and create endless healthy concoctions. Allocate in your health and explore the world of cold-pressed juicing with the Omega NC800HDS, Happy Juicing!


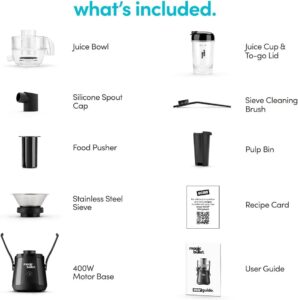 Components