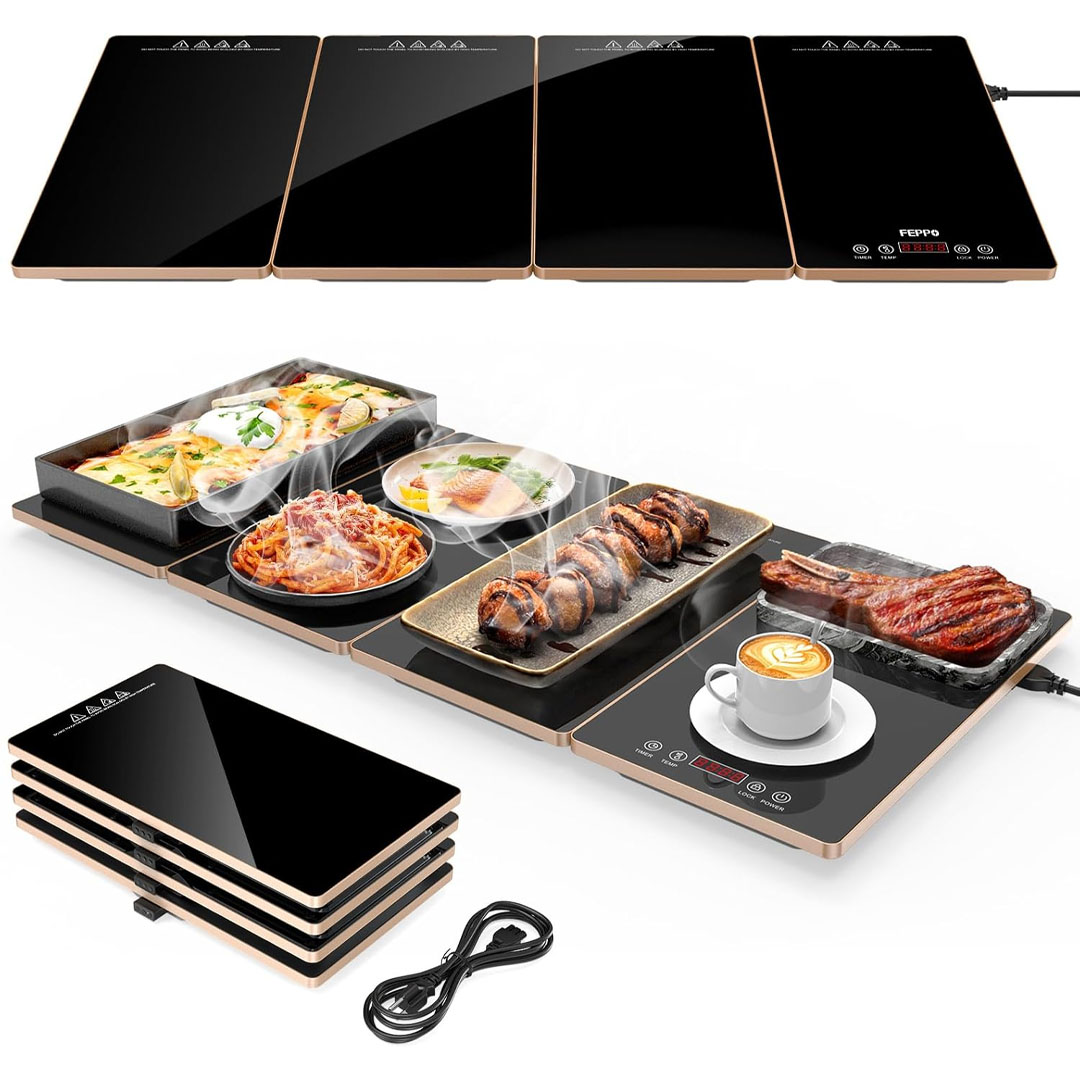
Enhance your mealtime and hosting experience with the FEPPO 4-in-1 Electric Warming Tray. Perfect for parties, buffets, and big gatherings, this adaptable warming tray keeps your food at the ideal temperature from beginning to end. With four separate warming zones, multiple dishes stay hot at once, ensuring even heating—great for everything from simple family dinners to sophisticated catered events.
Boasting 10 accurate temperature levels and an integrated timer, the FEPPO warming tray lets you fully manage the heat of your dishes. From delicate sauces to hearty mains and desserts, you can keep everything at the perfect serving temperature while focusing on other hosting duties. The 33″x15″ glass surface offers plenty of room for multiple serving dishes, and its stylish design adds a contemporary flair to any buffet or countertop.
Crafted for user-friendly operation and reliable safety, the modular construction lets you tailor the tray to any size event, whether a small gathering or a full catering spread. Sturdy and simple to maintain, the FEPPO warming tray removes the hassle from entertaining, keeping every dish warm and tasty. Ideal for both home use and professional catering, it guarantees your meals are served perfectly hot and your guests impressed.
Specification
Here’s a detailed specification list for the FEPPO Electric Warming Tray – 4‑in‑1 Food Warmers for Parties & Buffets (with 10 temperature settings, timer, and modular design):
Model & Brand
- Brand: FEPPO
- Model: HF‑PJNCB04 (Electric Warming Tray)
Dimensions & Construction
- Tray Size: 33″ x 15″ (glass warming surface)
- Surface Material: Tempered glass with elegant gold edges – explosion‑proof, waterproof, oil‑resistant, and easy to clean
- Modular Panels: 1 to 4 removable warming panels for flexible buffet configurations
Heating & Performance
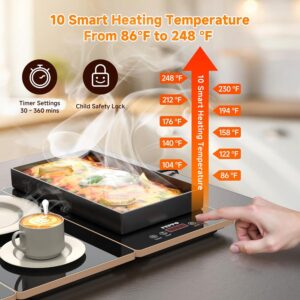
- Temperature Settings: 10 adjustable levels from 86 °F to 248 °F (30 °C to 120 °C)
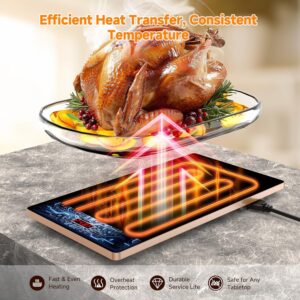
- Heating Type: Full‑surface warming with built‑in thermostat for even heat distribution
- Timer Range: 30 minutes up to 6 hours with programmable timer control
Safety & Features
- Child Safety Lock: Yes — prevents accidental operation
- Overheat Protection: Yes — automatic protection for safe continuous use
Usage & Compatibility
- Suitable Cookware: Works with glass, metal, ceramic, and stainless‑steel dishes
- Multi‑Purpose: Perfect for warming food, defrosting, dough proofing, melting butter or chocolate, and warming drinks such as milk, tea, or wine
- Ideal For: Parties, buffets, catering events, family dinners, holiday gatherings, and break rooms
Power & Installation
- Power Source: AC mains (standard plug)
- Easy Setup: Position the tray on a stable, heatproof surface, plug it in, and select your desired temperature and timer settings.

Key Features
Here are the key features of the FEPPO Electric Warming Tray – 4‑in‑1 Food Warmers for Parties & Buffets:
Modular & Expandable Design – Quickly link 1 to 4 warming modules to fit any event, from intimate dinners to large buffet setups, maximizing space and adjusting to your requirements.
Large 33″×15″ Tempered Glass Surface – A modern, sturdy, shatter-resistant, water-safe, and oil-resistant glass surface accommodates 6–8 dishes simultaneously, making it ideal for parties, events, and catering arrangements.
10 Temperature Settings & Built‑In Timer – Customizable temperatures from 86°F to 248°F, paired with a 30-minute to 6-hour timer, provide steady, uniform warming suited to every type of dish.
Safety & Reliability – Equipped with overheating protection and a child safety lock, ensuring safe, stress-free operation during extended use or when children are nearby.
Multi‑Purpose Use – Compatible with a wide range of cookware—including glass, metal, ceramic, and stainless steel—and suitable for tasks like defrosting, dough proofing, melting chocolate or butter, and warming drinks, making it perfect for both daily use and special occasions.

How to use the 4-in-1 FEPPO Electric Warming Tray
Here’s a step-by-step guide on how to use the FEPPO Electric Warming Tray 4-in-1 Food Warmers:
- Setup & Placement
- Position the warming tray on a secure, heat-safe surface, keeping it clear of flammable items.
- If multiple modules are needed, attach the required number of panels to match your arrangement.
- Connect to Power
- Connect the tray to a standard AC power outlet and position the cord securely to prevent tripping.
- Set Temperature
- Adjust the temperature dial or control panel to your preferred setting, choosing from 10 heat levels ranging from 86°F to 248°F (30°C to 120°C).
- Set the heat based on the food type—lower settings for delicate sauces and higher levels for hot main dishes or drinks.
- Set Timer
- Set the heating time using the integrated timer, adjustable from 30 minutes to 6 hours.
- The warming tray shuts off automatically when the timer ends, providing safe and energy-efficient operation.
- Place Food on the Tray
- Use heat-resistant or compatible cookware, including glass, ceramic, metal, or stainless steel.
- Place dishes evenly on the warming surface to achieve consistent heat distribution.
- Monitor & Serve
- Monitor the food periodically to ensure it stays at the preferred temperature..
- Dish out food straight from the warming tray if preferred; it keeps meals hot and ready to serve.
- After Use & Cleaning
- Switch off and unplug the tray.
- Let the glass surface fully cool before attempting to clean it.
- Clean using a soft, damp cloth or gentle detergent, and avoid harsh scrubbing tools to preserve the glass surface.
Tips and Recipes suitable for the 4-in-1 FEPPO Electric Warming Tray
Here’s a helpful guide with tips and recipe ideas for using the FEPPO Electric Warming Tray 4-in-1 Food Warmers:
Tips for Using the FEPPO Warming Tray
- Preheat Before Use – Power on the tray a few minutes in advance of placing food to guarantee consistent warmth across all dishes.
- Use Appropriate Cookware – Works with glass, ceramic, stainless steel, or metal cookware, but avoid plastic or flimsy materials that could deform.
- Layer Smartly – For denser dishes, position smaller or thinner items nearer the heat source to ensure even warming.
- Keep Food Covered – Cover with lids or aluminum foil to preserve moisture, prevent food from drying, and retain flavor.
- Modular Setup – For bigger events, link several warming panels; for smaller meals, one panel will suffice.
- Avoid Overcrowding – Keep a gap between dishes to allow airflow, ensuring consistent heating.
- Safety First – Use protective, heat-resistant gloves when moving food, and disconnect the appliance when finished.
Recipe Ideas Perfect for the FEPPO Warming Tray
- Buffet & Party Favorites: Mini meatballs, cocktail sausages, sliders, spring rolls, chicken wings.
- Breakfast & Brunch: Scrambled eggs, pancakes, French toast, bacon, sausage links, warm oatmeal.
- Side Dishes: Macaroni & cheese, mashed potatoes, roasted vegetables, steamed rice, baked beans.
- Desserts & Sweet Treats: Warm chocolate fondue, bread pudding, mini cobblers, caramel apples.
- Beverages & Drinks: Mulled wine, hot chocolate, warm cider, herbal teas.
The FEPPO warming tray is ideal for maintaining multiple dishes at the perfect serving temperature, making it perfect for buffets, festive occasions, catering, or family meals.
Cleaning Guide
Here’s a clear step-by-step guide on how to clean the FEPPO Electric Warming Tray 4-in-1 Food Warmers:
- Turn Off & Unplug
- Always switch off the tray and disconnect it from the power outlet before cleaning.
- Let it cool fully to prevent burns or damage.
- Remove Food & Dishes
- Remove all serving dishes, utensils, and detachable panels.
- Brush off loose crumbs or spills using a dry cloth.
- Wipe the Surface
- Clean the tempered glass surface with a soft, slightly damp cloth or sponge and gentle dish soap.
- Refrain from using abrasive pads, steel wool, or strong chemicals, as they can scratch or harm the glass.
- Clean Modular Panels & Edges
- If the tray includes removable panels, take them off and clean each one separately.
- Focus on corners and edges where food or liquids might collect.
- Dry Thoroughly
- After cleaning, dry with a cloth to remove any moisture and avoid water marks.
- Make sure all components are completely dry before reassembling or storing.
- Store Safely
- Keep the warming tray in a cool, dry location.
- Keep the cords tidily coiled to avoid damage.
Pro Tip: For tough stains, dampen a cloth with warm soapy water and lay it over the affected area for a few minutes before wiping. Do not submerge the warming tray in water or rinse under a faucet.
What to avoid when using the 4-in-1 FEPPO Electric Warming Tray
Here’s a clear guide on what to avoid when using the FEPPO Electric Warming Tray 4-in-1 Food Warmers to ensure safety, longevity, and optimal performance:
- Avoid Direct Water Contact
- Do not submerge the tray in water or rinse it under running water. The warming tray is electric, and exposure to water can damage the electronics and create a safety risk.
- Avoid Overloading
- Avoid placing too many dishes on the surface. Overcrowding may cause uneven heating, spills, or scratches on the glass.
- Avoid Using Incompatible Cookware
- Do not use thin plastic or non-heat-safe materials. Use glass, ceramic, metal, or stainless steel dishes that can tolerate heat.
- Avoid Scratching the Glass Surface
- Avoid using abrasive pads, steel wool, or sharp tools on the tempered glass to prevent scratches or cracking.
- Avoid Flammable Materials Nearby
- Keep paper, fabric, or other combustible materials away from the tray while it’s operating.
- Avoid Continuous Operation Beyond Limits
- Adhere to the timer and temperature instructions. Prolonged high-heat use beyond the recommended duration may reduce the tray’s lifespan or cause overheating.
- Avoid Moving While Hot
- Do not try to lift or move the warming tray while it’s hot, particularly with food on it. Always wear heatproof gloves if necessary.
Pro Tip: Periodically check the cords and connections before using the tray, and always unplug it when not in use to ensure safety and extend its lifespan.
In conclusion, the FEPPO Electric Warming Tray 4-in-1 Food Warmers is a versatile, safe, and convenient solution for keeping multiple dishes perfectly warm. Its modular design, adjustable temperature settings, and easy-to-clean glass surface make it ideal for family meals, buffets, and catering events. With built-in safety features and reliable performance, it ensures every meal is served hot, delicious, and stress-free.