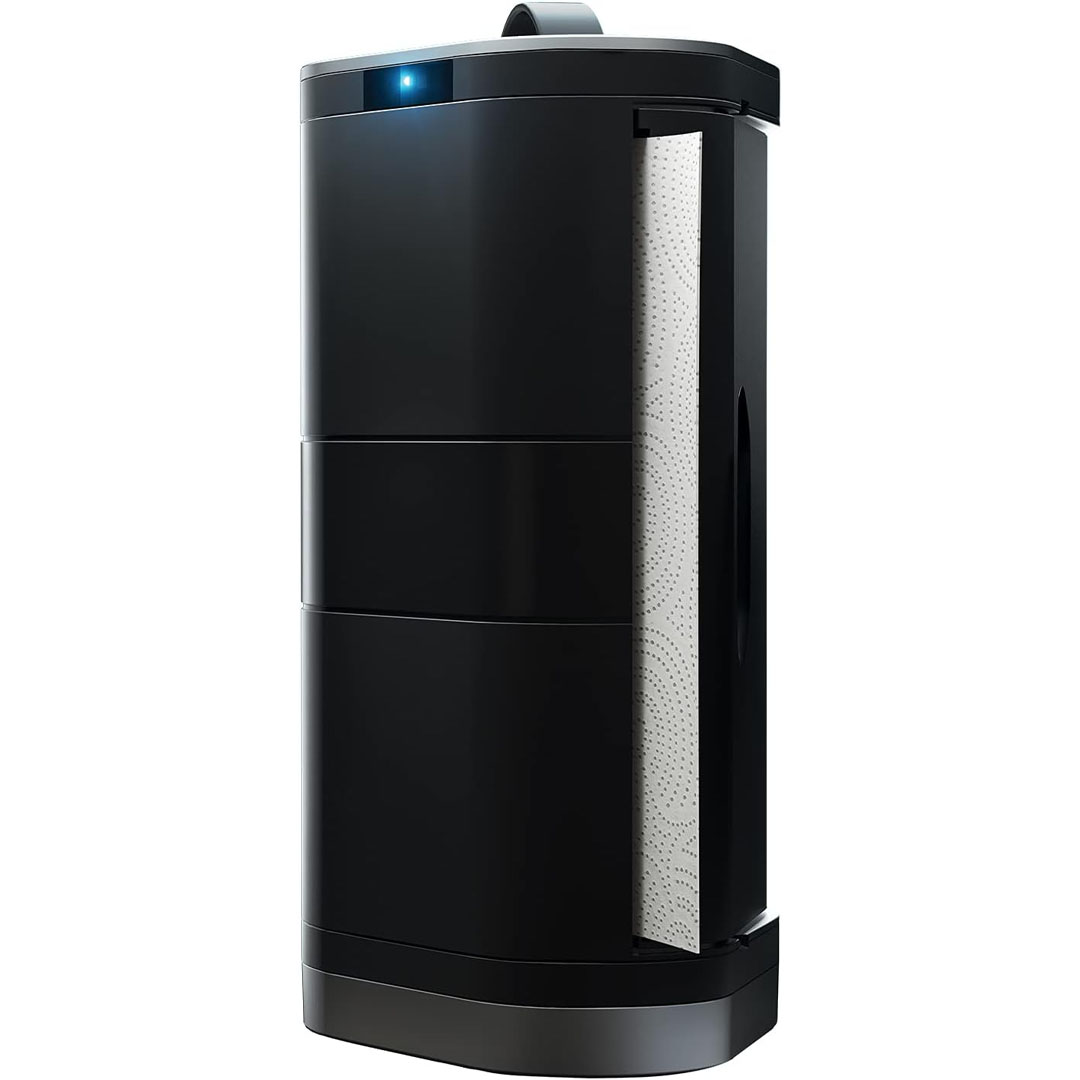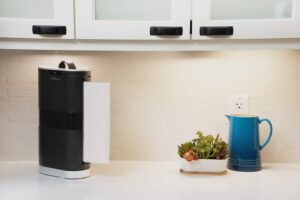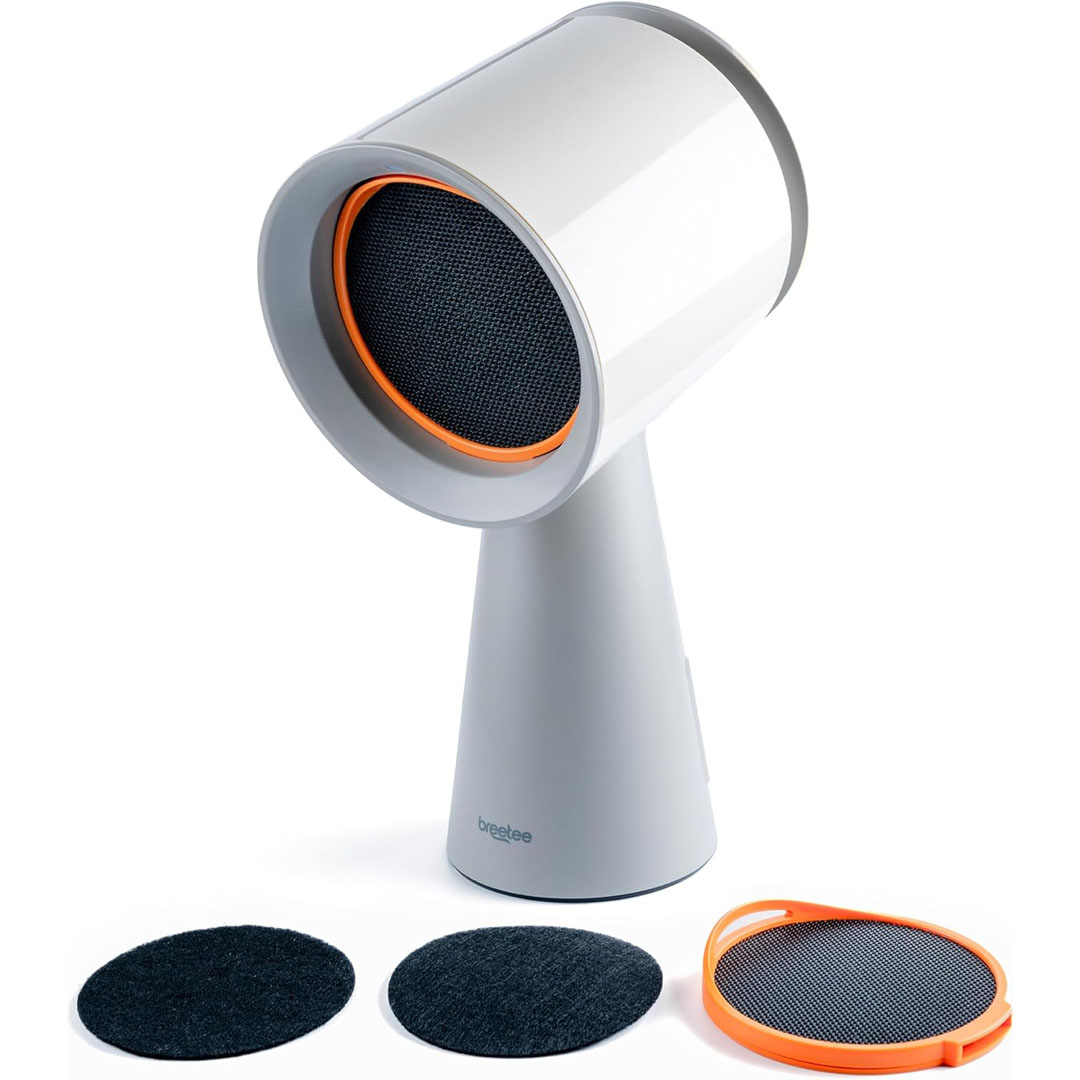
The BREETEE Portable Range Hood Kitchen is a ready-to-use ventilation option created for locations where standard range hoods can’t be installed. Its small, ductless build allows you to set it on your countertop and plug it in instantly—no setup or external exhaust needed. This makes it ideal for apartments, dorms, RVs, indoor grilling, and compact kitchens. With its modern off-white finish and simple controls, it fits seamlessly into different décor styles while enhancing air quality during cooking.
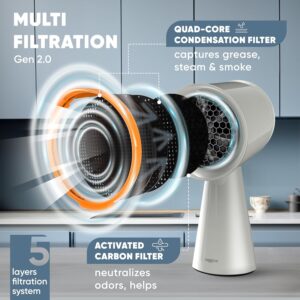
One of the most impressive aspects of this range hood is its five-layer filtering design, utilizing aluminum mesh, polymer material, and activated carbon to effectively capture airborne grease, odors, steam, and smoke. The adjustable 3-speed fan provides flexible airflow control for different cooking intensities, and the integrated LED light helps illuminate your workspace. Easy maintenance is ensured with a detachable grease cup and reusable, washable filters.
Although compact in size, the BREETEE range hood delivers strong suction while maintaining low noise operation, typically ranging from 50–65 dB. This allows for a more pleasant cooking environment, even during longer use. Its quiet performance and portability make it especially appealing for homes without built-in ventilation, though it may not match the power of larger, ducted hoods in spacious or open kitchens. Overall, it provides a practical and user-friendly way to enhance air quality and minimize lingering cooking odors in small spaces.

Specification
Here’s a specification summary for the BREETEE Portable Range Hood Kitchen – 5‑Layer Filter Compact Desktop Exhaust Fan:
Technical Specifications
- Power & Electrical:
• Voltage: 110–240 V (works with standard outlets)
• Power: ~36 W
• Amperage: ~1.5 A
• Controls: Push‑button operation - Performance:
• 3 adjustable fan speeds for light to heavy smoke removal
• Ventilation type: Ductless recirculating exhaust
• Airflow capacity: ~95 cfm (cubic feet per minute)
• Noise level: ~50–65 dB for quiet operation - Filtration & Features:
• Advanced 5‑layer filtration system (Quad‑Core + activated carbon layers) to capture smoke, grease, odors, and steam
• Oil/grease collection cup for easier maintenance
• LED lighting to illuminate the cooking area - Physical & Design:
• Mounting type: Countertop / desktop setup (no ducting needed)
• Material: Plastic/ABS construction
• Color: Off‑white (also available in other finishes)
• Product dimensions: approx. 8 × 6.5 × 14.5 inches (20.3 × 16.5 × 36.8 cm)
• Item weight: ~2.8–2.9 lb (1.27–1.32 kg) - Included Components:
• BREETEE Portable Range Hood unit
• Power adapter (110–240 V) with long cord (~70″)
• Multiple filters (e.g., Quad‑Core and carbon filter packs)
• User manual
Key Features
Here are the key features of the BREETEE Portable Range Hood Kitchen – 5‑Layer Filter Compact Desktop Exhaust Fan:
- Advanced Multi‑Layer Filtration System – Features a five-layer filtration system, including Quad-Core and activated carbon filters, to efficiently trap smoke, grease, steam, and unwanted odors for fresher indoor air.
- Powerful 3‑Speed Suction – Variable fan speeds allow you to customize airflow for everything from gentle cooking to heavy smoke extraction.
- Plug‑and‑Play, No Installation Required – Just set it on your countertop and plug it in—no ductwork or complicated installation required.
- Low Noise Operation – Low-noise operation (approximately 50–65 dB) makes it ideal for apartments, shared living spaces, and RVs.
- Built‑In LED Lighting – Lights up your cooking space for better visibility while preparing meals.
- Easy to Maintain – Features a detachable oil and grease collection cup along with washable filters for easy cleaning and maintenance.
- Compact & Portable Design – Compact, countertop-friendly design makes it perfect for small kitchens, dorm rooms, RVs, indoor BBQs, and temporary cooking spaces.

How to use the BREETEE Desktop Exhaust Fan
Here’s a clear, step-by-step guide on how to use the BREETEE Portable Range Hood Kitchen – 5‑Layer Filter Compact Desktop Exhaust Fan:
- Placement & Setup
- Position the range hood on a level, sturdy countertop close to your cooking zone.
- Make sure the appliance is connected to a standard 110–240 V power outlet.
- Ensure the egg ring, filters, and oil cup are correctly reassembled after cleaning.
- Power On & Fan Speed
- Click the power button to turn on the range hood.
- Choose your desired fan speed based on cooking intensity:
- Low: For light smoke or steam.
- Medium: For moderate cooking fumes.
- High: For heavy smoke, indoor BBQ, or frying.
- Lighting (Optional)
- Turn on the integrated LED light to brighten your cooking space when necessary.
- Cooking & Smoke Removal
- Begin cooking as normal, and the range hood will draw in smoke, odors, and grease through its multi-layer filters.
- Do not leave the appliance unattended, particularly when cooking smoke-heavy foods like eggs, cheese, or fried meats.
- Post-Cooking
- Turn off the appliance after cooking.
- Allow it to cool slightly before cleaning.
- Cleaning & Maintenance
- Take out the oil/grease cup and filters, clean them with warm, soapy water, and dry completely.
- Clean the outer surface and plates using a damp cloth.
- Assemble all detachable pieces again after cleaning and drying.
- Keep the appliance in a cool, dry location until it’s needed again.

Tips Suitable for the BREETEE Desktop Exhaust Fan
Here’s a curated list of tips suitable for the BREETEE Portable Range Hood Kitchen – 5‑Layer Filter Compact Desktop Exhaust Fan to help you get the best performance and longevity:
- Optimal Placement
- Position the range hood on a level, heat-safe countertop, keeping it away from edges or uneven areas to avoid tipping.
- Place it near the cooking zone (without sitting directly on the burners) to optimize smoke and odor extraction.
- Adjust Fan Speed Smartly
- Select a low setting for gentle cooking or steaming.
- Select medium or high speed for frying, grilling, or smoke-heavy foods.
- Refrain from using maximum speed unless needed to minimize noise and prolong motor life.
- Pre-Cook or Defrost Ingredients
- Steer clear of raw thick meats or frozen foods that can produce heavy smoke or odors. Pre-cook or thaw ingredients beforehand for effective smoke extraction.
- Avoid Overloading the Cooking Area
- Too much smoke can lower the hood’s performance. Keep space around pots and pans to allow proper airflow.
- Maintain the Filters Regularly
- Clean the removable filters and oil/grease cup frequently using warm, soapy water.
- Change the activated carbon filters regularly to maintain optimal odor elimination.
- Keep the Unit Clean
- Clean the hood’s exterior and top with a damp cloth to avoid grease accumulation.
- Do not use abrasive sponges or metal tools that may scratch surfaces.
- Use the LED Light When Needed
- Switch on the built-in LED light to improve visibility while cooking in dim conditions.
- Operate Safely
- Do not submerge the main unit in water; only detachable parts can be washed.
- Never leave the hood unsupervised while preparing dishes that produce excessive smoke or splatter.
- Storage Tips
- Once cleaned, keep the range hood in a dry, cool area until it’s needed again.
- Noise Management
- Although the unit operates quietly (~50–65 dB), placing it on a soft mat or towel can help minimize vibration noise on hard surfaces.

Cleaning Guide
Here’s a detailed, step-by-step guide on how to clean the BREETEE Portable Range Hood Kitchen – 5‑Layer Filter Compact Desktop Exhaust Fan:
- Safety First
- Always disconnect the appliance from the power source before cleaning.
- Let the appliance cool fully if it was just in use.
- Remove Removable Parts
- Remove the filters, oil/grease cup, and all other detachable parts.
- Ensure all detachable parts are present before cleaning.
- Clean the Filters
- Clean the aluminum mesh, polymer, and activated carbon filters (if washable) using warm, soapy water.
- Gently clean grease and residue with a soft sponge or cloth.
- Rinse well and ensure all parts are fully dry before reassembling.
- Swap out activated carbon filters when they are saturated and uncleanable.
- Clean the Oil/Grease Cup
- Take out the oil collection cup and clean it with warm, soapy water.
- Thoroughly rinse and ensure it’s fully dry before returning it to place.
- Wipe the Exterior
- Clean the outer surface of the main unit using a damp cloth or soft sponge.
- Do not use abrasive sponges or metal brushes that may scratch the surface.
- Wipe the Interior & Fan Area
- Use a damp cloth to gently clean accessible interior areas of light grease or smoke residue.
- Never submerge the main unit; wash only removable components.
- Reassemble
- After cleaning and drying all parts, securely put the filters and oil cup back in place.
- Make sure all parts are correctly positioned before using again.
- Regular Maintenance Tips
- Wash the filters and oil cup every few uses to keep the appliance performing at its best.
- Regularly clean the exterior to keep grease from accumulating.
- Change the filters according to the manufacturer’s instructions.

What to avoid when using the BREETEE Desktop Exhaust Fan
Here’s a clear list of what to avoid when using the BREETEE Portable Range Hood Kitchen – 5‑Layer Filter Compact Desktop Exhaust Fan to ensure safety, efficiency, and longevity:
- Do Not Immerse the Main Unit in Water
- Only detachable parts (filters, oil cup) are washable. Never immerse the main unit, as this may cause electric shock or damage.
- Avoid Overfilling the Cooking Area
- Too much smoke or grease can lower the hood’s performance and may pose safety risks.
- Do Not Use Raw Thick Meats or Frozen Foods Directly
- These can generate strong smoke or odors. Pre-cook or thaw ingredients beforehand.
- Avoid Using Abrasive Pads or Metal Utensils
- Scratching the filters, fan, or exterior may impair performance or harm the unit.
- Do Not Leave the Appliance Unattended
- Particularly when preparing high-smoke foods such as fried items, cheese, or eggs.
- Avoid Placing on Uneven Surfaces
- Always place on a level, stable, heat-resistant surface to avoid tipping.
- Do Not Spray Oil Directly onto Hot Plates or Filters
- Doing so may produce smoke or harm the surface. Lightly oil before cooking if necessary.
- Do Not Block the Airflow
- Keep objects away from the exhaust vent to maintain efficiency and prevent fan damage.
- Do Not Run at Maximum Speed Unnecessarily
- Using high speed generates more noise and can wear out the motor faster if not required for heavy smoke.
- Avoid Ignoring Maintenance
- Clogged filters or a full oil cup can lower suction performance. Clean and replace parts as instructed.
In conclusion, the BREETEE Portable Range Hood is a compact, easy-to-use solution for small kitchens, apartments, dorms, and RVs. Its 5-layer filtration system, 3-speed fan, and low-noise operation efficiently remove smoke, grease, and odors. With a plug-and-play design, built-in LED lighting, and easy-to-clean components, it offers convenient, safe, and long-lasting performance, making it an ideal choice for maintaining a fresh, smoke-free cooking environment.