There’s something deeply comforting about that first cup of coffee each morning. It’s more than taste—it’s ritual. A moment of calm before the day begins. And for those who cherish that moment, a top-tier coffee machine is not just an appliance—it’s an emotional investment in your daily experience.
As we look ahead to 2026, the world of luxury coffee machines is about to shift in exciting ways. Not just incremental upgrades, but full-on transformations: smarter automation, deeper personalization, and sustainable materials that align with lifestyle values. In short, your future morning ritual is about to get upgraded.
Below, I’ll outline ten machines available now or imminently and then explore the key projections for 2026—what to expect, what to look for, and how to future-proof your purchase.

Real Machines Worth Buying Now (That Will Serve You Well in 2026)
Here are some top picks available in 2025 that already deliver luxury and will remain strong into 2026:
Jura Z10 – Fully automatic, one-touch, including cold-brew capability, premium build.
Breville Oracle Touch – Semi-automatic, dual boiler, touchscreen, great for home baristas.
La Marzocco Linea Micra – Café-level performance for home use: dual boilers, PID control, high-end build.

Miele CM 7750 CoffeeSelect – Smart bean-to-cup with three bean hoppers, WiFi connectivity, and high customisation.
De’Longhi Maestosa – Flagship bean-to-cup machine with dual bean hoppers, full automation, touchscreen operation.
Rancilio Silvia Pro X—For espresso purists who want manual control with a luxury build.
Gaggia Classic Pro Premium – A premium update of a heritage model: more accessible luxury.
Jura E8 (4th Gen)—A slightly more accessible luxury bean-to-cup machine from Jura, but still top-tier.

Philips LatteGo Series 5400 – Lower price luxury segment: one-touch, milk system, sleek design.
Miele CM 6360 Milk Perfection—A strong premium option from Miele for those wanting smart features at a slightly lower price point.
These machines already give you high-quality materials and advanced features and elevate your coffee routine. But to truly stay ahead of the curve, you’ll want to think about what’s coming.
What Luxury Coffee Machines Will Look Like in 2026
Below are the key projections for how luxury coffee machines will evolve by 2026—and what you should keep an eye on when choosing your machine:
1. Smart, Connected, Data-Driven Brewing
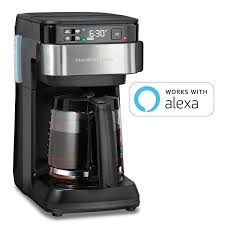
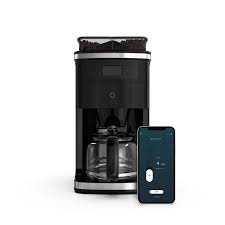
By 2026 we’ll see machines that not only brew coffee but also learn your habits and preferences and adjust themselves accordingly. IoT-enabled machines, remote app control, predictive maintenance, and AI-driven optimisation are already emerging.
What this means for you: a machine that knows your favourite strengths, milk froth texture, brew volume—and remembers them.
Action step: When buying, check for app connectivity, user profile support, over-the-air updates, and maintenance alerts.
2. Premium Materials + Sustainability
Luxury no longer just means “shiny metal and heavyweight”. It increasingly means eco-conscious design, energy-efficient heating systems, recyclability, and longer lifespans. According to market data, sustainability is becoming a key differentiator.
What this means for you: Machines designed for decades of use, minimal waste, and lower energy consumption—better for your coffee and for your conscience.
Action step: Choose models with eco-modes, energy efficiency certifications, and recyclable components.
3. Multi-Bean + Multi-Brew Flexibility
Consumers are demanding more variety—not just a standard espresso. By 2026, expect high-end machines that handle multiple bean types (e.g., decaf + regular), multiple brewing styles (cold brew, iced coffee, flat white, espresso) and switch seamlessly. Market reports show strong growth in machine versatility.
What this means for you: One machine can serve multiple users with different preferences, or adapt your preferences over time as your taste evolves.
Action step: Look for features like dual bean hoppers, customisable drink profiles, cold brew capability.
4. Transparent Maintenance + Extended Support
As machines get more complex, maintenance becomes more important. But users will expect easier cleaning, self-diagnostics, remote servicing and longer warranty periods. Reports highlight “smart diagnostics” as a growing feature.
What this means for you: Less time spent cleaning and troubleshooting, more time enjoying your coffee.
Action step: Verify self-clean programs, easy access parts, service-friendly design, and warranty/parts availability.


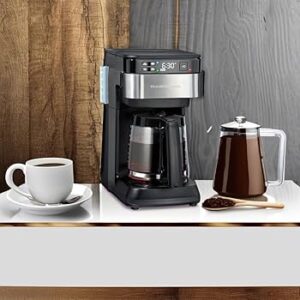
5. Experience-First Design & Human Connection
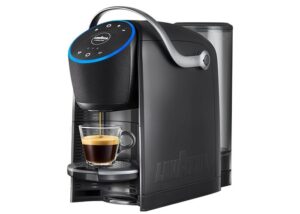
Even as machines get smarter, the coffee ritual remains human. Machines of 2026 will integrate better user interfaces (touchscreens, voice control), mood lighting, custom sounds, and perhaps even social features (brew my friend’s recipe remotely). Trend reports describe coffee as a “self-care” ritual and part of a lifestyle.
What this means for you: Your coffee machine becomes part of your daily mindset—not just convenience but ritual, calm and pleasure.
Action step: Don’t sacrifice aesthetics or user experience—select something with a tactile interface, intuitive controls and design you enjoy.
6. Regional & Emerging Market Growth
By 2026, the luxury coffee machine segment will have even greater growth in emerging markets—Asia-Pacific, Middle East, Africa—as disposable incomes rise and “coffee culture” expands. Market forecasts back this regional shift.
What this means for you: Broader availability of spare parts, accessories and better pricing due to global scale. Also, local support becomes stronger.
Action step: Ensure the model you choose has good supply chain, local service agents, and warranty support in your region (e.g., Nigeria, Africa).

Your 2026 Checklist: What to Look For
Here’s a quick checklist to future-proof your investment in a luxury coffee machine:
-
✅ App/mobile control + user profiles
-
✅ Multi-bean hoppers + multi-brew style support
-
✅ Smart maintenance + diagnostics + easy cleaning
-
✅ Energy-efficient and sustainable materials
-
✅ Aesthetic design + intuitive interface
-
✅ Warranty + local service support
-
✅ Flexibility to adapt as your taste evolves
If a machine ticks most or all of these boxes, you’re not just buying for today—you’re investing for the next few years of evolving coffee rituals.
The machines we have today are remarkable. But when you project into 2026, the luxury coffee machine landscape becomes even more exciting. We’re talking about machines that are smart, human-aware, adaptable and designed to integrate into your lifestyle—not just your kitchen.
The ten machines listed above already give you a strong foundation of luxury, but keeping an eye on the future trends means you’ll pick something that serves you well as your coffee tastes evolve and technology advances.
Invest in more than a machine—invest in your morning ritual, your moment of calm, your “coffee me-time.” Because by 2026, luxury coffee machines won’t just make coffee—they’ll enhance an experience you look forward to every day.
Here’s to your future perfect cup, the one you’ll still savour years from now.