Have you ever dreamed of having fresh, perfectly round rotis ready in just 90 seconds without the hassle of rolling and cooking? The Rotimatic Plus promises to transform your kitchen experience by automating one of the most time-consuming aspects of Indian cooking. But with a significant price tag and mixed user reviews, is this robotic roti maker truly worth the investment?
Let’s dive deep into what makes the Rotimatic Plus tick and whether it deserves a spot on your kitchen counter.
 What Makes the Rotimatic Plus Special?
The Rotimatic Plus isn’t just another kitchen gadget. It’s essentially a kitchen robot that combines artificial intelligence with precision engineering to recreate the traditional art of roti-making. The machine features 10 motors, 15 intelligent sensors, and a 32-bit processor that makes nearly 300 parts work seamlessly together, creating what the company calls an AI-powered appliance that mimics human roti-making techniques.
Think of it as having a dedicated roti chef who never gets tired, never takes breaks, and produces consistently shaped flatbreads every single time. The Plus model represents an evolution from the original Rotimatic, incorporating user feedback and technological improvements gathered over years of real-world usage.
Key Features That Set It Apart
Advanced Automation Technology
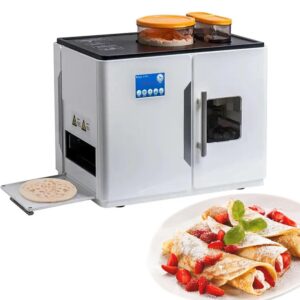
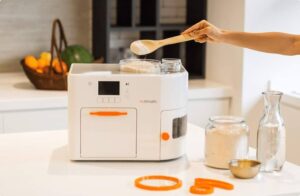
The Rotimatic Plus handles every step of the roti-making process automatically. You simply add flour, water, salt, and oil to their respective compartments, and the machine takes over. It measures ingredients precisely, kneads the dough to the perfect consistency, divides it into portions, rolls each piece into a perfect circle, and cooks it to your preferred level of doneness.
Improved Performance Over Original Model
The Rotimatic Plus offers additional features such as improved speed and efficiency with lower noise level while pressing, addressing some of the common complaints users had with the original model. The enhanced pressing mechanism works more quietly, making it suitable for open-plan kitchens where noise might be a concern.
Smart Connectivity
The device comes with WiFi connection capabilities, allowing you to control and monitor the machine remotely through a smartphone app. This feature lets you start the roti-making process before you even reach the kitchen, ensuring fresh rotis are ready when you need them.
Professional Build Quality
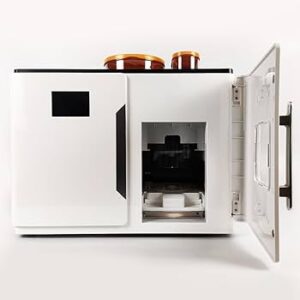
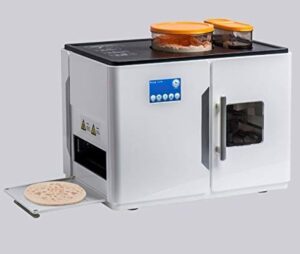
The build quality of this roti maker is outstanding, with a large, sleek appearance that suggests serious engineering behind the product. Unlike simple electric roti makers, the Rotimatic Plus feels more like a sophisticated appliance designed for long-term use.
The Reality Check: What Users Actually Experience
The Positives
Real users appreciate several aspects of the Rotimatic Plus. Many find the convenience factor transformative, especially busy families who struggle to find time for traditional roti-making. The consistency is another major advantage. Once you dial in your preferences, the machine produces uniform rotis every time, eliminating the variability that comes with hand-rolling.
Parents particularly value how the Rotimatic Plus frees up time for other cooking tasks or family activities. Instead of spending 30-45 minutes making rotis for dinner, you can focus on preparing curries or helping kids with homework while the machine handles the bread.
The Challenges
However, not everything is perfect. Some customers report issues with quality control, reliable logistics, and customer service, describing the entire process as exhausting for such an expensive purchase. These concerns highlight the importance of purchasing from authorized dealers and understanding the warranty terms.
The learning curve can be steep initially. Users often need several attempts to get the flour-to-water ratio just right for their preferred texture. Different flour types behave differently in the machine, and finding the sweet spot requires patience and experimentation.
Investment Considerations: Is It Worth the Price?
The Financial Reality
The machine costs around $999 USD, which is expensive but comparable to other smart kitchen innovations when they first entered the market. To put this in perspective, consider how much you currently spend on store-bought rotis or the value you place on the time saved.
If your family consumes rotis daily, the math can work in your favor over time. Calculate your current monthly spending on flatbreads, add the value of time saved (potentially 2-3 hours per week), and factor in the convenience of having fresh rotis available on demand.
Space and Practicality Factors
The Rotimatic Plus occupies quite a bit of counter space and is not easy to move, so ensure you have adequate kitchen real estate before purchasing. The machine measures approximately 16 inches wide, 16 inches deep, and 14 inches tall, making it similar in footprint to a large microwave.
Consider your kitchen workflow too. The machine works best when positioned near your cooking area, allowing you to time roti production with your curry preparation.
Who Should Consider the Rotimatic Plus?
Ideal Candidates
Busy Families: If you’re juggling work, kids, and household responsibilities while trying to maintain healthy eating habits, the Rotimatic Plus can be a game-changer. It’s particularly valuable for families who eat rotis regularly but struggle to find time for traditional preparation.
Health-Conscious Households: For those who prefer homemade bread over store-bought alternatives, the machine ensures you always have fresh, preservative-free rotis available. You control every ingredient that goes into your flatbreads.
Tech Enthusiasts: If you enjoy experimenting with smart kitchen appliances and appreciate the engineering behind automated cooking, the Rotimatic Plus offers a fascinating glimpse into the future of food preparation.
Think Twice If…
Limited Kitchen Space: The substantial footprint makes it impractical for small kitchens or those already cramped with appliances.
Occasional Roti Consumption: If your family only eats rotis occasionally, the investment might not justify the cost compared to buying ready-made options.
Budget Constraints: At nearly $1000, it’s a significant purchase that should fit comfortably within your kitchen appliance budget without creating financial strain.
Comparing Your Options in 2025
It’s worth noting that Rotimatic has released the NEXT model in 2025, representing years of innovation and customer feedback with the most refined and capable version. While the Plus model remains available, consider whether the newer technology in the NEXT might better serve your needs, even at a higher price point.
The Rotimatic Plus represents a bold step into automated cooking that can genuinely transform your kitchen routine. However, it’s not a casual purchase. Success with this machine requires commitment to learning its quirks, maintaining it properly, and integrating it into your cooking workflow.
Before buying, honestly assess your roti consumption patterns, kitchen space, and technical comfort level. Consider starting with a smaller, simpler roti maker to test your family’s usage patterns before investing in the full automation of the Rotimatic Plus.
The technology is impressive, the engineering is sophisticated, and for the right household, it can be genuinely transformative. Just make sure you’re that household before taking the plunge.
Ready to explore the world of automated roti-making? Research current pricing, read recent user reviews, and consider visiting a showroom if available in your area. Your perfect roti solution might be just one decision away.