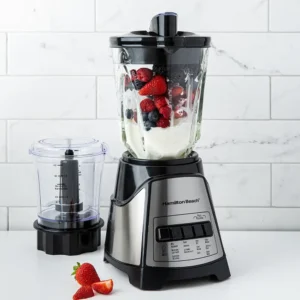
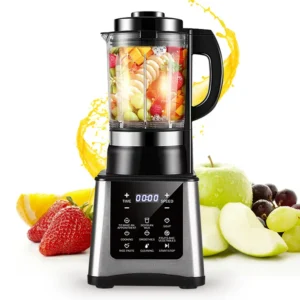
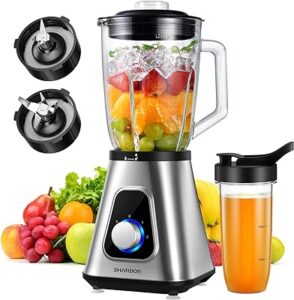
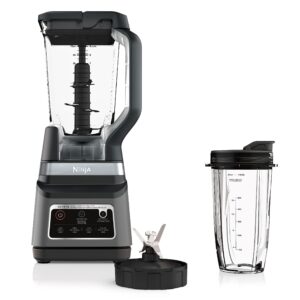
Cuisinart Elemental 13-Cup Food Processor

Cuisinart Elemental 13-Cup Food Processor: Master of Chopping, Dicing, and More! (with Spiralizer Bonus)
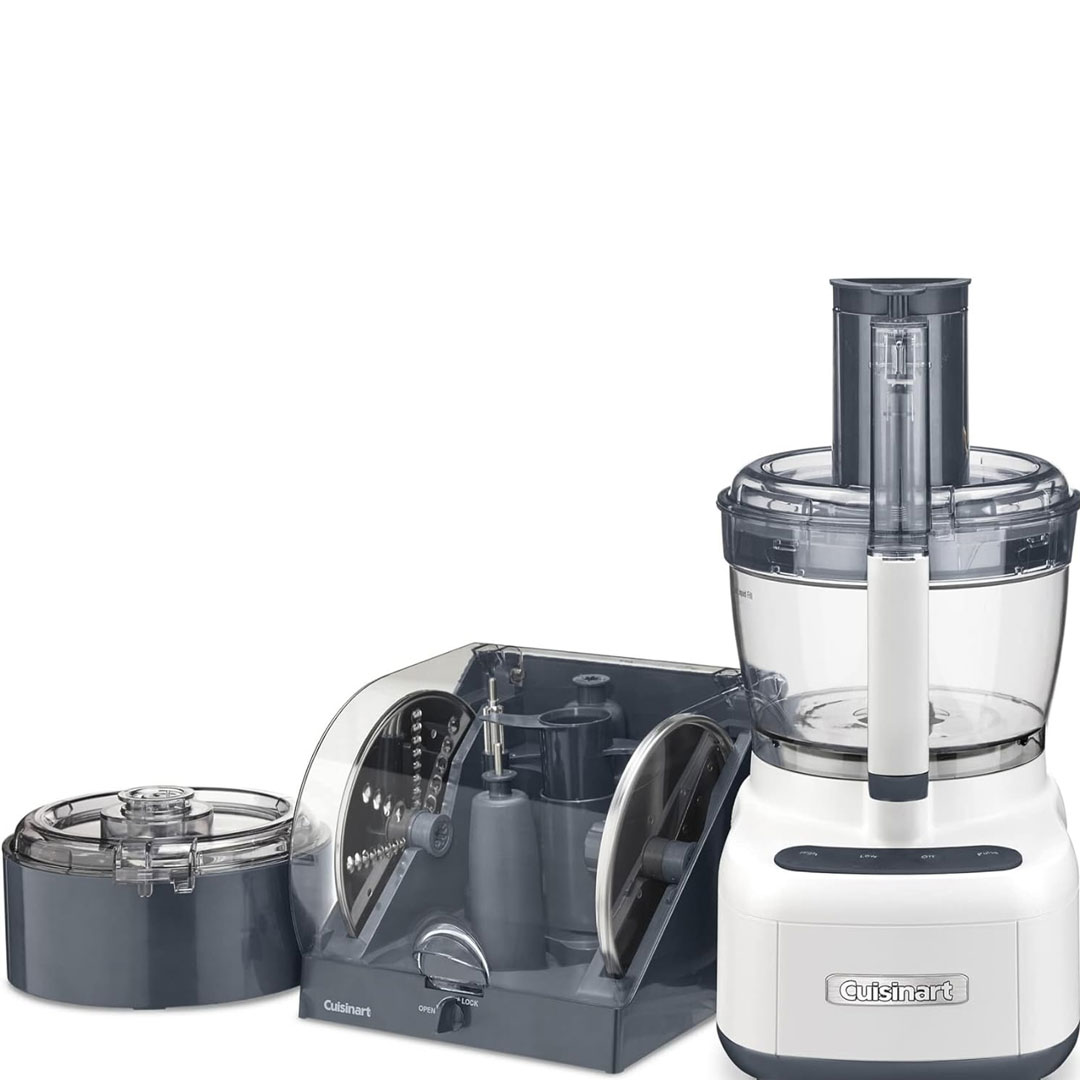
Looking to step up your food prep game? The Cuisinart Elemental 13-Cup Food Processor with Spiralizer and Dicer (White) might be your new kitchen hero. This multifunctional appliance boasts a powerful motor and a range of attachments that can handle almost any food prep task imaginable.
Big Bowl, Big Potential

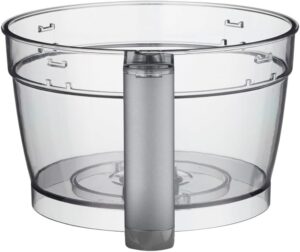
The first thing that stands out about this Cuisinart is the massive 13-cup work bowl. This means you can grate mountains of cheese, chop vegetables for a crowd, or blend enough soup for a whole party. Plus, there’s a handy 4-cup inner bowl for smaller jobs.

Beyond Chopping: Dicing, Spiralizing, and More!

This food processor goes way beyond just chopping. It comes with a dicing disc that creates even cubes perfect for salads, stews, or stir-fries. The real star of the show might be the spiralizer attachment, which lets you transform vegetables into nutritious, veggie noodles.

Power and Control

The 550-watt peak power motor ensures that Cuisinart can handle tedious tasks without breaking a sweat. The wide-mouth feed tube makes adding ingredients easy, and the included pushers keep your fingers safe. Plus, variable speeds and a pulse setting give you complete control over the food processing process.

Easy Cleaning

Cleanup is a breeze with the dishwasher-safe parts (blades excluded, of course). The SealTight Advantage System helps prevent leaks during processing, keeping your kitchen clean.

Is it Right for You?

This Cuisinart is a great choice for anyone who loves to cook and wants to save time and effort in the kitchen. The large capacity and several attachments make it perfect for families or those who entertain frequently. However, if you have limited counter space or only do light food pre-cook, a smaller food processor might be a better fit.

Final Verdict

The Cuisinart Elemental 13-Cup Food Processor with Spiralizer and Dicer is a powerful and multifunctional appliance that can handle different kinds of food prep tasks. With its large capacity, multiple attachments, and easy cleaning, it’s a great choice for busy home cooks.
 

Key Features

Here are the features of the Cuisinart Elemental 13-Cup Food Processor with Spiralizer and Dicer (White):

Large Capacity: 13-cup work bowl with a 4-cup inner bowl for both large and small jobs.

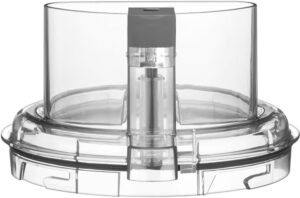
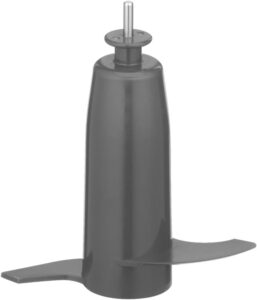
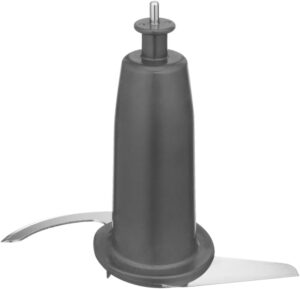
Multiple Attachments: Comes with stainless steel chopping/mixing blade, dough blade, small and large S-blades, dicing disc, reversible shredding disc (fine/medium), adjustable slicing disc (0-7mm), and a spiralizer attachment.

Powerful Motor: 550-watt peak power motor for handling tedious ingredients.

Easy Control: Electronic touchpad with High/Low/Off/Pulse settings and revealing blue LED lights.

Safe to Use: Supreme wide-mouth feed tube with small, medium, and large pushers.

Easy Cleaning: Dishwasher-safe parts and SealTight Advantage System to prevent leaks.
How to Use your Cuisinart Elemental 13-Cup Food Processor

While I can’t give you the full instruction manual here, I can walk you through the general steps of using the Cuisinart Elemental 13-Cup Food Processor with Spiralizer and Dicer. It’s always advised to check the full manual that comes with the appliance for detailed instructions and safety information.

General Steps:

  1. Wash and Prep: Wash and dry all ingredients before processing. Cut large items into bits small enough to fit the feed tube.
  2. Choose Your Attachment: Depending on your task (chopping, dicing, shredding, etc.), choose the appropriate blade or disc attachment. Check the manual for instructions on how to set up each attachment.
  3. Assemble the Processor: Place the work bowl on the motor base and lock it into place. Add the chosen attachment and secure it with the lid.
  4. Add Ingredients: Place your chopped ingredients into the feed tube. You can use the different sized pushers depending on the ingredient size.
  5. Start Processing: Select your desired speed setting (High, Low, or Pulse) using the control panel.
  • Pulse: Use the pulse function for short bursts of processing for tasks like chopping nuts or getting a coarse chop on vegetables.
  • High/Low: Use the High setting for tasks like mincing cheese or blending soups. Use Low for softer ingredients or tasks requiring more control.

6. Process Until Desired Consistency: Use the pulse function or hold down the High/Low button depending on your chosen setting, until your ingredients reach the desired consistency.

7. Stop and Empty: Turn off the processor and unplug it before unlocking the lid and removing the work bowl.

For Spiralizing:

  1. Follow steps 1-3 above.
  2. Attach the spiralizer attachment with your chosen disc (ribbon or spaghetti) as stated by the manual’s instructions.
  3. Prepare your vegetables according to the manual’s recommendations (firm vegetables like zucchini or sweet potatoes work best).
  4. With the processor on, feed the prepared vegetable through the feed tube using the pusher. The vegetable will be spiralized as it comes out of the smaller opening.

Cleaning:

  1. Unplug the processor before detaching.
  2. Check the manual for instructions on detaching the blades and discs.
  3. Wash the work bowl, lid, pusher, and most attachments in the dishwasher.
  4. Wipe down the motor base with a damp cloth. Never submerge the motor base in water.
  5. Hand wash the blades and discs with soapy water. Be very careful when handling sharp blades!

Safety Tips:

  • Always unplug the processor before attaching or detaching attachments, cleaning, or after use.
  • Never put your fingers near the blades while the processor is running. Use the pushers to feed ingredients.
  • Don’t overload the processor bowl. Process food in groups if necessary.
  • Don’t process hot liquids.

For detailed instructions and safety information, consult the manual that comes with your Cuisinart Elemental 13-Cup Food Processor.


Tips and Recipes Suitable for the Cuisinart Elemental 13-Cup Food Processor

Tips and Tricks for Your Cuisinart Elemental 13-Cup Food Processor:

  1. Pulse for Perfection: Don’t just hold down the button! Use the pulse function for tasks like chopping vegetables or nuts. This gives you more control over the final consistency and prevents over-processing.
  2. Prep is Key: Dicing your ingredients before using the food processor saves time and ensures even processing. Cut large vegetables or fruits into similar-sized bits before feeding them through the chute.
  3. Freeze for Easier Grating: Try freezing hard cheeses like parmesan for 30 minutes before mincing. This will make them easier to grate and prevent them from clustering together.
  4. Make Perfect Pie Dough: Use the pulse function to mix the dry ingredients for pie dough. Then, with the motor running on low, slowly add wet ingredients until the dough just comes together. Avoid over-processing for a crispy topping.
  5. Leftover Makeover: Renew leftover cooked vegetables or roasts by pulsing them in the food processor for use in soups, stews, or fillings.
  6. Homemade Hummus in Minutes: The dicing attachment makes quick work of preparing chickpeas for hummus. You can also use the processor to whip up other dips and spreads.
  7. Quick and Easy Salads: Skip the chopping! Use the shredding disc to dice cabbage for coleslaw or carrots for a salad in seconds. The dicing kit is ideal for creating uniform cubes for different kinds of salad ingredients.
  8. Healthy Veggie Noodles: The spiralizer attachment turns vegetables into fun and healthy noodle alternatives. Perfect for zucchini noodles (zoodles!), sweet potato noodles, or even beet noodles!

Recipes Perfect for Your Cuisinart Elemental
Main Courses:

  • Homemade Veggie Burgers: Pulse vegetables like mushrooms, onions, and lentils in the food processor to create the base for delicious veggie burgers.
  • Quick and Easy Salmon Salad: Poach or bake salmon, then use the food processor to mince it for a tasteful salad.
  • Creamy Tomato Bisque: Blend cooked tomatoes and vegetables in the food processor for a smooth and creamy bisque.

Sides:

  • Coleslaw: Use the shredding disc to dice cabbage and carrots for a classic coleslaw.
  • Homemade Guacamole: The food processor makes quick work of whipping up fresh guacamole.
  • Restaurant-Style Pico de Gallo: Pulse together chopped tomatoes, onions, cilantro, and jalapenos for a refreshing salsa.

Desserts and Snacks:

  • Homemade Pizza Dough: Use the dough blade to quickly mix ingredients for a delicious homemade pizza dough.
  • Healthy Fruit Sorbet: Freeze your favorite fruits, then throb them in the food processor for a refreshing and healthy sorbet.
  • Nut Butters from Scratch: The food processor is perfect for creating your own nut butters from scratch. Try out with different nuts and flavors for a customized treat.

These are just a few ideas to get you started. With its versatility, the Cuisinart Elemental 13-Cup Food Processor can be a lifesaver in the kitchen, helping you create delicious and nutritious meals quickly and easily. Be sure to check the cookbooks and online resources for even more recipe inspiration!


A Cleaning Guide

Following the instructions in the manual is the safest way to clean your Cuisinart Elemental 13-Cup Food Processor, but here’s an overall breakdown:

Safety First!

  • Unplug the processor before detaching any parts.

Disassemble:

  • Check the manual for specific instructions on detaching the blades and discs. Some attachments may lock in place and require a specific release mechanism.

Cleaning the Parts:

  • Dishwasher Safe: The work bowl, lid, pusher, and most attachments are dishwasher safe (top rack recommended).
  • Motor Base: Wipe down the motor base with a damp cloth. Never submerge the motor base in water or any other liquids.
  • Blades and Discs: Hand wash the blades and discs with soapy water. Be very careful when handling sharp blades!

Drying:

  • After washing, thoroughly dry all parts before reconstructing the processor.

Additional Tips:

  • For stubborn food remnants, you can drench the blades and discs in soapy water before washing.
  • The SealTight Advantage System should help prevent leaks during processing, reducing the cleaning required on the motor base.

Refer to the Manual:

Remember, this is an overall guide, and it’s always best to check the manual that comes with your specific Cuisinart model for detailed cleaning instructions. The manual will have specific information on which parts are dishwasher safe and any special cleaning recommendations for certain attachments.


What to Avoid when Using the Cuisinart Elemental 13-Cup Food Processor

Here are some things to avoid when using your Cuisinart Elemental 13-Cup Food Processor:

Safety Precautions:

  • Never put your fingers near the blades: Always use the pushers provided to feed ingredients into the machine. The blades are very sharp and can cause serious injury.
  • Don’t overload the bowl: Process food in groups if necessary. Flooding the bowl can strain the motor and make it difficult to achieve even processing.
  • Don’t process hot liquids: The processor is not designed to handle hot liquids and could crack or become damaged.
  • Unplug before cleaning or disassembling: This is essential to prevent accidental startup and injury.
Preventing Damage to the Food Processor:

  • Don’t process very hard ingredients: This appliance isn’t meant for super hard ingredients like ice cubes or whole nuts. These can damage the blades and motor.
  • Don’t chop or grind very dry ingredients: Very dry ingredients like flour or spices can put a strain on the motor and may not process well.
  • Avoid using the dicing attachment for soft ingredients: Soft ingredients like cooked vegetables or fruits may turn floppy in the dicing attachment.
  • Don’t force the lid: Make sure the bowl is properly locked in place and all attachments are securely fastened before starting the processor.

Additional Tips:

  • Pulse for better control: Especially for tasks like chopping vegetables or nuts, use the pulse function to avoid over-processing.
  • Prep your ingredients: Cut large vegetables or fruits into similar-sized bits before feeding them through the chute. This ensures balanced processing and reduces stress on the motor.
  • Read the manual: The manual will have specific instructions and limitations for your particular Cuisinart model. Following these will help you get the most out of your food processor and avoid spoiling it.

In conclusion, the Cuisinart Elemental 13-Cup Food Processor is a powerful and feature-packed machine that can handle different kinds of food prep tasks. It’s perfect for those who cook frequently or in large groups thanks to its big capacity and multiple attachments. Remember to follow the manual’s cleaning instructions and avoid overloading the motor to keep this appliance running smoothly for years to come.

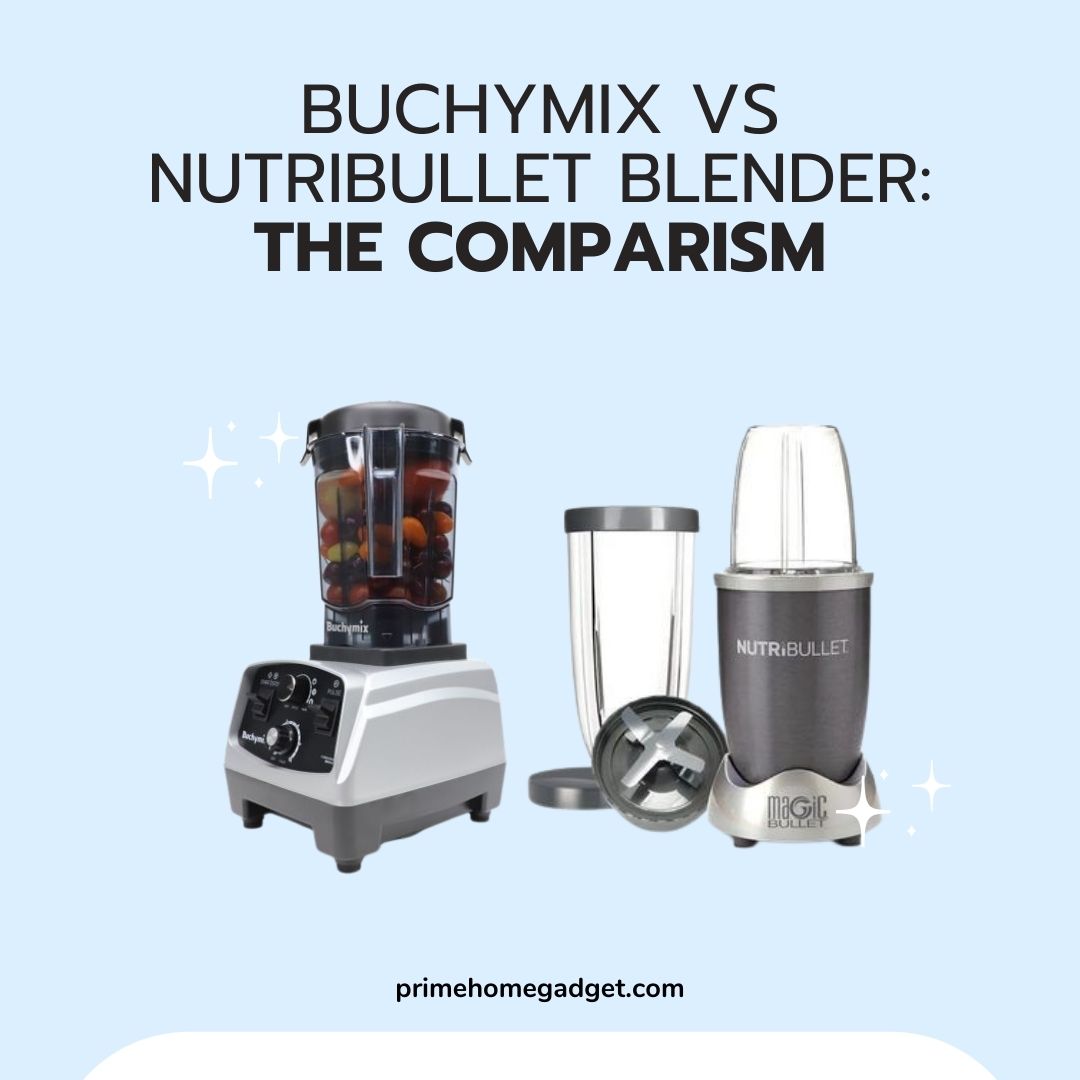
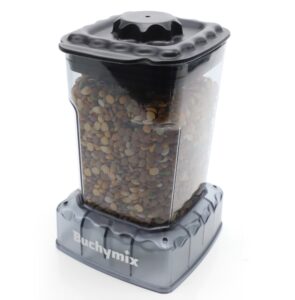
Buchymix vs nutribullet blender: The comparism

Battle of Blenders: Buchymix vs Nutribullet: A Comprehensive Comparison

Blenders have become an indispensable tool in modern kitchens, simplifying food preparation and opening doors to a variety of culinary creations. Among the top contenders in the blender market are Buchymix and Nutribullet. In this in-depth comparison, we’ll dissect and analyze the features, performance, and overall value of Buchymix and Nutribullet blenders, helping you make an informed decision based on your blending needs and preferences.

Introduction to Buchymix and Nutribullet Blenders

Before diving into the comparison, let’s familiarize ourselves with Buchymix and Nutribullet blenders:

Blender Model Features
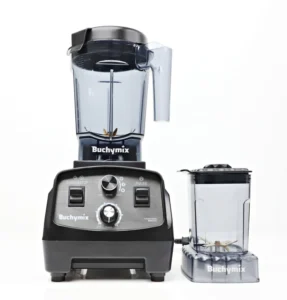
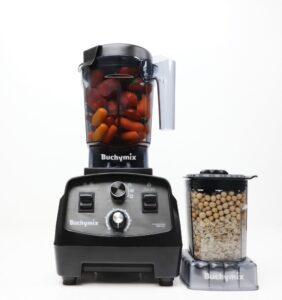
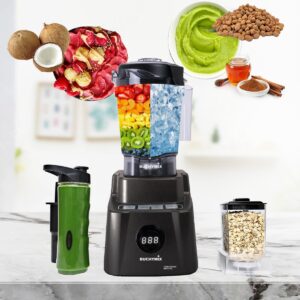
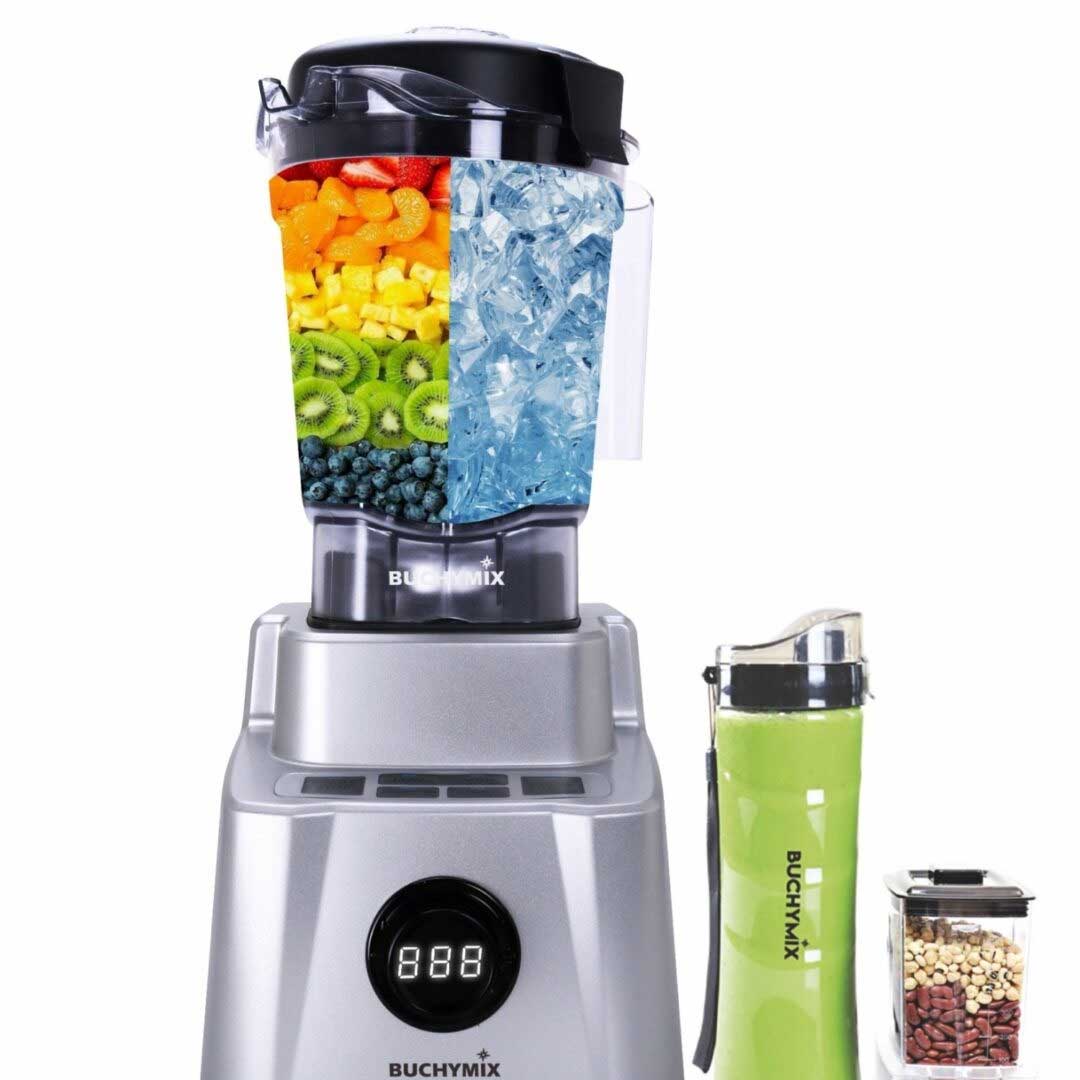
Buchymix Blender Buchymix blenders are renowned for their powerful motors, innovative blade designs, and versatile jar options. They are designed to handle a wide range of ingredients, from soft fruits to hard nuts and ice, making them a favourite among home cooks and health enthusiasts.
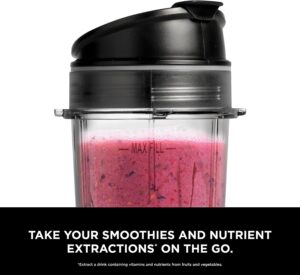
Nutribullet Blender Nutribullet blenders have gained popularity for their compact size, convenient design, and focus on extracting nutrients from fruits and vegetables. They are often marketed as personal blenders, ideal for creating smoothies, shakes, and nutrient-rich drinks on the go. put it in a table

Comparison Between Buchymix and Nutribullet Blenders

blenders blender

1. Motor Power and Performance

One of the primary considerations when choosing a blender is its motor power and performance. Buchymix blenders are equipped with robust motors ranging from 1000 to 1500 watts, delivering high-speed blending and ensuring smooth consistency even with tough ingredients. Nutribullet blenders, on the other hand, typically feature motors ranging from 600 to 1000 watts, which are suitable for everyday blending tasks but may struggle with heavier loads. This stark difference in power can significantly impact the blending capabilities of each blender, especially when handling challenging ingredients like ice, frozen fruits, or dense vegetables.

2. Blade Design and Efficiency

Blade design plays a crucial role in blending efficiency. Buchymix blenders boast innovative blade designs optimized for thorough blending and smooth results. The arrangement and sharpness of the blades ensure ingredients are pulverized evenly, resulting in consistent textures. Nutribullet blenders also feature sharp blades designed for efficient nutrient extraction. However, some users may find occasional pulsing or shaking necessary for consistent blending, particularly when dealing with larger or denser ingredients. The blade design can influence not only blending performance but also the ease of achieving desired textures, whether it’s a silky smooth smoothie or a chunkier salsa.

3. Jar Capacity and Options

The jar capacity and options offered by each brand can significantly impact blending versatility. Buchymix blenders come with multiple jar sizes, including personal-sized cups and larger pitchers, catering to individual servings as well as batch blending. This flexibility allows users to customize their blending experience based on the quantity of ingredients they need to process, whether it’s a single smoothie or a family-sized batch of soup. Nutribullet blenders, on the other hand, typically come with compact blending cups designed for single servings, ideal for those seeking portability and convenience. While this is advantageous for on-the-go blending, it may be limiting for users who often prepare larger quantities or multiple servings at once.

4. Speed Settings and Control

Both Buchymix and Nutribullet blenders offer variable speed settings and control, allowing users to customize blending speeds according to their preferences. Buchymix blenders often include pre-programmed settings for tasks like smoothies, soups, and ice crushing, providing added convenience and ease of use. These pre-set programs take the guesswork out of blending, ensuring optimal results with just the touch of a button. Nutribullet blenders also feature variable speed settings, allowing users to adjust the blending intensity as needed. However, the absence of pre-programmed settings may require users to manually control blending times and speeds for different recipes, which can be a learning curve for those new to blending or seeking a more streamlined experience.

5. Additional Features and Accessories

Buchymix blenders may come with additional features, such as a tamper tool for thick blends, safety features like overload protection, and dishwasher-safe components for easy cleaning. These additional features enhance user convenience and safety during blending operations, ensuring a hassle-free experience and prolonging the lifespan of the blender. Nutribullet blenders often include accessories like travel lids, recipe books, and blending guides, enhancing the overall blending experience. These accessories cater to users looking for a comprehensive blending system, providing inspiration and guidance for creating a variety of recipes.

6. Design and Build Quality

Design and build quality are essential factors to consider for durability and aesthetics. Buchymix blenders feature sleek designs, sturdy construction, and high-quality materials that withstand regular use. The robust build ensures stability during blending, minimizing vibrations and noise. Nutribullet blenders are compact, lightweight, and designed for portability, making them ideal for small kitchens or blending on the go. However, some users have noted durability concerns with certain plastic components, particularly with frequent use or heavy blending tasks. The design and build quality can influence not only the blender’s longevity but also its performance and user experience, making it crucial to choose a blender with durable materials and thoughtful design elements.

7. Price and Value for Money

When comparing Buchymix and Nutribullet blenders, pricing and overall value are significant considerations. Buchymix blenders are competitively priced, offering excellent value for their performance, versatility, and additional features. The investment in a Buchymix blender is often justified by its durable construction, powerful motor, and range of functionalities, making it a worthwhile addition to any kitchen. Nutribullet blenders cater to various budgets, with entry-level models providing basic blending capabilities and higher-end models offering advanced features at a premium. While Nutribullet blenders may be more budget-friendly initially, users should weigh the long-term value and performance against the upfront cost to ensure they choose a blender that meets their blending needs and expectations.

Conclusion: Choosing the Right Blender

In conclusion, both Buchymix and Nutribullet blenders have their strengths and weaknesses, catering to different blending needs, lifestyles, and budgets. When making your decision, consider factors such as motor power, blade efficiency, jar capacity, speed settings, additional features, design, build quality, and overall value for money. By evaluating these aspects and understanding your specific blending requirements, you can select the blender that best suits your culinary adventures and enhances your blending experience. Whether you prioritize power, versatility, portability, or nutrient extraction, both Buchymix and Nutribullet blenders offer quality options to elevate your blending game.

SHOP: http://primehomegadget.com

FOLLOW: https://www.instagram.com/primevendors/

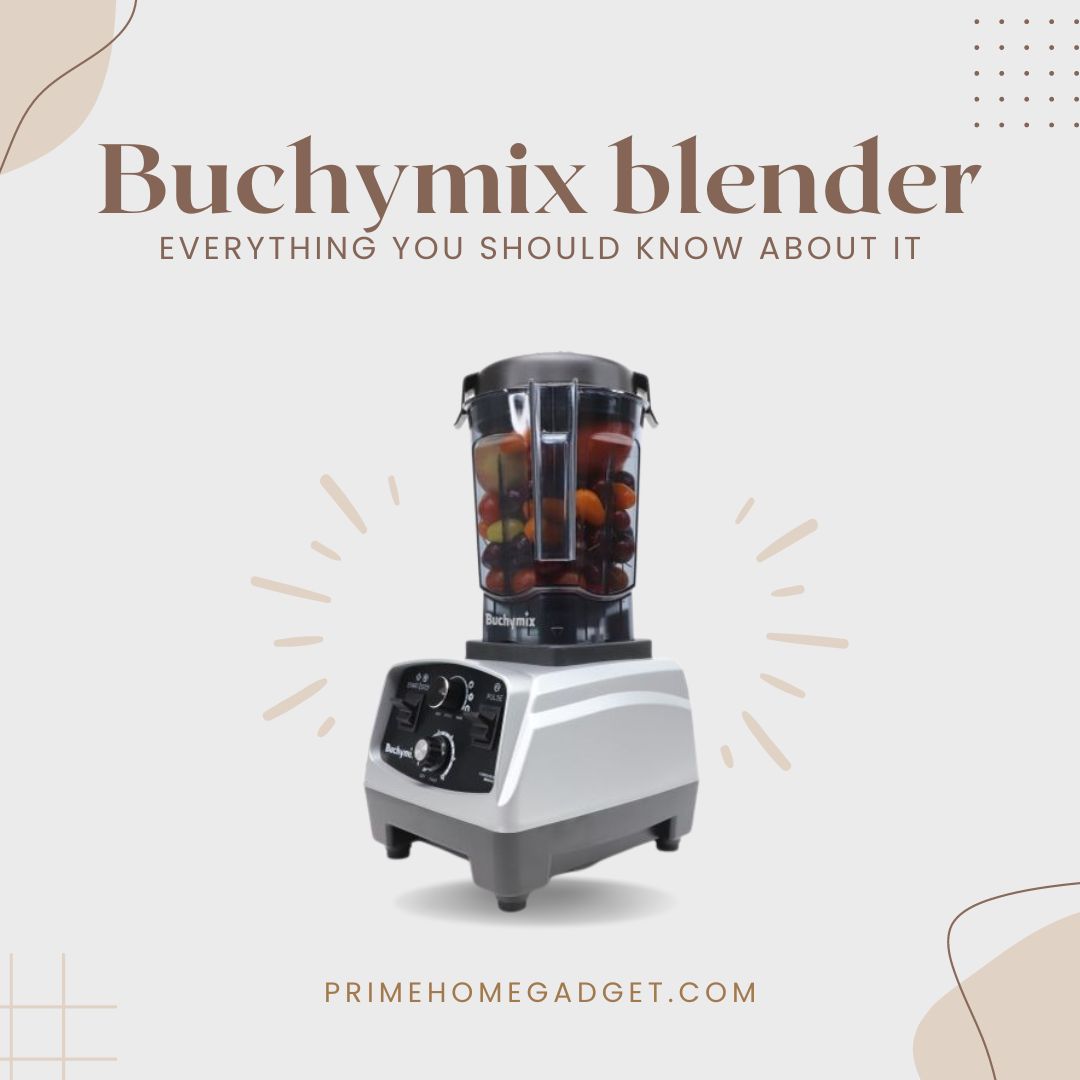
Buchymix blender

Buchymix blender: Everything you should know about it

Blenders have become an indispensable tool in modern kitchens, revolutionizing the way we prepare food and drinks. Among the myriad of blenders available in the market, one that has been gaining significant attention is the Buchymix blender. In this comprehensive guide, we’ll delve deep into the features and functions of the Buchymix blender, exploring why it has become a favourite among home cooks and culinary enthusiasts alike.

Introduction to the Buchymix Blender

The Buchymix blender is a powerhouse kitchen appliance designed to simplify blending, chopping, pureeing, and mixing tasks. It comes equipped with a range of features that make it versatile, efficient, and user-friendly.

Let’s explore these features in detail:

1. Motor Power and Blade Design

One of the standout features of the Buchymix blender is its robust motor power combined with innovative blade design. With a high-wattage motor, typically ranging from 1000 to 1500 watts, the Buchymix blender can effortlessly blend even the toughest ingredients, including frozen fruits, nuts, and ice cubes. The blade design is optimized for efficient blending, ensuring smooth and consistent results every time.

2. Variable Speed Control

The Buchymix blender offers variable speed control, allowing users to adjust the blending speed according to their specific requirements. Whether you’re making a smoothie, sauce, soup, or salsa, you can easily customize the blending speed to achieve the desired texture and consistency.

3. Pre-programmed Settings

In addition to variable speed control, the Buchymix blender also features pre-programmed settings for common tasks such as smoothies, soups, ice crushing, and more. These pre-set programs take the guesswork out of blending, ensuring optimal results with just the touch of a button. This feature is especially convenient for users who are new to blending or prefer a hassle-free experience.

4. Multiple Jar Options

The Buchymix blender comes with multiple jar options, including a standard blending jar, a smaller personal-sized jar, and a larger capacity jar for batch blending. This versatility allows users to choose the jar size that best suits their needs, whether they’re preparing a single serving or a larger quantity of food or beverages.

5. Pulse Function

For precise control over blending tasks, the Buchymix blender is equipped with a pulse function. This feature allows users to manually pulse the blender for short bursts, perfect for achieving a coarse texture, mixing ingredients lightly, or incorporating delicate components into the blend without over-processing.

6. Tamper Tool

To aid in blending thick or stubborn ingredients, the Buchymix blender includes a tamper tool. The tamper fits securely into the blending jar and can be used to push ingredients towards the blades, ensuring thorough blending without air pockets or unprocessed chunks.

7. Safety Features

Safety is paramount in kitchen appliances, and the Buchymix blender prioritizes user safety with features such as overload protection, which automatically shuts off the motor in case of overheating or excessive load. This not only protects the blender from damage but also ensures user safety during operation.

8. Easy Cleaning and Maintenance

Keeping the Buchymix blender clean is a breeze, thanks to its removable blade assembly and dishwasher-safe parts. The jar, lid, and tamper can be easily disassembled and cleaned either by hand or in the dishwasher, saving time and effort after each use.

9. Sleek Design and Durability

Beyond its functional features, the Buchymix blender boasts a sleek and modern design that complements any kitchen decor. Its durable construction and high-quality materials ensure longevity and reliability, making it a worthwhile investment for years to come.

Buchymix blender


Key advantages of Buchymix blenders over other blenders include

1. Powerful Motor: Buchymix blenders are equipped with powerful motors, typically ranging from 1,000 to 1,800 watts, which allows them to handle even the toughest blending tasks with ease. This high wattage ensures efficient blending and crushing of ingredients, resulting in smoother and more consistent textures.

2. Durable Construction: These blenders are built with high-quality materials, such as stainless steel blades and sturdy plastic or metal pitchers. This durable construction ensures that the blender can withstand heavy use and last for many years.

3. Versatility: Buchymix blenders often come with a variety of pre-programmed settings and variable speed controls, allowing you to blend, puree, crush ice, and even knead dough with ease. This versatility makes them suitable for a wide range of culinary tasks.

4. Large Capacity: Many Buchymix blenders feature large pitchers, ranging from 64 to 90 ounces, which is ideal for making larger batches of smoothies, soups, or sauces, making them suitable for larger households or for entertaining.

5. Tamper or Plunger: Some Buchymix models come with a tamper or plunger accessory, which allows you to safely push ingredients down toward the blades while the blender is running, ensuring a more consistent blend.

6. Warranty: Buchymix blenders often come with extended warranties, providing users with peace of mind and protection against potential defects or manufacturing issues.


Buchymix blender

In conclusion, the Buchymix blender stands out as a versatile and efficient kitchen appliance, offering a range of features that cater to the diverse blending needs of users. From its powerful motor and blade design to its variable speed control, pre-programmed settings, and safety features, the Buchymix blender combines functionality with convenience. Whether you’re whipping up smoothies, sauces, soups, or desserts, this blender is designed to deliver exceptional results with ease. With its easy cleaning and maintenance, durable construction, and sleek design, the Buchymix blender earns its place as a must-have tool for any kitchen enthusiast.

Check out our Products
FOLLOW US ON INSTAGRAM

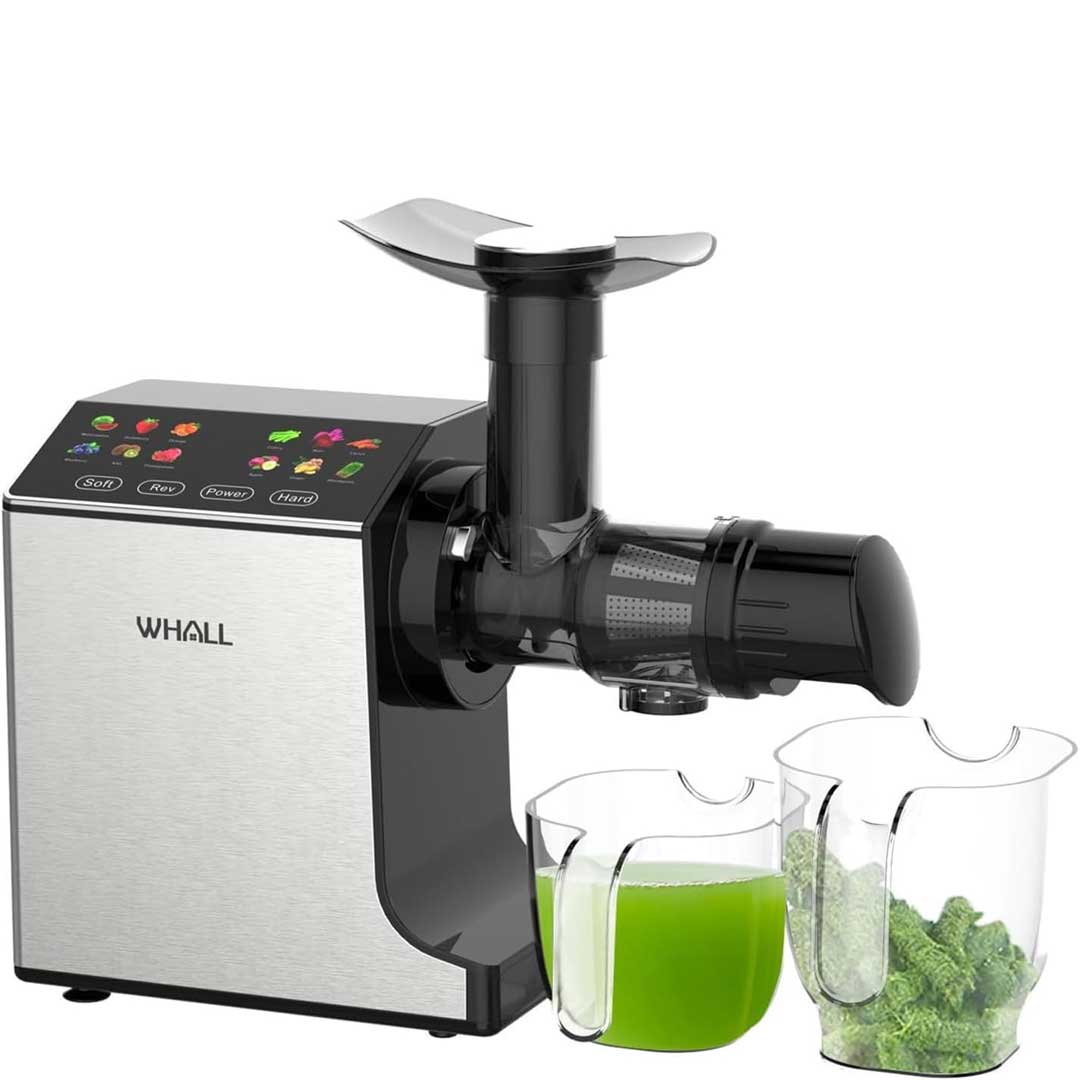
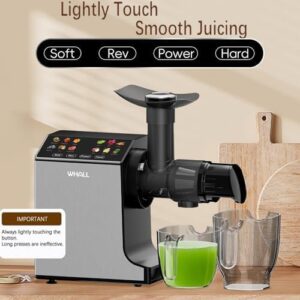
Whall Masticating Slow Juicer

Unleash the Full Potential of Your Produce: Explore the Masticating Slow Juicer

Are you ready to enhance your health routine and unlock a world of delicious, nutritious juices? Look no further than the Masticating Slow Juicer, a professional-grade appliance designed to extract the maximum health benefits from your favorite fruits and vegetables.
This creative juicer uses cutting-edge masticating technology, a method that gently crushes and presses ingredients instead of using high-speed blades. This preserves precious enzymes, vitamins, and minerals that can be destroyed by traditional juicing methods.

Why Choose the Masticating Slow Juicer?

  • Superior Nutrition: Cold press technology reduces oxidation, resulting in juices that are richer in nutrients and stay fresh for longer.
  • Versatility: Derive juice from a wide range of fruits, vegetables, leafy greens, and even some nuts and herbs, all with outstanding results.
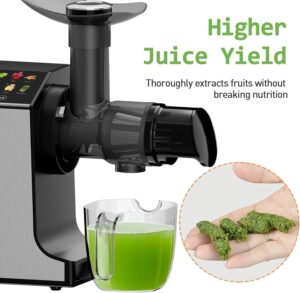
  • High Juice Yield: The slow juicing process increases juice extraction, ensuring you get the most out of your produce.
  • Quiet Operation: Unlike traditional juicers, the masticating technology works at a much lower noise level, making it a welcome addition to any kitchen.
  • Easy to Clean: The dishwasher-safe parts and user-friendly design make cleanup a breeze.

Professional Features for the Home Chef

  • Sleek Stainless Steel Design: This juicer brags a modern and stylish aesthetic that extols any kitchen décor.
  • Intuitive Touchscreen Control: Easily select your desired speed and navigate functions with the touch of a finger.
  • Two Speed Modes: Choose the ideal speed for softer or harder ingredients to ensure maximum juice extraction.
  • Reverse Function: Easily clear any jams or clogs for a flawless juicing experience.

Investing in Your Health:
The Masticating Slow Juicer is more than just an appliance; it’s an investment in your well-being. By integrating fresh, nutrient-rich juices into your diet, you can:

  • Boost your immune system
  • Increase your energy levels
  • Improve your skin health
  • Aid in weight management
  • Support in general detoxification

Key Components

Components of a Professional Stainless Steel Masticating Slow Juicer

A professional stainless steel masticating slow juicer usually consists of the following parts:

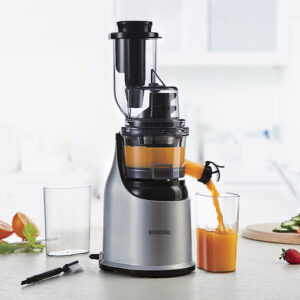
Feed Chute: This is the opening where you put your fruits and vegetables. Masticating juicers are likely to have smaller feed chutes compared to centrifugal juicers, requiring you to pre-cut your produce into smaller bits.
Pusher: A pusher helps you gently guide ingredients down the feed chute and towards the drill.
Auger: The auger, also known as the screw, is the heart of the masticating juicer. It’s a single, spiral-shaped component that rotates at a slow speed, crushing and pressing the product against a net screen.
Mesh Screen: The mesh screen separates the extracted juice from the pulp. The pulp exits through a separate chute, while the juice flows through the screen and into the accumulation container.
Collection Container: This BPA-free container catches the freshly squeezed juice.
Motor Base: The motor base houses the motor that powers the drill and facilitates the juicing process.
Touchscreen Control Panel (optional): A user-friendly touchscreen dashboard provides intuitive control over your juicer’s settings, such as speed selection and on/off functions.

Investing in Your Health: The Masticating Juicer Advantage
While the original cost of a masticating juicer might be higher compared to centrifugal models, the long-term benefits are absolute. You’ll get more juice with a higher concentration of nutrients, eventually getting the most out of your investment in fresh yield.


Step-by-step guide to Using your Whall Masticaticating Slow Juicer

Now that you’re familiar with the components of a masticating slow juicer, let’s explore how to use this powerful kitchen appliance to create delicious and healthy juices!

Preparation is Key: Wash and thoroughly dry your fruits and vegetables. Masticating juicers work best with chopped ingredients. Cut your produce into bits small enough to comfortably fit down the feed chute.
Assemble Your Juicer: Follow the manufacturer’s instructions to properly construct your juicer. This usually involves placing the feed chute, auger, mesh screen, and collection container in their specific positions. Secure the lid and ensure all components are locked in place.
Power Up: Plug in your juicer and turn it on. Some models might have a touchscreen interface where you can select the preferred speed mode.
Juicing Time: Begin feeding your prepared fruits and vegetables into the feed chute one piece at a time. Use the pusher to gently guide the ingredients down towards the drill. Avoid overloading the chute, and allow the juicer to process the ingredients at its own rate.
Pulp Power: The pulp will be removed through a separate chute. You can compost the pulp or use it in recipes like muffins, breads, or veggie burgers.
Savor the Freshness: Once you’ve finished juicing, turn off the juicer and unplug it. Enjoy your freshly squeezed, nutrient-rich juice.

Tips for Optimal Juicing:
Alternate Hard and Soft Ingredients: Process harder fruits and vegetables like carrots and apples first, followed by softer ones like berries or leafy greens. This helps preserve a smooth juicing flow.
Leafy Greens are Welcome: While some juicers might struggle with huge quantities of leafy greens, masticating juicers are generally better equipped to handle them. You can even add a small amount of water to leafy greens to assist extraction.
Cleaning Up: Dismantle your juicer according to the manufacturer’s instructions. Most components are dishwasher-safe, but it’s always a good practice to rinse them with warm water immediately after use to prevent pulp build-up.
By following these steps and tips, you’ll be well on your way to juicing success with your masticating slow juicer.


How to Clean the Whall Masticating Slow Juicer

Keeping your masticating slow juicer clean is vital for maintaining ideal performance and hygiene. Here’s how to ensure your juicer stays sparkling clean:
Quick Rinse After Use:

  • This is the golden rule! Immediately after juicing, dismantle your juicer as much as possible (check the manual for specific instructions).
  • Rinse all the detachable parts, including the feed chute, auger, mesh screen, collection container, and pusher, under warm running water. This removes any leftover juice and pulp remnants, making the thorough cleaning process much easier.                                                                                                                                                                    Thorough Cleaning:

Depending on how often you use your juicer, a deeper clean is advised at least once a week. Here’s what you’ll need:

  • Warm, soapy water
  • Dish soap
  • Soft sponge or dishcloth
  • Cleaning brush (often included with the juicer)
  • Baking soda (if required)
  • Fill your sink with warm, soapy water. Add a few drops of dish soap.
  1. Deep the detachable parts (excluding the motor base) into the soapy water and let them soak for 15-20 minutes. This loosens any dried-on pulp or debris.
  2. Use the soft sponge or dishcloth to gently clean all the parts, paying particular attention to the nooks and crannies of the mesh screen and drill. The cleaning brush that often comes with the juicer is helpful for scrubbing these areas.
  3. For stubborn pulp remnants, you can make a paste with baking soda and a little water. Apply the paste to the affected areas and scrub gently with the brush. Baking soda acts as a gentle abrasive that helps remove tough stains without damaging the components.
  4. Rinse all the parts thoroughly with clean water to remove any soap residue.

Drying:

  • It’s important to dry all the components completely before reconstructing the juicer.
  • Moisture left behind can promote mold growth.
  • Use a clean dish towel or paper towels to dry the parts. You can also let them air-dry on a clean dish rack.

Motor Base Care:

  • Wipe down the motor base with a damp cloth to remove any splashes or juice residue. Never deep the motor base in water or dishwasher.

Bonus Tip: If you’re planning to store your juicer for a longer period, ensure all the components are completely dry before storing it in a cool, dry place.

By following these simple cleaning steps, you can keep your masticating slow juicer functioning flawlessly and hygienically for years to come, allowing you to continue creating healthy and delicious juices.


Tips & Recipes

Masticating slow juicers exceeds at extracting juice from a wide variety of fruits and vegetables, unlocking their concentrated flavors and nutrients. Here are some recipe ideas to get you started on your juicing journey:

Classic Green Juice:

This refreshing and nutrient-packed juice is a great way to start your day.
Ingredients:

  • 2 handfuls spinach
  • 1 cucumber
  • 1 celery stalk
  • 1 apple (cored)
  • 1/2 lemon (peeled)

Sweet and Tangy Citrus Blast:

This energizing juice is packed with Vitamin C and antioxidants.
Ingredients:

  • 2 oranges (peeled)
  • 1 grapefruit (peeled)
  • 1/2 inch ginger (peeled)
  • 1 small beet (peeled)

Tropical Delight:

A taste of the tropics in a glass!
Ingredients:

  • 1 pineapple (peeled, cored)
  • 1 mango (peeled, pitted)
  • 1 handful kale
  • 1/2 lime (peeled)

Remember: These are just a starting point, Feel free to try out different mixtures of fruits and vegetables to discover your favorite flavor profiles. Here are some additional tips for creating delicious juices with your masticating slow juicer:

  • Start Simple: Begin with single-ingredient juices to get a feel for the juicer’s skills and your desired taste preferences.
  • Balance Flavors: Mix fruits and vegetables with complementary flavors. For example, pair sweet fruits with leafy greens or tart citrus fruits.
  • Gradually Add Greens: Leafy greens add a nutritional boost but can have a strong flavor. Start by adding small amounts and increase gradually as your taste buds adjust.
  • Frozen is Okay: Frozen fruits can be a convenient option, especially during off-seasons. Just make sure they are completely melted before juicing.
  • Don’t Forget Herbs: A sprout of mint, parsley, or basil can add a unique and refreshing twist to your juice.
    With a masticating slow juicer and a little creativity, you can unlock a world of delicious and healthy juice mixtures!


Certain things to avoid to ensure optimal performance

Here are some key points to remember:

Ingredients Not Well-Suited for Masticating Juicers:

Fruits with Pits: Avoid juicing fruits with large pits like peaches, mangoes, or avocados. The pits can damage the juicer’s drill or mesh screen. It’s best to remove the pits before juicing.
Starchy Vegetables: Starchy vegetables like potatoes or bananas are high in starch content, which can obstruct the juicer’s mesh screen and make cleaning difficult. These ingredients are better suited for blending.
Nuts and Seeds: While some quality masticating juicers might have connectors for nut butters, standard juicers are not designed to handle nuts and seeds. Their hard texture can damage the drill and mesh screen.
Frozen Large Fruits: Avoid juicing large frozen fruits whole. It’s best to cut them into smaller bits to prevent overloading the juicer and ensure smooth operation.

Operational Avoidances:

Overfeeding: Don’t overload the feed chute with too much yield at once. This can strain the motor and make juicing ineffective.
Forcing Ingredients: Masticating juicers work best when ingredients are fed gradually. Avoid pushing or forcing produce down the feed chute. Let the drill do its job of crushing and extracting the juice.
Running Empty: Never operate your juicer empty. This can damage the motor and auger. If there are no more ingredients to juice, turn off the juicer immediately.
Continuous Juicing: While masticating juicers are more durable than centrifugal juicers, they are not designed for continuous operation. Take breaks in between juicing periods to allow the motor to cool down and prevent overheating. Check your juicer’s manual for recommended usage times.

Cleaning Cautions:

Harsh Detergents: Avoid using harsh detergents or abrasive scrubbers on your juicer’s parts. These can damage the surfaces. Stick to warm, soapy water and a soft sponge or dishcloth for cleaning.
Dishwasher (Motor Base): Never deep the motor base of your juicer in water or place it in the dishwasher. This can damage the electrical parts.
By following these tips and understanding what to avoid while using your masticating slow juicer, you’ll ensure it continues to perform effectively and extract the maximum amount of juice from your favorite fruits and vegetables for a long time to come.

In conclusion, masticating slow juicers offer a superior juicing experience. They extract more nutrients and yield a higher juice content compared to centrifugal juicers. With features like doubl speeds and touchscreen controls, they are user-friendly and easy to clean. If you’re looking to boost your health and enjoy delicious juices, a masticating slow juicer is a great investment for your kitchen.

blenders

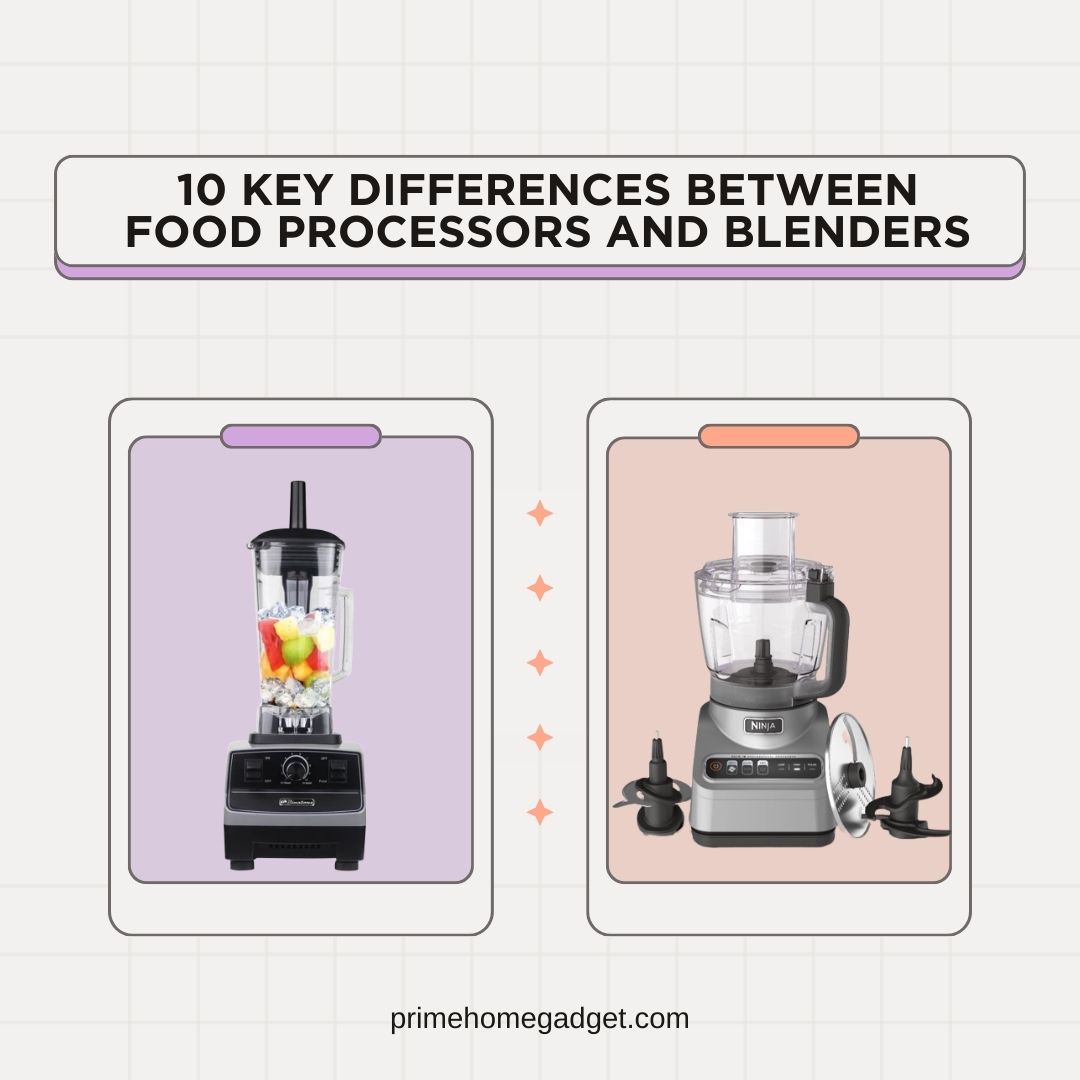
10 Key Differences Between Food Processors and Blenders

Blenders   cold press juicer

When it comes to kitchen appliances, food processors and blenders are two must-have items that make cooking and food preparation easier. Although they may initially appear to be similar, they have unique features and serve varied functions to accommodate a range of culinary chores. We’ll go over the top ten distinctions between food processors and blenders in this blog post so you can learn about their distinct features and choose the one that works best for you.

1. Purpose and Functionality

Food Processors:
Purpose: Food processors are designed to streamline various food preparation tasks, offering efficiency and versatility in the kitchen.
Functionality: Food processors excel at tasks such as chopping, slicing, dicing, grating, and mixing ingredients. They are particularly useful for preparing ingredients for recipes that require uniform cuts or blending multiple ingredients together. Additionally, food processors can handle heavier tasks such as kneading dough and making nut butter, offering a wide range of culinary possibilities.

Blenders:
Purpose: Blenders are primarily utilized for creating smooth textures by blending ingredients together, making them essential for preparing a variety of beverages, soups, sauces, and purees.
Functionality: Blenders excel at mixing liquids and soft ingredients to create smooth and homogeneous textures. They are particularly effective for blending fruits, vegetables, ice, and liquids to make smoothies, shakes, soups, sauces, and purees. Blenders offer convenience and speed in achieving desired textures, making them indispensable appliances for many kitchen tasks.


2. Blade Design

One of the noticeable differences between food processors and blenders is their blade design. Food processors typically come with multiple interchangeable blades suited for different tasks, such as a chopping blade, slicing disc, shredding disc, and dough blade. These blades are designed to handle solid and semi-solid ingredients with varying textures.

In contrast, blenders have a single set of sharp blades attached to the bottom of the blending jar. These blades are specifically designed for blending liquids and soft ingredients, creating smooth and homogeneous mixtures.


3. Texture and Consistency

Food processors and blenders produce different finished products in terms of texture and consistency. Depending on the blade used, food processors are excellent for producing coarse or fine textures. For instance, a food processor can be used to achieve finely minced vegetables or chunky sauce.

Conversely, blenders are excellent at producing creamy, smooth textures. Smoothies, smooth soups, and rich sauces are all made possible by them because they thoroughly combine all ingredients into a uniform creation.


4. Liquid Capacity

Generally speaking, blenders hold more liquid than food processors do. Because of this, blenders are perfect for making big quantities of sauces, soups, and drinks. Although they can contain liquids, food processors work best when processing smaller amounts of materials at once.


5. Blender’s Speed and Power

Because of their strong motors, which can quickly break ice, grind fruits and vegetables, and produce smooth mixes, blenders are renowned for their high-speed blending capabilities. Food processors feature strong motors as well, but they run at slower rates and are primarily used for operations like precise chopping, slicing, and mixing.


6. Versatility

Food processors are very adaptable kitchen tools that can be used for a variety of jobs, such as slicing vegetables, kneading bread, shredding cheese, and processing nuts. Their adaptability is increased by the changing blades and attachments, which let you easily complete a variety of recipes.

Although they are mainly used for blending liquids and soft substances, blenders can also be used for other purposes, such as smashing ice, pureeing fruits, and, with the appropriate attachments, grinding some dry components.


7. Size and Footprint

When it comes to size and footprint, blenders are often smaller than food processors and require less counter space. Because of this, blenders are a popular option for people who want to save room in their kitchen or have smaller spaces.

Food processors are typically bulkier and require more storage space because of their larger capacity and flexible functions. Nonetheless, a few modern food processors have elegant designs and offer little storage spaces for their attachments.


8. Control Options

Blenders often have a few speed settings, a pulse function, and not much control over the machine. Blenders are simple to use because of this, especially for jobs that call for constant mixing.

More control choices, such as pulse functions, variable speed settings, and dedicated modes for chopping, pureeing, and kneading, are frequently included with food processors. This degree of control makes it possible to process materials precisely to achieve the right consistency and texture.


9. Cleaning and Maintenance

Both food processors and blenders are relatively easy to clean, with most parts being dishwasher safe. However, food processors may require more attention when cleaning due to their multiple blades, discs, and attachments.

Blenders, with their single-blade design, are usually quicker to clean and maintain. Simply rinsing the blending jar with soap and water or running a cleaning cycle with water and detergent can suffice for most cleaning needs.


10. Cost

The cost of food processors and blenders can vary depending on the brand, model, features, and functionality. Generally, blenders tend to be more affordable than food processors, especially basic models designed for simple blending tasks.

However, high-end blenders with advanced features such as variable speed controls, preset programs, and powerful motors can be quite expensive and comparable in price to mid-range food processors that offer a wide range of functions and attachments.

In brief, although food processors and blenders have many features in common, they are two different kitchen machines with special uses. Depending on your culinary preferences, recipes, and available kitchen space, knowing the distinctions between a food processor and a blender will help you make an informed choice.

To improve your cooking experience and broaden your recipe repertoire, food processors and blenders can be useful additions to your kitchen equipment, regardless of your priorities. These include texture control, convenience of use, adaptability, and capacity for liquid mixing.


SHOP: https://primehomegadget.com/

FOLLOW: https://www.instagram.com/primevendors/

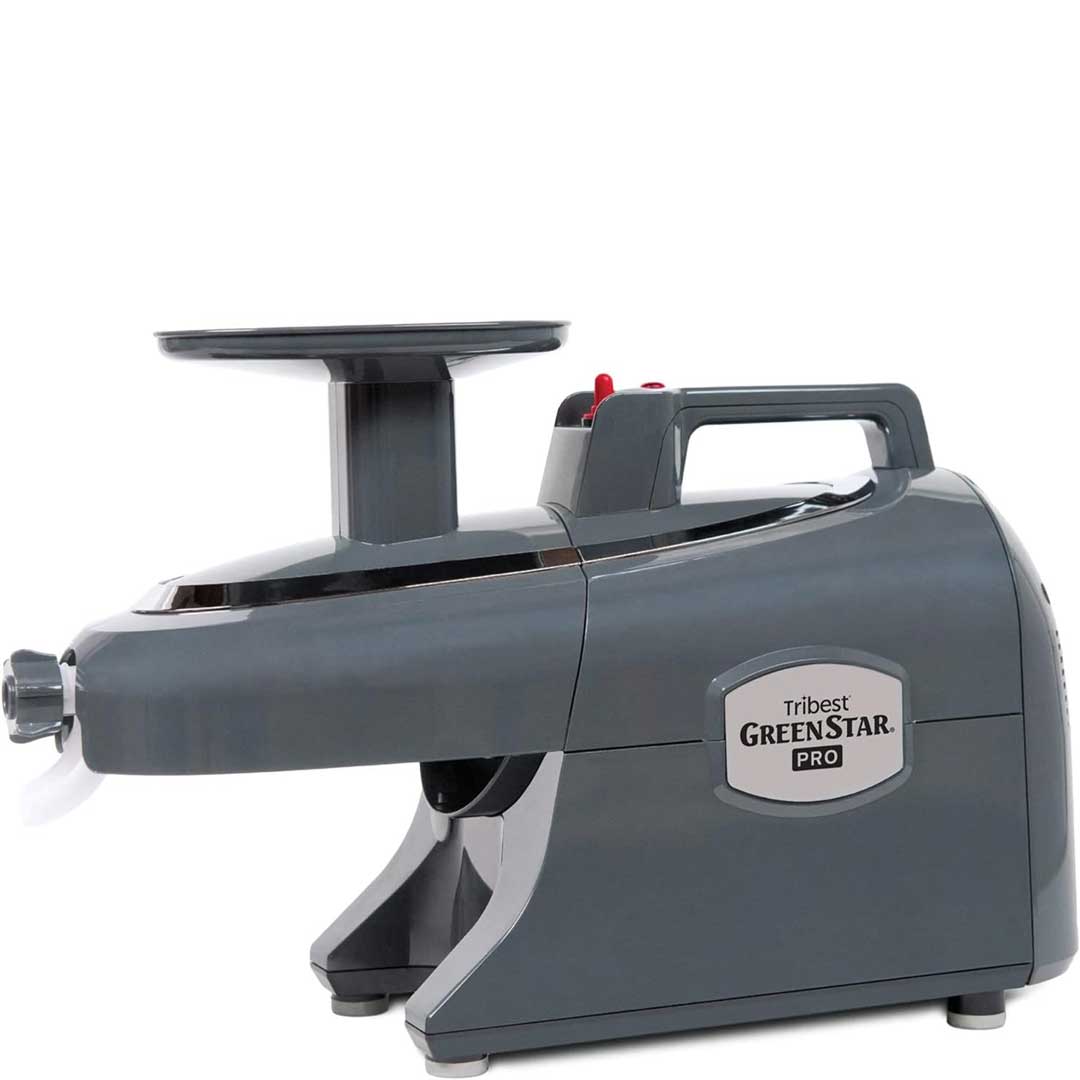
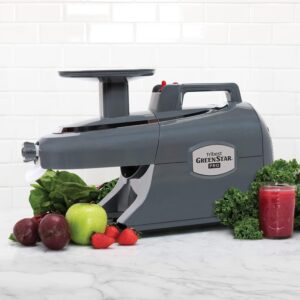
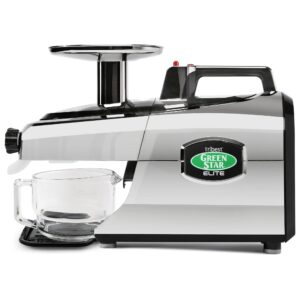
Tribest Greenstar GS-P502-B Slow Masticating Juicer

Should You Buy the Tribest Greenstar GS-P502-B Pro Jumbo Slow Masticating Juicer?
Are you looking for a top-notch juicer that can extract most juice produce and preserve nutrients? Then the Tribest Greenstar GS-P502-B Pro Jumbo Slow Masticating Juicer might be for you. This feature-packed juicer brags slow masticating technology and Jumbo Twin Gears to create a powerful and multi functional appliance. But with a massive price tag, is it worth the investment?

Here’s a closer look at the Tribest Greenstar GS-P502-B Pro:

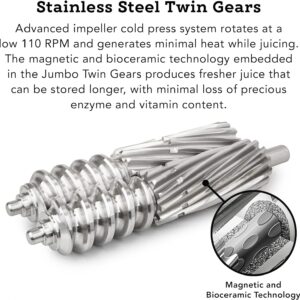
Cold Press Technology: This juicer uses a slow grinding tool (110 rpm) to minimize heat buildup, which can damage enzymes and nutrients. This results in a higher quality juice with possibly long life span.
Jumbo Twin Gears: The twin gears are the heart of this juicer. They are designed to crush and extract juice from different kind of fruits, vegetables, and even leafy greens. Tribest claims that Jumbo Twin Gears extract more juice and preserve more nutrients compared to conventional juicers.
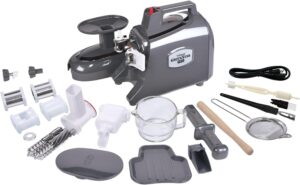
Versatility: This juicer handles more than just fruits and vegetables. It can also be used to make nut butter, baby food, frozen fruit sorbets, and lots more.
Durability: The Greenstar Pro is built with stainless steel components and comes with a 15-year warranty for household use, indicating Tribest’s confidence in the product’s lifespan.
Commercial Certification: Unlike many home juicers, the Greenstar Pro is commercially certified, meaning it can withstand heavier use.

Downsides to Consider:
Price: The Tribest Greenstar GS-P502-B Pro is a high-end juicer with a price tag to match.
Size and Weight: This is a bulky and heavy appliance that may not be ideal for kitchens with limited counter space.
Cleaning: While not overly complex, disassembling and cleaning the juicer can take some time and effort.

Overall, the Tribest Greenstar GS-P502-B Pro is a powerful and multi-functional juicer that can be a great investment for those who are serious about juicing and extracting the most nutrients from their yield. However, the high price tag and large size make it less ideal for casual juicers or those with limited space.

Here are some additional points to consider before making your decision:
• Read reviews from other users to get a sense of their real-world experiences with this juicer.
• Consider your juicing needs and budget. If you’re only planning to juice frequently, a less expensive juicer might be enough.
• Think about how much prep area you have available.


Key Components

Are you looking for a high-end juicer that can extract maximum juice yield and preserve nutrients? Then the Tribest Greenstar GS-P502-B Pro Jumbo Slow Masticating Juicer might be for you. This feature-packed juicer brags slow masticating technology and Jumbo Twin Gears to make a powerful and multi functional appliance. But with a heavy price tag, is it worth the investment?

Here’s a closer look at the Tribest Greenstar GS-P502-B Pro:
Cold Press Technology: This juicer uses a slow grinding mechanism (110 rpm) to reduce heat buildup, which can damage enzymes and nutrients. This results in a higher quality juice with potentially longer shelf life.
Jumbo Twin Gears: The twin gears are the heart of this juicer. They are designed to crush and extract juice from different kind of fruits, vegetables, and even leafy greens. Tribest demands that Jumbo Twin Gears extract more juice and preserve more nutrients compared to conventional juicers.
Versatility: This juicer can handle more than just fruits and vegetables. It can also be used to make nut butter, baby food, frozen fruit sorbets, and more.
Durability: The Greenstar Pro is built with stainless steel components and comes with a 15-year warranty for household use, indicating Tribest’s confidence in the product’s lifespan.
Commercial Certification: Unlike many home juicers, the Greenstar Pro is commercially certified, meaning it can cope with heavier use.

Downsides to Consider:
Price: The Tribest Greenstar GS-P502-B Pro is a high-end juicer with a price tag to match.
Size and Weight: This is a large and heavy appliance that may not be ideal for kitchens with limited counter space.
Cleaning: While not overly complex, disassembling and cleaning the juicer can take some time and effort.

In general, the Tribest Greenstar GS-P502-B Pro is a powerful and multi-functional juicer that can be a great investment for those who are serious about juicing and extracting the much nutrients from their produce. However, the high price tag and large size make it less ideal for casual juicers or those with limited space.

Here are some additional points to consider before making your decision:
• Read reviews from other users to get a sense of their real-world experiences with this juicer.
• Consider your juicing needs and budget. If you’re only planning to juice occasionally, a less expensive juicer might suffice.
• Think about how much counter space you have available.

How to Use your Tribest Greenstar GS-P502-B Pro

Using the Tribest Greenstar GS-P502-B Pro Jumbo Slow Masticating Juicer
The Tribest Greenstar GS-P502-B Pro is a high-end juicer, and while it’s powerful, it requires some assembly and specific steps to function. Here’s a general guide to using it:

Before You Begin:
• Wash all fruits and vegetables thoroughly.
• Cut large or hard produce into pieces that will size comfortably in the feed chute.
• Make sure the juicer is not plugged.

Assembly:
1. Check the manual that comes with your juicer for detailed instructions on construction.
2. Generally, it will involve placing the juicing bowl in its position, followed by the drill (the screw component) and twin gears.
3. Protect the locking operation according to the manual’s instructions.
4. Assemble the juicing screen and the pulp outlet.
5. Place the juice pitcher under the spout.

Juicing:
1. Now Plug in the juicer.
2. Turn it on according to the manual’s instructions.
3. Slowly feed the prepared fruits or vegetables into the feed chute. Use the pusher provided to gently guide the yield down.
4. Don’t overload the juicer, because it can lead to jamming.
5. Juice will come out of the spout and collect in the pitcher.
6. Pulp will be ejected from the separate pulp outlet.

Tips:
• Switch between soft and hard produce to improve juicing effectiveness.
• If the juicer seems to be struggling, cut your produce into smaller bits.
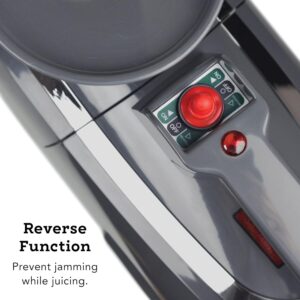
• Use the reverse function (check the manual if your model has this) to unwind any jams.
• To extract maximum juice, you can push a little down on the pusher towards the end of juicing each piece of yield.

Cleaning:
1. Unplug the juicer before detaching it for cleaning.
2. Detach the juicer according to the manual’s instructions.
3. Use the included cleaning brush to remove pulp from the juicing screen and other parts.
4. Wash all components with warm, soapy water. Rinse thoroughly.
5. You can also run some clean water through the juicer to flush out any remaining pulp.

A Guide to clean the Tribest Greenstar GS-P502-B Pro

The Tribest Greenstar GS-P502-B Pro is a powerful juicer, but its multiple components require proper dismantling and cleaning to ensure optimal performance and lifespan. Here’s how to handle the cleaning process:

Before You Begin:
• Unplug the juicer for safety reasons.

Disassembly:
1. Check your juicer’s manual for detailed instructions on dismantling. However, the general steps typically involve:
o Unlocking and removing the juicing bowl.
o Taking out the drill (the screw component) and twin gears.
o Detaching the juicing screen and pulp outlet.

Cleaning the Parts:
2. Use warm, soapy water and a soft dishcloth to wash all the disassembled parts.
3. The juicing screen, which is liable to pulp buildup, can benefit from a dedicated cleaning brush included with the juicer.
4. You can also run some warm soapy water through the juicer itself to rinse out any remaining pulp.

Extra Cleaning Tips:
• For stubborn pulp remnant, you can soak the parts in warm soapy water for a while before scrubbing.
• Some parts, as mentioned in the manual, might be dishwasher-safe. Double-check the manual’s recommendations for dishwasher use to avoid damaging any parts.
• Don’t use harsh chemicals or abrasive sponges on any parts, to avoid any scratch or damage the surfaces.

Reassembly:
5. Once everything is clean and dry, reconstruct the juicer following the instructions in the manual.

Additional Tips:
• It’s recommended to clean the juicer immediately after use to prevent pulp from drying and becoming tough to remove.
• If you plan on juicing leafy greens or soft fruits, cleaning in between batches might be necessary to avoid obstructing and maintain ideal juicing performance.
By following these steps and checking your juicer’s manual for specific details, you can keep your Tribest Greenstar GS-P502-B Pro clean and functioning effectively for years to come.
 

Tips and Recipes Suitable for your masticating Juicer

The Tribest Greenstar GS-P502-B Pro isn’t just a juicer! This versatile machine can handle a variety of tasks beyond creating delicious juices. Here are some recipe ideas to get you started:

Juices:
Daily Greens Boost: Mix leafy greens like kale or spinach with cucumber, celery, apple, and lemon for a vitamin-packed green juice.
Root Power: This juice is perfect for a fall or winter day. Mix carrots, beets, ginger, and apple for a vibrant and immune-boosting drink.
Tropical Refreshment: Create a taste of the tropics by juicing pineapple, mango, orange, and a touch of ginger.

Beyond Juices:
Nut Butter: The Tribest Greenstar can change nuts and seeds into creamy nut butter. Almonds, cashews, and peanuts are all popular choices. You can even experiment with nut butter mixtures or add a pinch of salt for extra flavor.
Baby Food: Steam fruits and vegetables until soft, then blend them in the juicer for a smooth and nutritious baby food.
Sorbet: Frozen fruits like berries or mango can be turned into refreshing sorbets using the juicer’s blending function.
With a little creativity, you can use your Tribest Greenstar GS-P502-B Pro to create different kind of healthy and delicious drinks and foods.


What to avoid while using the Tribest Greenstar GS-P502-B Pro

To get the most out of your Tribest Greenstar GS-P502-B Pro and avoid damaging it or frustration while juicing, here are some things to keep in mind:
Avoid juicing overly large or hard items whole:
• Cut fruits and vegetables into manageable bits that will fit comfortably in the feed chute. Forcing large or hard items can stress the motor and damage the juicer.

Don’t overload the juicer:
• Feed produce slowly and in measured. Adding too much at once can lead to obstructing and make it harder to extract all the juice.

Avoid overheating the motor:
• The Tribest Greenstar is designed for slow masticating juicing. Don’t run it constantly for extended periods. Check the manual for recommended use times and rest periods to prevent overheating the motor.

Not all fruits and vegetables are ideal:
• Some very soft fruits like bananas or berries might not be the best fit for this juicer. They lack the structure needed for effective juicing and can create a soft mess. These are better suited for blenders.

Don’t use harsh cleaning methods:
• Avoid coarse sponges or harsh chemicals when cleaning the juicer components. These can scratch or damage the surfaces. Stick to warm soapy water and the included cleaning brush.

Skip the pits and seeds:
• Remove pits and seeds from fruits before juicing to avoid damaging the juicer and adding bitterness to your juice.

Be mindful of fibrous ingredients:
• Large quantities of very fibrous ingredients like pineapple can block the juicer screen. You might need to swap them with softer or leafy greens or cut them into smaller pieces.

By following these tips, you can ensure your Tribest Greenstar juicer function smoothly and efficiently for a long time. If you’re unsure about anything, check the user manual that came with your juicer for specific recommendations.

In conclusion, the Tribest Greenstar GS-P502-B Pro is a powerful juicer that extracts high-quality juice and offers flexibility beyond juicing. However, its massive price tag, large size, and cleaning requirements make it perfect for serious juicers with the space and budget, not casual juicers.

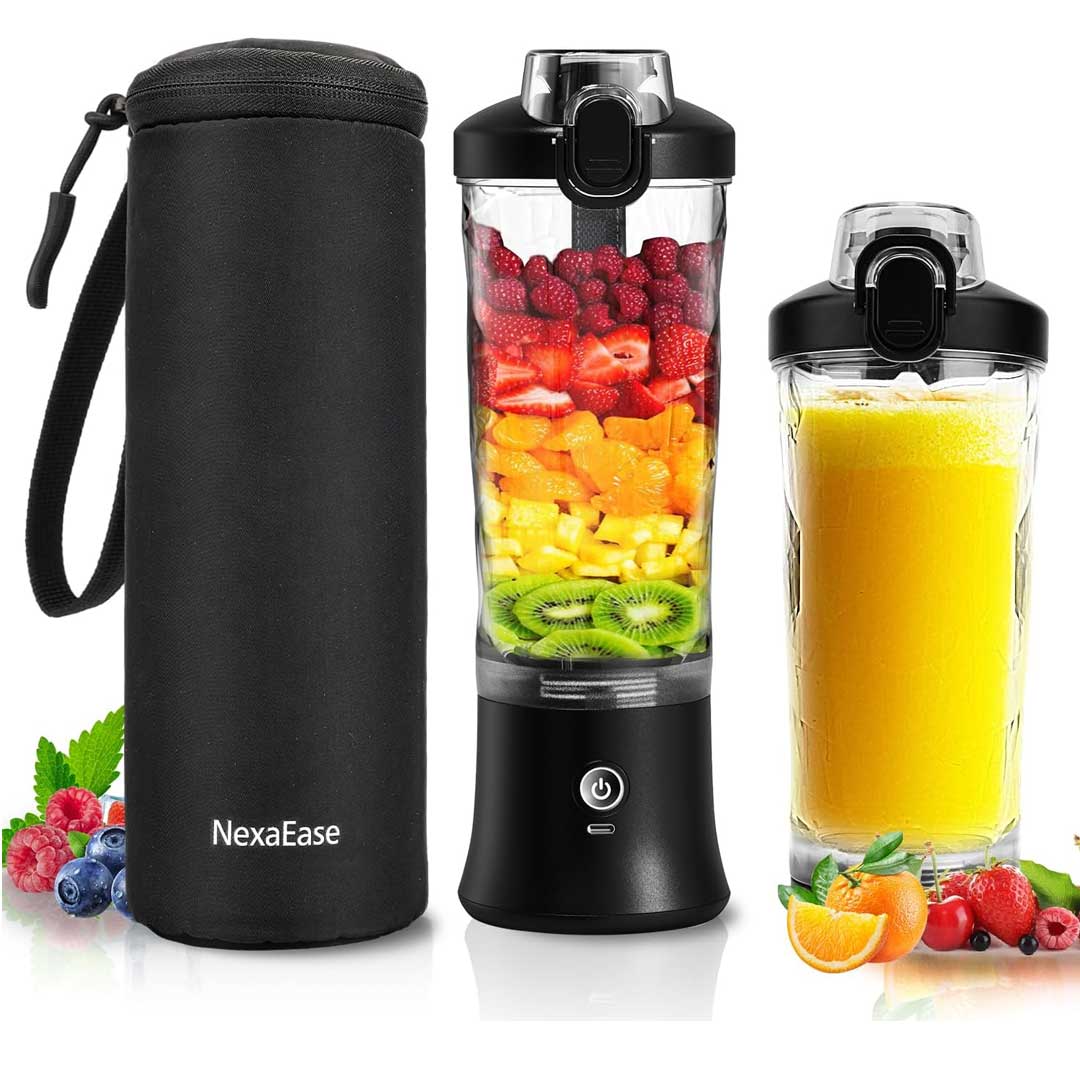
Insulated Sleeve NexaEase Portable Personal Juicer

Life is busy, and staying healthy can sometimes fall by the wayside. But what if you could drive up a nutritious smoothie wherever you are? Enter the portable blender personal juicer, your new best friend for delicious and healthy drinks on the go.

Power in Your Pocket

This tiny marvel packs a punch. It’s small in size but delivers big results. It boasts a powerful motor and sharp stainless steel blades, easily grinding fruits, vegetables, and even ice for perfectly smooth and refreshing drinks.

More Than Just Smoothies

This multi-functional little appliance isn’t just for smoothies. Use it to create nutritious protein shakes, baby food, salad dressings, dips, and even frozen cocktails (for the adults, of course!).

Convenience at its Finest

The included insulated sleeve keeps your drinks cold for a longer period, perfect for those hot days on the go. The travel lid allows for safe and easy sipping, so you can enjoy your creation without worrying about spills. Moreover, the USB rechargeable battery means you can blend up as much as you want without needing an outlet.

Cleaning Up a Breeze

With its simple design and detachable parts, cleaning this portable blender is a breeze. Just fling the cup and blades into some soapy water or rinse them under the tap. Most are dishwasher-safe too.

This portable blender personal juicer is more than just a kitchen gadget; it’s a lifestyle upgrade. It empowers you to take control of your health and enjoy delicious drinks anytime, anywhere. So drop the sugar store-bought options and blend your way to a healthier, happier you!


Power Packed Features for Your Portable

Alongside the benefits stated, here’s a detailed breakdown of the features this portable blender personal juicer offers:

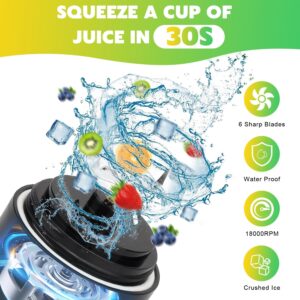
Powerful Motor and Blades: Don’t underestimate its size! This blender features a strong motor and sharp, typically 6-blade stainless steel blade system, capable of crushing ice and frozen fruits for smooth and refreshing drinks.

21-Ounce Capacity: This single-serve size is perfect for portion control and creating personalized smoothies or shakes.

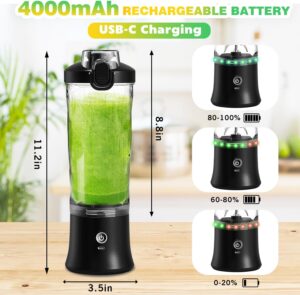
Ditch the cords! The built-in battery allows you to recharge via USB, making it perfect for travel, the gym, or anywhere without an outlet.

Travel Lid and Insulated Sleeve: The included travel lid ensures sipping without mess on the go, while the insulated sleeve keeps your drinks cold longer, ideal for hot days or extended travel.

Detachable Parts and Easy Cleaning: With its simple design and removable parts, cleaning is a breeze. Just toss the cup and blades into soapy water, rinse under the tap, or enjoy the convenience of dishwasher-safe parts (refer to the specific model’s details).

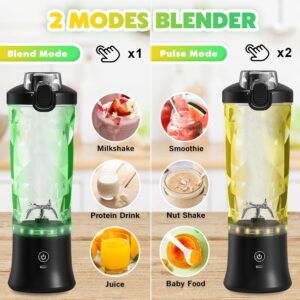
Multiple Functions: This multifunctional little blender goes beyond smoothies. Blend protein shakes, baby food, salad dressings, dips, or even frozen cocktails (for adults!).

Stylish Design: Available in different colors, this portable blender is a sleek and functional addition to your healthy lifestyle.

Additional Features to Consider:

Pulse Function: Some models offer a pulse function for more control over blending and achieving the perfect consistency.

Safety Features: Look for features like automatic shut-off or overheating protection for added peace of mind.

Capacity Options: While 21 oz is a common size, some models might offer slightly smaller or larger capacities to suit your needs.

By considering these features, you can find the perfect portable blender personal juicer to fit your healthy and convenient lifestyle.


A Blending Guide

Your new portable blender personal juicer is here to transform your on-the-go beverage game. Here’s a quick guide to get you started on creating delicious and healthy drinks:

Preparation:

Charge Up: Before your first blend, ensure your blender is fully charged using the provided USB cable.

Wash Up: Most models come with removable parts. Give them a quick wash with warm soapy water before your first use (refer to your manual for dishwasher compatibility).

Prep Your Ingredients: Cut fruits, vegetables, and any other ingredients into small bits, especially if they are frozen, to ensure smooth blending.

Blending Time!

Add Ingredients: Place your ingredients in the blender cup, following the recommended top up line (usually marked on the cup).

Secure the Lid: Twist on the travel lid tightly to prevent leaks or spills during blending.

Power Up: Press the power button according to your model’s instructions. Some may require a single press, while others might have a double-press safety feature.

Blend Away: Most portable blenders have a pre-programmed blending cycle. Hold the cup firmly while blending.

Pulse Function (optional): If your model has a pulse function, you can use short bursts for more control over the consistency, especially for ingredients that are very thick.

Enjoy and Clean Up

Power Down: Once your blending cycle is complete, or you’ve achieved the desired preference, turn off the blender.

Sip and Savor: Unscrew the travel lid and enjoy your delicious creation!

Clean Up: Dismantle the blender, rinse the cup and blades with warm soapy water, or toss them in the dishwasher (depending on your model’s instructions).

Safety Tips:

  • Never run the blender empty.
  • Don’t blend extremely hot liquids.
  • Be mindful of the blade when cleaning.
  • Always ensure the lid is securely fastened before blending

With these simple steps, you’ll be a portable blending pro in no time! Now get creative and experiment with different smoothie and drink recipes to energize your healthy and active lifestyle.


Easy Clean Ups

Keeping your portable blender personal juicer clean is easy and essential to maintain a healthy and hygienic blending experience. Here’s a breakdown of the cleaning process:

Pre-Cleaning:

Disconnect from Power: Always unplug the blender or ensure it’s switched off before cleaning.

Disassemble and Rinse:

Detach the Parts: Most portable blenders have removable blades and cups for easy cleaning. Check your user manual for specific disassembly instructions.

Rinse Away the Big Stuff: Under running water, rinse away any leftover smoothie or ingredient remnant from the cup and blades.

Deep Clean:

Warm Soapy Water: Fill a sink or bowl with warm, soapy water. Add a light dish soap.

Soak and Wash: Submerge the cup, blades (be mindful of sharp edges!), and lid (if removable) in the soapy water for a few minutes to loosen any stuck-on ingredients.

For Tough Stains: If you notice stubborn stains, you can add a sprinkle of baking soda to the soapy water for extra cleaning power.

Scrub Gently: Use a soft sponge or brush to gently scrub the cup, blades, and lid, removing any remaining remnant.

Optional: Dishwasher Cleaning (depending on model)

Check Your Manual: Some models might have dishwasher-safe parts. Always check the manufacturer’s instructions for dishwasher compatibility information.

Top Rack Only: If dishwasher safe, place the cup and lid (if applicable) on the top rack only for a gentle wash cycle

Drying:

Air Dry Completely: After washing, thoroughly air dry all the parts (cup, blades, and lid) on a clean dish towel or drying rack. Never reconstruct the blender until everything is completely dry to prevent mold or mildew growth.

Extra Tips:

Clean After Every Use: For optimal hygiene and to prevent lingering odors, clean your blender after each use.

Deep Clean Occasionally: In addition to regular cleaning, consider a deeper clean with baking soda or a vinegar solution every few weeks to remove any buildup.

Never Submerge the Motor Base: The motor base typically contains electrical components and should never be dipped in water. Wipe it clean with a damp cloth if needed.

By following these simple cleaning steps, you can ensure your portable blender personal juicer stays fresh, hygienic, and ready to grind up delicious and healthy drinks for a long time!


Recipes suitable for Insulated Sleeve NexaEase Portable Personal Juicer

Your portable blender personal juicer is a recipe creation machine in disguise! Here are some recipe ideas to get you started, keeping in mind the capacity and power limitations:

Classic Smoothies:

Berry Blast: Blend frozen berries (strawberries, blueberries, raspberries), banana, yogurt, and a splash of milk or plant-based milk for a refreshing and nutritious smoothie.

Tropical Twist: Mix frozen mango, pineapple, spinach (for a hidden veggie boost!), coconut milk, and a squeeze of lime for a taste of the tropics.

Green Power: Blend a handful of baby spinach or kale, banana, apple, cucumber, and water for a nutrient-packed green smoothie.

Healthy Snacks and Drinks:

Protein Power Shake: Blend your favorite protein powder with banana, almond butter, milk, and a sprinkle of chia seeds for a post-workout pick-me-up.

Overnight Oats on the Go: Blend rolled oats, yogurt, milk, a touch of honey, and your favorite toppings like nuts and berries. Store in the fridge overnight for a grab-and-go breakfast.

Creamy Avocado Dip: Blend avocado, a squeeze of lime juice, cilantro, and a touch of garlic powder for a healthy and delicious dip for veggies or crackers.

Additional Tips:

Start with Liquids: Always add some liquid (water, milk, juice) to your blend first to help the blades move freely.

Frozen Fun: Frozen fruits add thickness and creaminess to your smoothies.expand more

Chop it Up: For best results, especially with tougher ingredients, pre-chop fruits and vegetables into smaller bits.

Spice it Up: Don’t be afraid to experiment with spices like ginger, cinnamon, or nutmeg for added flavor.

Keep it Cool: Enjoy your blended creations right away to maintain the freshest flavor and nutrient content.

With a little creativity, you can use your portable blender personal juicer to create endless possibilities for healthy and delicious drinks and snacks to energize your busy lifestyle!


What to avoid when using Insulated Sleeve NexaEase Portable Personal Juicer

To ensure your portable blender personal juicer last longer, here are some things to avoid while using it:

Ingredients:

Hard or Whole Ingredients: Avoid blending very hard ingredients like nuts, whole coffee beans, or ice cubes without pre-crushing them. This can stress the motor and spoil the blades.

Hot Liquids: Don’t blend boiling hot liquids. The blender isn’t designed to handle extreme temperatures and could potentially crack or deform. Let hot liquids get warm before blending.

Dry Blending: Never run the blender empty. You need some liquid to help the blades move freely and prevent them from overheating.

Overfilling: Don’t go beyond the blender’s recommended fill line. This can cause the motor to strain and potentially lead to leaks.

Usage and Cleaning:

Over-Blending: Most portable blenders have a pre-programmed blending cycle. Avoid too much blending for long durations, as this can overheat the motor.

Improper Cleaning: Not cleaning your blender properly can lead to bacteria growth and dull blades. Ensure you dismantle, wash, and dry all parts thoroughly after each use.

Submerging the Motor Base: The motor base usually houses electrical components. Never deep it in water for cleaning. Wipe it down with a damp cloth if needed.

Dishwasher Abuse (if not dishwasher-safe): Not all portable blenders have dishwasher-safe parts. Always check the user manual. Using the dishwasher on non-dishwasher safe parts can damage them.

Safety:

Unattended Blending: Never leave the blender neglected while it’s running.

Forgetting the Lid: Always ensure the lid is securely fastened before blending to prevent spills and messes.

Ignoring the Blades: Be mindful of the sharp blades when cleaning and dismantling the blender.

By following these simple tips, you can avoid spoiling your portable blender personal juicer and ensure it continues to be your reliable buddy for creating healthy and delicious on-the-go drinks.

In Conclusion, the portable blender personal juicer is your on-the-go companion for healthy drinks. It blends fruits, veggies, and ice for delicious smoothies, shakes, and dips. It’s easy to clean, easy to use, and keeps your drinks cold with the insulated sleeve. Remember to avoid hard ingredients, hot liquids, and overloading to keep it working its best. With this little blender, healthy choices are always a blend away!

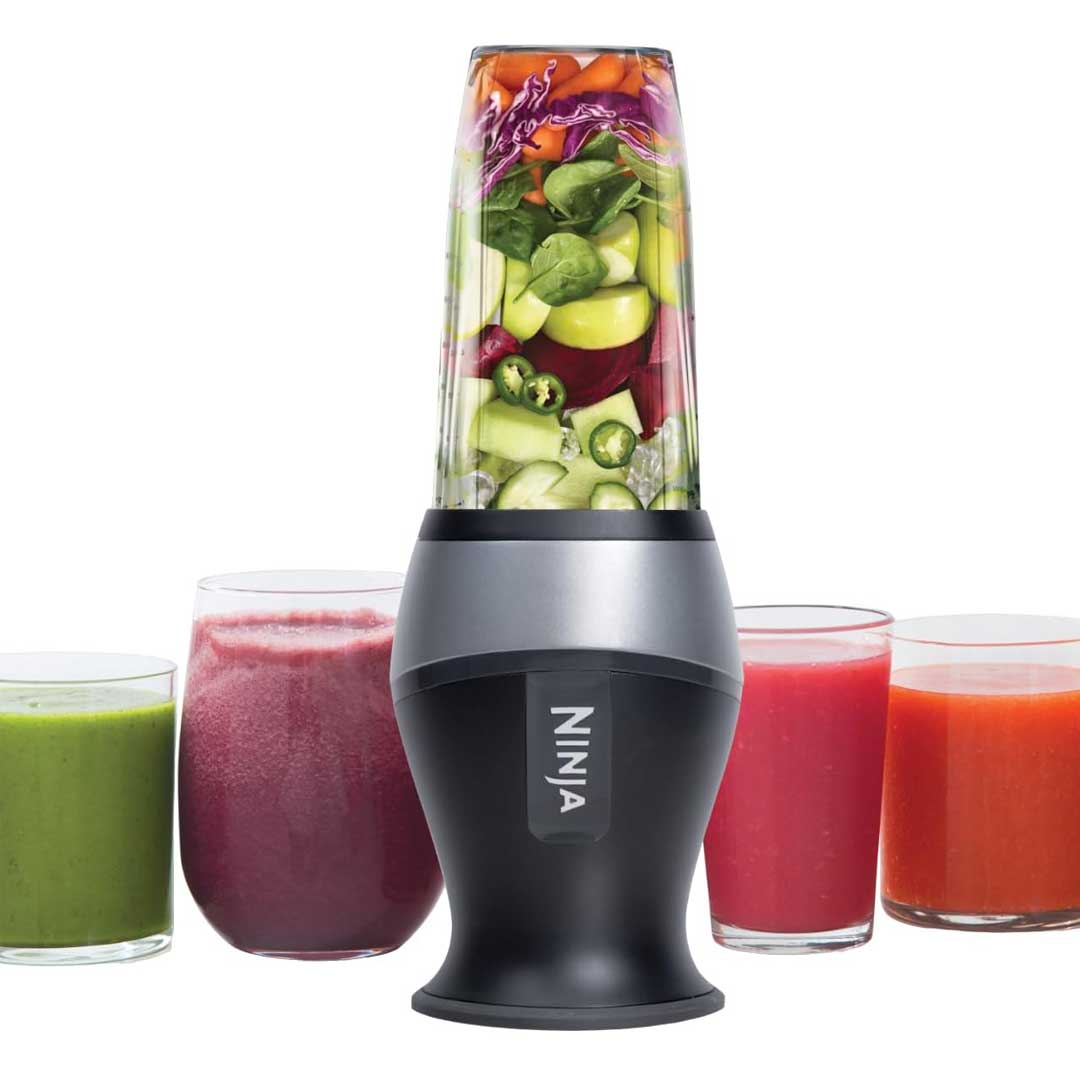
Ninja QB3001SS Ninja Fit Compact Personal Blender

The Compact Powerhouse for Your Daily Blend

Looking to up your smoothie game but short on surface space? Ninja QB3001SS Ninja Fit Compact Personal Blender might be your best match. This little blender packs a powerful punch, making it ideal for whipping up delicious and nutritious drinks on the go. Now let’s dive into the features of the Ninja Fit and see if it fits your blending needs.

Powerhouse in a Pint-Sized Package

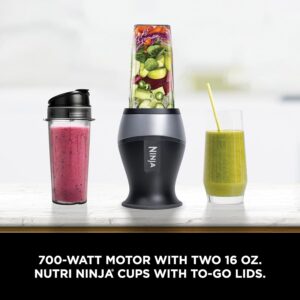
Don’t let the Ninja Fit’s compact size fool you. This personal blender boasts a 700-watt motor, which is remarkable for its size. This unravels to smooth and creamy blends, effortlessly grinding fruits, vegetables, and even crushed ice. Whether you’re a smoothie fan or looking for a handy tool for food prep tasks, the Ninja Fit can handle it all.

Simple and Convenient

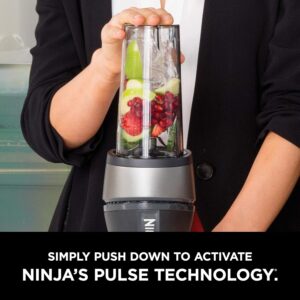
The Ninja Fit prioritizes convenience. Unlike some complex blenders, this one features a buttonless function. Simply push down on the cup to blend and release to stop. This user-friendly design makes it easy to use for anyone, from busy mornings to post-workout energizes. Plus, the included 16-ounce cups come with spout lids, allowing you to take your creations on the go.


Is the Ninja Fit Right for You?

The Ninja Fit is a great choice for

Individuals and small households: The 16-ounce cup size is perfect for single servings.

People on the go: The compact design and spout lids make it perfect for portable smoothies and drinks.

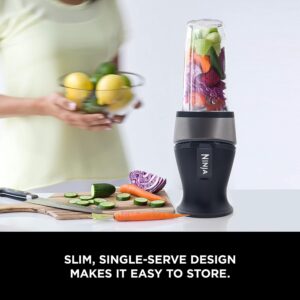
Those with limited counter space: The small footprint allows for easy storage.

Anyone who wants a simple and powerful blender: The intuitive design and 700-watt motor make it a user-friendly choice.


Some Things to Consider

Limited capacity: While great for single servings, the 16-ounce cup size might not be appropriate for larger families.

No variable speed settings: The Ninja Fit offers a simple on/off function, which may not be perfect for users who prefer more control over blending textures.

Noise level: Personal blenders can be noisy, and the Ninja Fit is no exemption.


However, the Ninja Fit Compact Personal Blender is a great option for those seeking a powerful, convenient, and easy-to-use tool for creating delicious smoothies, drinks, and even assisting with food prep tasks. Its compact size and portability make it perfect for small kitchens and busy lifestyles.


Features of the Ninja Fit Compact Personal Blender

Absolutely, here’s a upgraded section on the features of the Ninja Fit Compact Personal Blender:

Power Packed Features of the Ninja Fit Compact Personal Blender
The Ninja Fit might be compact, but its features are anything but small. Here’s a closer look at what this little blender can do:

700-Watt Power: Don’t underestimate this powerhouse motor. It grinds fruits, vegetables, and even crushes ice with ease, delivering smooth and creamy blends every time.

Pulse Technology: The Ninja Fit uses pulse technology, which allows for better control over the blending process. This is especially helpful for achieving different textures or avoiding over-blending ingredients. (Note: While some reviewers mention a design without a button, it can be clarified here that the pulsing function is likely achieved by pressing and releasing the cup, creating a pulsing effect).

Simple Push-to-Blend Operation: Forget tossing with buttons and settings. The Ninja Fit prioritizes ease with its innate push-to-blend design. Simply press down on the cup to start blending and release to stop. This makes it user-friendly for anyone, from creating quick morning smoothies to post-workout energizes.

16-Ounce BPA-Free Cups with Spout Lids: The Ninja Fit comes with two BPA-free cups, ideal for single servings. The spout lids allow you to transform your blended creations into portable drinks, perfect for taking your healthy concoctions on the go.

Dishwasher-Safe Parts: Cleaning up is a breeze with the Ninja Fit. Both the cups and blades are dishwasher-safe, saving you time and no stress.

In addition to these core features, here’s a quick mention of some additional benefits:

Compact Design: The small footprint of the Ninja Fit makes it perfect for limited counter space or easy storage.

Durable Stainless Steel Blades: The blades are durable, ensuring they can handle tough ingredients and maintain their sharpness over time.

By incorporating these features, the Ninja Fit aims to be a convenient and powerful tool for creating delicious and healthy drinks, assisting with food prep tasks, and fitting flawlessly into busy lifestyles.


Keeping Your Ninja Fit Sparkling Clean

The Ninja Fit Compact Personal Blender is designed for flawless blending, making it a great choice for anyone who wants healthy and delicious drinks on the go. Here’s a quick guide to get you started with using your Ninja Fit:

Preparing Your Ingredients:

  • Wash and chop your fruits, vegetables, or other ingredients. Since the Ninja Fit has a 16-ounce cup, chopping larger fruits or vegetables into smaller pieces will ensure they blend more effectively.
  • Add your ingredients to the cup. The Ninja Fit is designed for single servings, so keep the total ingredient volume within the 16-ounce capacity.

Using the Ninja Fit:

  • Attach the blade assembly to the cup. Ensure it’s securely fastened to prevent leaks and spills.
  • Twist the cup onto the motor base. There should be a specific locking mechanism that aligns the cup with the base. Make sure it’s secure before proceeding.
  • Here comes the magic! The Ninja Fit utilizes a push-to-blend design. Simply press down on the cup with fair pressure to activate the motor and start blending.

Achieving Your Desired Consistency:

Short pulses: Use short bursts of blending (pressing and releasing the cup quickly) for a rougher or chunkier consistency. This is perfect for ingredients like salsa or nut butters where you want some texture.

Continuous blending: Hold down the cup for a longer duration to achieve a smoother and creamier consistency. This is perfect for classic smoothies or protein shakes.

Pro Tip: If you’re using frozen ingredients, you might need to use the pulse function more frequently to help break down the ice before getting a smooth blend.

Enjoy and Clean Up:

  • Once you’ve achieved your desired consistency, release the pressure on the cup, and the motor will stop.
  • Unscrew the cup from the base and detach the blade assembly.
  • Transfer your drink to the spout lid if you’re taking it on the go, or simply enjoy it directly from the cup.
  • Cleaning is easy! Both the cups and blades are dishwasher-safe. Simply rinse them and place them on the top rack of your dishwasher for a hassle-free cleanup.

Safety Reminders:

  • Never run the blender empty. Always ensure there are ingredients in the cup before turning it on.
  • Do not exceed the 16-ounce capacity to prevent overflow and potential damage to the motor.
  • Make sure the cup is securely fastened to the base before blending.
  • Avoid putting hot liquids in the blender cups, as they are not heat-resistant.

By following these simple steps, you’ll be a Ninja Fit pro in no time!


A Guide to Easy Maintenance

The Ninja Fit Compact Personal Blender is designed for flawless blending and cleaning! Here’s a quick guide to ensure your blender stays fresh and hygienic after every use:

Effortless Cleanup:

The good news is, the Ninja Fit prioritizes ease when it comes to cleaning. Both the cups and blades are dishwasher-safe, making the process quick and hassle-free. Here’s how to do it:

Disassemble the blender: Unscrew the cup from the motor base and detach the blade assembly.

Rinse the cups and blades: Give them a quick rinse under running water to remove any remnant food particles.

Dishwasher time: Place the cups and blades on the top rack of your dishwasher.
Relax and let the dishwasher do its magic!

Additional Cleaning Tips:

  • If you’re dealing with stubborn ingredients or want a deeper clean, you can add a drop of dish soap to the cup with warm water before placing it in the dishwasher.
  • For occasional cleaning of the motor base, you can wipe it down with a damp cloth. Avoid deeping the base in water or using abrasive cleaners.
  • To remove any lingering odors, you can occasionally fill a cup with water and a few drops of lemon juice or vinegar, and run the blender for a short pulse cycle. Rinse thoroughly afterward.

By following these simple cleaning steps, you’ll ensure your Ninja Fit stays clean and hygienic, ready to tackle your next blending challenge!


Recipes suitable for Compact Personal Blender

The Ninja Fit Compact Personal Blender is your gateway to a world of delicious and healthy creations. With its powerful motor and convenient design, it’s perfect for whipping up single-serve smoothies, protein shakes, and even assisting with food prep tasks. Here are some recipe ideas to get you inspired:

Classic Smoothies:

The Green Get-Up-and-Go: Grind together spinach, banana, frozen mango, pineapple chunks, and coconut water for a refreshing and vitamin-packed smoothie.

Berry Blast: This energizing blend combines frozen berries (strawberries, blueberries, raspberries), Greek yogurt, almond milk, and a touch of honey.

Post-Workout Power Up:

Chocolate Peanut Butter Protein Power: This protein-rich smoothie is perfect for muscle recovery. Blend together banana, peanut butter, cocoa powder, protein powder of your choice, and milk (dairy or not).

Tropical Refresher: Combine frozen pineapple, mango, banana, and coconut water for a taste of the tropics with a hydrating boost.

Beyond Smoothies:

Homemade Nut Butter: The Ninja Fit can handle grinding tasks too! Roast your favorite nuts (almonds, peanuts, cashews) and blend them in the Ninja Fit until you reach a desired consistency. You can add a pinch of salt or honey for extra flavor.

Salad Dressings: Whip up quick and healthy salad dressings by blending together your favorite ingredients like olive oil, lemon juice, herbs, and spices.

Tips for Success:

  • Start with fresh or frozen fruits and vegetables. Frozen ingredients can add a thicker consistency to your blends, while fresh ingredients offer a lighter and more refreshing taste.
  • Liquids are key! Use enough liquid (water, milk, juice) to ensure proper blending and achieve your desired consistency.
  • Don’t overfill the cup. Limit the amount of ingredients to ensure the blades can rotate freely and achieve a smooth blend.
  • Get creative! There are endless possibilities when it comes to smoothie and recipe mixtures. Experiment with different fruits, vegetables, and healthy add-ins like nut butters, seeds, or protein powder.

With the Ninja Fit and a little creativity, you can enjoy delicious and nutritious drinks and snacks that are perfectly portioned and convenient for your busy lifestyle. So get your Ninja Fit, explore these recipes, and get blending!

What to avoid when using the Ninja Fit Compact Personal Blender

While the Ninja Fit QB3001SS is a great little blender, there are a few things to keep in mind to get the most out of it and avoid any hitches:

Don’t overload it: The cups are on the smaller side (16oz), so do not put too much stuff in. This can strain the motor and make blending uneven.

Not for hot liquids: The Ninja Fit isn’t designed for hot ingredients. Just do cold blending to avoid damaging the machine or the cups.

Tough or stringy ingredients: The blades are great for fruits, veggies, and ice, but they might struggle with very fibrous or grispy ingredients. Avoid things like raw, leafy kale stems or thick fruit peels.

Continuous blending: The Ninja Fit uses a pulse function, which means you need to hold down the button to blend. Don’t try to continuously blend for long periods – it’s better to take short bursts with breaks to avoid overheating the motor.

Blended bliss, not soup maker: This blender is fantastic for smoothies and shakes, but it’s not perfect for heavy-duty tasks like pureeing soups or nut butters.

By following these tips, you can ensure your Ninja Fit runs smoothly and blends up delicious creations for a long time!

In conclusion, the Ninja Fit is a powerful and convenient personal blender for smoothies and shakes, a delight for small spaces and busy lives. But it’s not for big batches or tough ingredients. If that’s what you need, consider a full-size blender. However, the Ninja Fit is a great choice for creating delicious and healthy personal-sized blended drinks.

Masticating juicers, Juicing

The 7 Most Expensive Masticating Juicers on Amazon

In recent years, the trend of leading a healthy lifestyle has gained immense popularity, and with it, the demand for high-quality juicers has surged. Masticating juicers, also known as slow juicers or cold press juicers, have become a preferred choice for health-conscious individuals due to their ability to extract juice without compromising on nutrients. As with any market, there are luxury options available for those willing to invest in top-of-the-line appliances.

In this blog, we’ll delve into the realm of luxury masticating juicers available on Amazon. These juicers are not only designed to deliver superior juicing performance but also boast advanced features, durability, and aesthetics that cater to discerning consumers.

1. Omega MM900HDS Slow Masticating Juicer

The Omega MM900HDS Slow Masticating Juicer stands out as one of the most expensive options in the masticating juicer category. Priced at around $400, this juicer is renowned for its efficiency in extracting juice from leafy greens, wheatgrass, and soft fruits. It features a powerful motor and a dual-stage extraction process that ensures maximum yield and nutrient retention. The stainless steel design adds a touch of elegance to any kitchen, making it a favourite among luxury appliance enthusiasts.

2. Tribest GSE-5050 Greenstar Elite Cold Press Complete Masticating Juicer

The Tribest GSE-5050 Greenstar Elite Cold Press Juicer is a premium choice for health enthusiasts who value quality and versatility. Priced at approximately $600, this juicer boasts twin gears that mimic the human mastication process, resulting in higher juice yields and nutrient preservation. Its advanced features include automatic pulp ejection, easy assembly, and a homogenizing attachment for making sorbets and nut butter. The sleek design and durable construction make it a long-term investment for juicing aficionados.

3. Kuvings EVO820 Evolution Cold Press Juicer

The Kuvings EVO820 Evolution Cold Press Juicer combines style and functionality to deliver an exceptional juicing experience. With a price tag of around $700, this juicer features an innovative wide-mouth feeding chute that accommodates whole fruits and vegetables, reducing prep time. Its powerful motor and slow-squeezing technology ensure maximum juice extraction and nutrient retention. The sleek and compact design makes it a standout addition to modern kitchens, appealing to those with a taste for luxury appliances.

Juicer

4. Hurom H-AI-SBB20 H-AI Platinum Slow Juicer

Hurom is renowned for its premium juicers, and the H-AI-SBB20 H-AI Platinum Slow Juicer is no exception. Priced at approximately $800, this juicer combines cutting-edge technology with elegant design. Its self-feeding hopper and automated features make juicing effortless, while the slow squeeze technology ensures minimal oxidation and maximum nutrient preservation. The sleek platinum finish adds a touch of sophistication, making it a coveted choice among health-conscious individuals with a penchant for luxury.

Juicer

5. Super Angel DELUXE Model with Soft Fruit Extracting Housing

The Super Angel DELUXE Model is a top-tier masticating juicer designed for those who demand the best in juicing performance. Priced at around $1,300, this juicer is crafted from high-quality stainless steel, ensuring durability and hygiene. Its twin-gear system extracts juice efficiently from a wide range of produce, including soft fruits, leafy greens, and wheatgrass. The included soft fruit extracting housing expands its versatility, making it a versatile appliance for health enthusiasts seeking premium quality.

6. Kuvings Whole Slow Juicer Chef CS600

The Kuvings Whole Slow Juicer Chef CS600 is a commercial-grade masticating juicer that caters to professional juicing needs. Priced at approximately $1,500, this juicer features a robust motor and an extra-wide feeding chute, allowing for fast and efficient juicing of whole fruits and vegetables. Its durable construction and advanced juicing technology ensure optimal juice extraction and nutrient retention, making it a preferred choice for juice bars, restaurants, and health centres.

Masticating juicers, Juicing

7. Norwalk Model 290 Hydraulic Press Juicer

At the top of the luxury spectrum is the Norwalk Model 290 Hydraulic Press Juicer, priced at around $2,500. This juicer is revered for its hydraulic press technology, which exerts thousands of pounds of pressure to extract juice with minimal heat and oxidation. The result is the juice of unparalleled quality, rich in nutrients and flavour. While its price may be prohibitive for many consumers, its exceptional performance and durability make it a favourite among health enthusiasts and juice connoisseurs.

Masticating juicers, Juicing

The world of luxury masticating juicers offers a glimpse into the intersection of cutting-edge technology, exquisite design, and optimal functionality. While these juicers come with a hefty price tag, they cater to discerning consumers who prioritize quality, performance, and aesthetics in their kitchen appliances. Whether you’re a health-conscious individual looking to elevate your juicing experience or a professional seeking commercial-grade equipment, these seven most expensive masticating juicers on Amazon represent the pinnacle of juicing excellence.

SHOP PRIME HOME GADGETS

SOCIAL MEDIA

Nutribullet blender, Smoothies

15 Things you can do with the Nutribullet Blender

The Nutribullet blender has become a staple in many kitchens, celebrated for its compact size, powerful motor, and versatility. While it’s commonly associated with making delicious and nutritious smoothies, its capabilities go well beyond that. In this comprehensive guide, we’ll delve into 15 creative and surprising things you can do with your Nutribullet blender, expanding your culinary horizons and making the most out of this innovative kitchen appliance.

1. Smoothie Sensations
Smoothies are Nutribullet’s claim to fame and for good reason. The high-speed motor effortlessly blends fruits, vegetables, yoghurt, and other ingredients into a smooth and creamy concoction packed with vitamins, minerals, and fibre. Whether you prefer classic fruit blends or green smoothies bursting with leafy greens, the Nutribullet can handle it all, making it easy to incorporate more fruits and veggies into your diet.

2. Creamy Soups
Say goodbye to lumpy soups forever. With the Nutribullet blender, you can create velvety-smooth soups in a matter of minutes. Simply blend cooked vegetables, broth, and seasonings until silky and homogeneous. You can customize the texture to your liking, from hearty purees to light and frothy bisques. It’s a game-changer for soup lovers looking for convenience without sacrificing flavour or nutrition.

3. Silky Sauces
Elevate your culinary creations with homemade sauces made in the Nutribullet blender. Blend fresh herbs, garlic, onions, spices, and liquids like olive oil or vinegar for smooth and flavorful sauces. Whether you’re whipping up a pesto, chimichurri, or creamy pasta sauce, the Nutribullet ensures a uniform consistency and vibrant taste, perfect for drizzling over dishes or dipping with crusty bread.

4. Homemade Nut Butters
Why settle for store-bought nut butter when you can easily make your own at home? The Nutribullet excels at transforming roasted nuts into creamy spreads without any added preservatives or sugars. Simply blend your favourite nuts—such as almonds, peanuts, or cashews—until smooth and velvety. You can customize the flavour by adding a pinch of salt, honey, or cocoa powder for a decadent twist.

5. Dips and Spreads
From hummus to guacamole, the Nutribullet simplifies the process of making flavorful dips and spreads. Combine ingredients like chickpeas, tahini, lemon juice, avocados, or roasted vegetables in the blender for creamy and delicious results. Adjust the seasonings and textures to suit your taste preferences, and enjoy homemade dips that are healthier and more economical than store-bought options.

6. Healthy Pancakes
Revamp your breakfast routine by incorporating the Nutribullet into pancake batter preparation. Blend oats, bananas, berries, or other fruits into the batter for added nutrients and natural sweetness. The blender ensures a smooth consistency and even distribution of ingredients, resulting in fluffy and wholesome pancakes that are sure to become a family favourite.

Nutribullet blender, Smoothies

7. Frozen Treats
Indulge in guilt-free frozen desserts with the Nutribullet blender. Blend frozen fruits like bananas, berries, or mangoes with a splash of milk or yoghurt for instant “nice cream” that’s dairy-free and naturally sweetened. You can also get creative by adding nuts, seeds, or chocolate chips for added texture and flavour. It’s a refreshing and healthy alternative to traditional ice cream.

8. Chapman Cocktail: Impress your guests with a Chapman cocktail, bursting with fruity flavours and vibrant colours. Blend fruit juices like orange, pineapple, and grenadine syrup in your Nutribullet blender, then mix with soda water and garnish with fresh fruit for a festive and refreshing drink.

9. Salad Dressings
Elevate your salads with homemade dressings made in the Nutribullet. Combine ingredients like olive oil, balsamic vinegar, mustard, honey, herbs, and spices for personalized dressings that are free from additives and preservatives. The blender ensures a smooth and well-emulsified texture, allowing the flavours to meld together perfectly and enhancing the freshness of your salads.

10. Baby Food
For parents looking to provide wholesome and homemade meals for their little ones, the Nutribullet is a game-changer. Easily puree fruits, vegetables, grains, and proteins into smooth and nutritious baby food free from artificial ingredients. You can batch-make and freeze portions for convenience, ensuring your baby gets the best start to healthy eating right from the beginning.

11. Grind Spices
Unlock the full flavour potential of whole spices by grinding them fresh in the Nutribullet blender. From peppercorns to cumin seeds to cinnamon sticks, the high-speed motor pulverizes spices into fine powders, releasing their aromatic oils and intensifying the taste of your dishes. Say goodbye to pre-ground spices and hello to elevated culinary experiences.

12. Flour Substitutes
For those following gluten-free or grain-free diets, the Nutribullet offers a convenient way to make homemade flour substitutes. Blend oats, almonds, coconut, or other suitable ingredients into fine flour suitable for baking. You can use these flours as a one-to-one substitute for traditional flours in recipes, adding a nutritious and flavorful twist to your baked goods.

13. Milk Alternatives
Embrace dairy-free options by making your plant-based milk in the Nutribullet. Blend soaked nuts (such as almonds, cashews, or macadamia nuts) or oats with water, a pinch of salt, and optional sweeteners like dates or maple syrup for creamy and nutritious milk alternatives. Strain the mixture for a smoother texture or enjoy it as is for a richer flavor.

14. Herb Infusions
Impart fresh and aromatic flavours to oils, vinegar, or syrups with homemade herb infusions made in the Nutribullet. Blend fresh herbs like basil, rosemary, thyme, or mint with your chosen liquid base for infused creations that elevate your culinary repertoire. Use these infusions in dressings, marinades, cocktails, or drizzled over roasted vegetables for a burst of flavour.

15. Face Masks
Beyond the kitchen, the Nutribullet can also be used to create natural and nourishing face masks. Blend fruits like bananas, strawberries, or papayas with yoghurt, honey, or avocado for hydrating and revitalizing masks that are gentle on the skin. Apply the mixture to your face, relax for 10-15 minutes, and then rinse off for a spa-like experience at home.
In conclusion, the Nutribullet blender is a versatile and indispensable tool that goes far beyond just making smoothies. From soups to sauces, nut butter to face masks, its capabilities empower you to explore a wide range of culinary and self-care possibilities. Whether you’re a health enthusiast, a busy parent, or a home cook looking to level up your skills, the Nutribullet is sure to become your go-to companion in the kitchen and beyond. So, dust off your Nutribullet and let your creativity flourish as you embark on a journey of delicious discoveries and holistic wellness.

Click on this link to check out our product
Check out our social media platforms

Upgraded Turbocrush Professional Plus Digital Blender BX300

Are you looking for a blender that can handle anything you throw at it? Then the Upgraded Turbocrush Professional Plus Digital Blender BX300 might be your perfect match. This machine blender is designed for serious blending experts and can crush ice, grind fruits and vegetables, and create creamy smoothies easily.

Whether you’re making margaritas, smoothies, sauces, or soups, this commercial blender will guarantee perfectly smooth drinks without unwanted ice or fruit lumps.

It functions as a great multi-purpose blender, perfect for everything from cocktails to spreads and dressings, and boasts plenty of practical, useful qualities to keep your business running smoothly.


Feature Breakdown

Professional Power

2200 Watts Motor: This high-wattage motor tackles even the toughest blending tasks. You can effortlessly crush ice, pulverize frozen fruits and vegetables, and create smooth nut butters.

The BX300 boasts a whopping 2200 watts of professional-grade power. This means it can shred through even the toughest ingredients, making it ideal for frozen drinks, nut butters, and even grinding grains.


Large Capacity

64-Ounce BPA-Free Pitcher: This generous capacity allows you to blend large collections of smoothies, soups, or frozen cocktails, perfect for families or delight. The BPA-free construction ensures safe food contact.

The 64-ounce BPA-free pitcher is perfect for making large quantities of smoothies or soups for the whole family. Whether you just like to meal prep, the BX300 got you covered.


One-Touch Convenience

Digital Control Panel: The user-friendly interface features pre-programmed settings for common blending tasks like smoothies and ice crushing. This facilitates operation and ensures reliable results.

Manual Control Dial: For ultimate blending control, there’s a manual control dial that allows you to adjust speed and power to your desired preference.

The BX300 features a user-friendly digital control panel with pre-programmed settings for smoothies, ice crushing, and more. There’s also a manual control dial for essential blending control.

If you’re looking for a top-of-the-line blender that can handle any blending task, then the BX300 is a great option. However, it’s also a high-priced appliance.


Easy Cleaning

Dishwasher-Safe Blades: The stainless steel blades are detachable for easy cleaning and are dishwasher safe, saving you time and effort.

Simple Pitcher Cleaning: The BPA-free pitcher’s smooth design makes it easy to wipe down by hand or toss in the dishwasher (refer to the manufacturer’s instructions).


Additional Features

Depending on the manufacturer, some models may include a meddle tool for processing thicker ingredients or an extra grinding container for dry ingredients like grains or coffee beans.
Overall, the Upgraded Turbocrush Professional Plus Digital Blender BX300 boasts a powerful motor, a large capacity jug, user-friendly controls, and easy cleaning features, making it a strong rival for your kitchen countertop.


Possible Design Elements

Base Unit: Likely a robust construction with a brushed metal or high-quality plastic base for stability and a sophisticated look.

Motor Housing: May be combined into the base unit effortlessly or have a more Conspicuous housing depending on the overall design aesthetic.

Pitcher: Expected to be a clear BPA-free plastic with a large capacity (64oz) and measurement markings for convenience. The design might favor clean lines and a wider base for stability during blending.

Controls: The digital control panel with pre-programmed settings recommend a modern and user-friendly interface. This could be a touch panel or buttons with an LED display.

Overall Style: Given its high-performance nature, the BX300 is likely to prioritize a modern, functional design that relies towards a professional or high-end kitchen appliance aesthetic.


Here are some additional things to consider:

Color: Without specific information, it’s difficult to say for sure. Black is a common color for high-performance blenders, but there could be other options available.

Material Finishes: Brushed metal accents or a glossy plastic finish are possibilities for the base unit.

Control Panel Design: The layout and button/display design will depend on the manufacturer’s preference.


Finding More Information:

If you’d like to solidify the design and style, searching for the specific model on the manufacturer’s website or authorized retailer sites might provide high-resolution images that display the blender’s design.

Video reviews can also offer a visual perspective on the BX300’s aesthetics.
While specifics are limited, hopefully, this gives you a better idea of what the Upgraded Turbocrush Professional Plus Digital Blender BX300 might look like on your kitchen surfaces.


How to Use

While a physical manual would provide the most accurate instructions, here’s a general guide on how to use the Upgraded Turbocrush Professional Plus Digital Blender BX300 based on its typical features:

Before Using for the First Time:

Wash the pitcher and blades: Most blenders come with instructions on washing the parts before first use. This usually involves washing the pitcher with warm soapy water and rinsing thoroughly. Check the manufacturer’s instructions for dishwasher compatibility of the pitcher and blades.

Construct the blender: Place the pitcher on the motor base, ensuring it clicks securely into place.


Using the Blender:

Add ingredients: Add your desired ingredients to the pitcher, ensuring they stay below the maximum top up line marked on the pitcher.

Choose a setting (if applicable): If your BX300 has pre-programmed settings, select the appropriate button for your recipe (e.g., Smoothie, Ice Crush). These settings will automatically adjust blending speed and period.

Manual control (optional): If your model has a manual control dial, you can modify the speed and power to your preference. Start on a lower setting and gradually increase as needed.

Blend: Turn on the blender by pressing the labeled button or adjusting the dial.

Use the tamper (optional): If your BX300 comes with a meddle tool, use it to push down thick ingredients towards the blades for equal blending, especially when processing frozen ingredients.

Stop blending: Once you’ve achieved the desired consistency, turn off the blender.


Additional Tips:

Cut ingredients into smaller pieces: This will help the blender process them more effectively.

Start on low and gradually increase speed: This helps prevent ingredients from getting stuck and allows the motor to adjust to the load.

Don’t overload the blender: Exceeding the maximum top up line can strain the motor and lead to rough blending.

Add liquids first: This helps create a vortex that pulls ingredients down towards the blades.
Take breaks when blending for longer periods: This allows the motor to cool down and prevents overheating.


Easy and Quick CleanUp

The Upgraded Turbocrush Professional Plus Digital Blender BX300 seems designed for easy cleaning, with dishwasher-safe blades and a potentially user-friendly pitcher design. Here’s a breakdown of the general cleaning process:

Before you begin, always unplug the blender before cleaning.

Cleaning the Pitcher:

Deconstruct the pitcher: Most pitchers remove from the motor base by twisting or lifting. Check your user manual for specific instructions.

Check for dishwasher compatibility: The BX300 likely has a BPA-free plastic pitcher. Look for dishwasher-safe symbols below the pitcher or consult the user manual.

Dishwasher safe: If the pitcher is dishwasher safe, place it on the top rack for cleaning.

Hand wash: If it’s not dishwasher safe, wash the pitcher with warm, soapy water and a soft sponge. You can also fill the pitcher with warm soapy water and blend for 30 seconds to loosen any stuck-on remnant. Rinse the pitcher thoroughly afterward.


Cleaning the Blades:

The BX300 most likely has dishwasher-safe, removable stainless steel blades. Double-check the user manual for confirmation.

Dishwasher safe: Place the blades on the top rack of the dishwasher for cleaning.

Hand wash: If not dishwasher safe, carefully hand wash the blades with warm, soapy water. Use caution as the blades are sharp. You can also fill the pitcher with warm soapy water and blend for 30 seconds to help loosen residue around the blades. Rinse the blades thoroughly afterward.


Cleaning the Base Unit:

1. Wipe down the exterior of the motor base with a damp cloth to remove any spills or splatters.

2. Do not drench the base unit in water.


Drying:

Allow all components to dry completely before reconstructing the blender. You can leave the pitcher and blades on a drying rack or towel dry them.

Additional Tips:

To remove stubborn odors, you can fill the pitcher with equal parts water and white vinegar, and blend for 30 seconds. Let the mixture sit for a few minutes, then empty and wash the pitcher as usual.

Baking soda can also be used to remove tough stains. Make a paste with baking soda and water, and apply it to the stained areas of the pitcher. Let it sit for a few minutes, then scrub with a soft sponge and rinse thoroughly afterwards.


Tips and Recipes

The Upgraded Turbocrush Professional Plus Digital Blender BX300’s powerful motor and large capacity make it suitable for a wide range of recipes. Here are some recipe ideas that can leverage the BX300’s strengths:

Smoothies:

This is a classic use for any blender, and the BX300’s power is perfect for creating creamy and uniform smoothies. You can experiment with a variety of fruits, vegetables, yogurt, protein powder, and nut butter combinations to create endless healthy and delicious options.


Here are some specific smoothie ideas:

Green Power Smoothie: Mix spinach, kale, banana, mango, pineapple, and coconut water for a vitamin-packed and refreshing drink.

Berry Blast Smoothie: Blend together frozen berries, yogurt, honey, and a splash of milk for a tasty and antioxidant-rich smoothie.

Peanut Butter Protein Smoothie: Use the BX300’s power to pulverize peanut butter into a smooth consistency for a protein-rich smoothie with banana, milk, and cocoa powder.


Frozen Drinks:

The BX300’s ice crushing capabilities make it perfect for creating restaurant-quality frozen cocktails and mocktails. The large capacity allows you to prepare drinks for crowds as well.

Here are some recipe ideas:

Margaritas: Frozen margaritas are a breeze with the BX300. Simply blend tequila, lime juice, orange liqueur, and ice for a perfect summer drink.

Daiquiris: Frozen daiquiris are another refreshing option. Blend rum, lime juice, simple syrup, and ice for an exquisite treat.

Virgin Pina Coladas: For a non-alcoholic option, blend pineapple chunks, coconut milk, cream of coconut, and ice for a tropical satisfaction


Soups and Dips:

The BX300 can be used to create smooth and creamy soups and dips. Its power allows you to blend cooked vegetables and other ingredients into a homogeneous combination.

Here are some recipe ideas:

Tomato Soup: Blend cooked tomatoes, garlic, herbs, and broth for a quick and flavorful homemade soup.

Hummus: The BX300 can handle chickpeas, tahini, olive oil, lemon juice, and garlic easily to create a smooth and delicious hummus.

Cauliflower Soup: Roast cauliflower florets and blend them with broth, spices, and cream cheese for a healthy and delicious soup.


Nut Butters and Spreads:

The BX300’s motor can grind nuts into creamy nut butters. You can test with different types of nuts, such as peanuts, almonds, or cashews, to create homemade nut butters without any added sugar or sodium.

In addition to nut butters, the BX300 can also handle grinding other ingredients for spreads, such as:

  1. Roasted red peppers for a energetic and flavorful spread for sandwiches or crackers.
    2. Fresh herbs with olive oil and garlic for a homemade pesto
    .
    Remember, these are just a few ideas to get you started. With the Upgraded Turbocrush Professional Plus Digital Blender BX300’s power and versatility, the recipe possibilities are endless!

Here are some additional tips for finding recipes suitable for the BX300:

  1. Look for recipes that call for a high-powered blender. These recipes will benefit from the BX300’s ability to crush ice and grind ingredients.

2. Online recipe websites often have filters that allow you to search for recipes based on appliance type. Look for filters for “blender” or “high-powered blender.”

3. Consider the pitcher size when choosing recipes. The BX300’s large 64-ounce pitcher allows you to make large groups of drinks or soups, perfect for entertaining or meal prepping.


What to avoid while using the upgraded Turbocrush professional Plus digital blender

Here are some things to avoid when using the Upgraded Turbocrush Professional Plus Digital Blender BX300 to protect both you and your appliances:

Exceeding Capacity:

The BX300 has a large 64-ounce pitcher, but it’s still important not to overload it. Check the pitcher’s markings for the maximum top up line and avoid exceeding it. Overfilling can strain the motor and lead to uneven blending
.
Hot Liquids:

While the BX300 might handle warm ingredients, avoid blending very hot liquids. The heat can damage the plastic pitcher and potentially warp it. Let hot liquids cool slightly before blending.

Dry Ingredients:

The BX300 isn’t designed for dry grinding. While some models might come with an additional grinding container, check the user manual before using the BX300 for dry ingredients like spices or coffee beans. Using it for dry grinding can damage the blades and potentially shorten the lifespan of the motor.

Hard or Frozen Objects:

The BX300 is powerful, but it’s not meant to crush extremely hard objects like ice cubes straight from the freezer. Break large ice cubes into smaller pieces before blending to avoid putting unnecessary pressure on the motor and blades. Similarly, avoid blending large bits of very hard fruits or vegetables.

Empty Blending:

Never run the blender empty. This can damage the blades and motor. Always add some liquid or ingredients to the pitcher before turning it on.

Continuous Use:

While the BX300 is a powerful blender, avoid using it for longer periods without breaks. Check the user manual for recommendations on appropriate blending times and allow the motor to cool down in between long blending sessions. This will prevent overheating and prolong the life of the appliance.

Improper Cleaning:

Not cleaning the blender properly can lead to build-up, odors, and dull blades. Always follow the manufacturer’s instructions for cleaning the pitcher, blades, and base unit.

Ignoring the Manual:

The user manual is a valuable resource. Take the time to read it thoroughly before using the BX300. The manual will provide specific instructions on using the pre-programmed settings, proper care and cleaning procedures as well.
By following these tips, you can ensure safe and optimal use of your Upgraded Turbocrush Professional Plus Digital Blender BX300.

In conclusion, The Upgraded Turbocrush Professional Plus Digital Blender BX300 appears to be a feature-rich and powerful blender designed for serious blending tasks.

Overall, the Upgraded Turbocrush Professional Plus Digital Blender BX300 is a strong contender for those looking for a powerful and versatile blender.

By weighing the pros, cons, and your specific needs, you can decide if the Upgraded Turbocrush Professional Plus Digital Blender BX300 is the right choice for your kitchen. So what’s the holdup? Order your upgraded Turbocrush professional plus Digital Blender now!

centrifugal juicers, Juicing recipes

What is a centrifugal juicer? Your Comprehensive Guide to Efficient Juice Extraction

The efficiency, speed, and user-friendly nature of centrifugal juicers have propelled them to popularity among health enthusiasts and home juicing enthusiasts alike. If you’re new to the world of juicing or looking to delve deeper into the mechanics of centrifugal juicers, this comprehensive guide is tailored just for you. In this article, we’ll take an in-depth look at centrifugal juicers, exploring their operational principles, benefits, drawbacks, effective usage tips, and guidance on choosing the right juicer for your needs.

  1. Understanding Centrifugal Juicers

Let’s begin with the fundamentals. A centrifugal juicer is a type of juicing appliance designed to extract juice from various fruits and vegetables using centrifugal force. The process involves shredding the produce into a pulp using a high-speed spinning blade and then separating the juice from the pulp through centrifugal motion. The extracted juice is collected in one container, while the pulp is expelled into a separate compartment for convenient disposal.


centrifugal juicers, juicing


2. How Does a Centrifugal Juicer Work?
Understanding the operational mechanism of a centrifugal juicer is crucial to appreciating its efficiency. Let’s break down the process step by step:

  • Feeding the Produce
    The juicing process starts by placing fruits or vegetables into the feeding chute of the juicer. Most centrifugal juicers feature wide chutes capable of accommodating whole or large pieces of produce, reducing the need for pre-cutting and saving time.
  • Shredding and Grinding
    Once the produce enters the chute, it encounters a sharp spinning blade or multiple blades. These blades swiftly shred and grind the produce into a pulp, ensuring efficient extraction of juice from the ingredients.
  • Centrifugal Separation
    As the blade continues to spin at high speed, centrifugal force comes into play. This force pushes the pulp against the sides of a perforated strainer basket, allowing the juice to pass through the strainer and into a collection chamber. Meanwhile, the pulp remains trapped inside the basket.
  • Juice Collection
    The freshly extracted juice flows seamlessly into a separate container attached to the juicer, ready for immediate consumption or further processing in recipes.
  • Pulp Disposal
    Simultaneously, the leftover pulp accumulates in another compartment or container within the juicer. Many modern centrifugal juicers feature automatic pulp ejection systems, making pulp disposal a hassle-free task.

3. Pros and Cons of Centrifugal Juicers
Centrifugal juicers offer several advantages and drawbacks compared to other types of juicers. Let’s delve into these aspects in detail:

  • Pros
    Speed: Centrifugal juicers operate at high speeds, making them ideal for quick juice extraction and perfect for busy individuals with limited time.
    Wide Feeding Chute: The presence of a wide chute reduces prep time as it accommodates whole fruits and vegetables, minimizing the need for chopping or slicing.
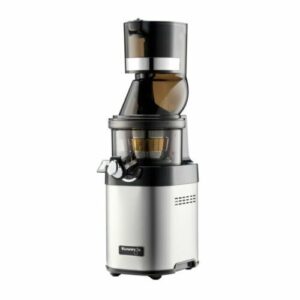
    Affordability: Centrifugal juicers are often more budget-friendly compared to masticating or triturating juicers, making them accessible to a wide range of consumers.
    Easy to Clean: Many centrifugal juicers come with dishwasher-safe parts and simple assembly, streamlining the cleaning process and enhancing user convenience.
  • Cons:
    Oxidation: The high-speed spinning action of centrifugal juicers can introduce more oxygen into the juice, leading to quicker oxidation and potential nutrient loss. It’s recommended to consume the juice immediately for optimal freshness.
    Leafy Greens Handling: While centrifugal juicers excel at processing most fruits and firm vegetables, they may struggle with leafy greens like kale or spinach, resulting in lower juice yields.
    Noise Level: Due to their high-speed motors, centrifugal juicers can be noisier during operation compared to slower-speed juicers, such as masticating juicers.
    Limited Juice Yield: Some users may find that centrifugal juicers produce less juice and drier pulp compared to masticating or triturating juicers, especially when juicing leafy greens or softer fruits.

4. Tips for Using a Centrifugal Juicer Effectively
To maximize the performance of your centrifugal juicer and obtain the best results, consider implementing the following tips:

Use Fresh Produce: Opt for fresh, ripe produce to ensure the best-tasting and most nutrient-rich juice.
Alternate Ingredients: To prevent clogging and enhance juice extraction, alternate soft and hard ingredients while juicing.
Immediate Consumption: Consume the freshly extracted juice immediately to retain maximum freshness and nutrient content.
Prompt Cleaning: Rinse and clean your juicer components promptly after use to prevent residue buildup and maintain optimal juicing performance.
Experiment with Recipes: Explore diverse juicing recipes by combining various fruits, vegetables, and herbs to create unique flavour profiles and maximize health benefits.

centrifugal juicers, Juicing recipes

5. Choosing the Right Centrifugal Juicer for You

When choosing a juicer, you should consider the following factors:

1. Motor Power: Make sure to choose a juicer with a powerful motor that can handle a variety of produce effectively.
2. Chute Size: Look for a juicer with a wide feeding chute to accommodate whole fruits and vegetables, reducing prep time.
3. Ease of Cleaning: Prioritize juicers with dishwasher-safe parts and simple assembly for hassle-free cleaning.
4. Brand Reputation: Research reputable brands that are known for producing high-quality centrifugal juicers with reliable performance.
5. User Reviews: Consider reading user reviews and testimonials to gauge customer satisfaction and gather insights into real-world experiences.

Centrifugal juicers are a convenient and efficient way to extract fresh juice at home. By understanding how they work, the benefits and drawbacks they offer, and adopting effective juicing techniques, you can enjoy delicious and nutritious juices that cater to your taste and health goals. So, go ahead and start juicing!

Click here to check out the Top 10 Power Blenders on Amazon for Weight Loss: Your Ultimate Guide

For more juicing tips, recipes, and product recommendations, chat with us on WhatsApp and stay tuned to our blog for regular updates and insights into the world of healthy living. Cheers to vibrant health and flavorful juices!

weight-loss

Top 10 Power Blenders on Amazon for Weight Loss: Your Ultimate Guide

Are you embarking on a weight loss journey and searching for the ideal blender to assist you in reaching your goals? Amidst the vast array of options available on Amazon, selecting the perfect power blender can feel like a daunting task. But fret not! Within this comprehensive guide, we’ll delve into the top 10 power blenders found on Amazon that are specifically crafted to aid in weight loss endeavours. From robust motors to resilient blades, these blenders are certain to become indispensable tools in your kitchen. Let’s dive in and uncover the finest blenders for your health and wellness expedition.

  1. NutriBullet Pro 900 SeriesThe NutriBullet Pro 900 Series stands as a powerhouse blender lauded by health enthusiasts for its remarkable blending capabilities. Boasting a 900-watt motor and extractor blades, it effortlessly transforms fruits, vegetables, and nuts into nutrient-rich smoothies. Its compact size makes it perfect for individuals seeking single-serving smoothies for their weight loss regimen.


Weight loss


    2. Vitamix E310 Explorian Blender

The Vitamix E310 Explorian Blender is renowned for its high-performance blending prowess and durability. Equipped with a 2-horsepower motor and aircraft-grade stainless steel blades, it easily blends even the toughest ingredients. The variable speed control empowers you to achieve your desired smoothie consistency, making it a versatile choice for weight loss enthusiasts.


  1. Ninja Professional Countertop BlenderThe Ninja Professional Countertop Blender offers a budget-friendly yet potent option for those in search of a reliable blender for weight loss purposes. Featuring Total Crushing blades and an 1100-watt motor, it crushes ice and blends ingredients smoothly to craft delicious and nutritious smoothies. The included single-serve cups enhance its on-the-go convenience.


  1. Blendtec Classic 575 BlenderThe Blendtec Classic 575 Blender, designed for home use, boasts commercial-grade blending capabilities. Its 1575-watt motor and patented blade design ensure consistent blending results, making it ideal for smoothies, soups, and sauces. Pre-programmed cycles and a pulse feature offer precise blending control, catering to individual preferences for weight loss smoothies.

5. Oster Versa Blender

The Oster Versa Blender merges affordability with performance, making it a popular choice for health-conscious individuals. With a 1400-watt motor and stainless steel blades, it blends a variety of ingredients, including leafy greens, fruits, and protein powders, to create nutrient-packed smoothies. Variable speed control and a pulse function provide blending versatility.


  1. Hamilton Beach Power Elite BlenderThe Hamilton Beach Power Elite Blender offers an affordable option without compromising quality. Featuring a 700-watt motor and Wave-Action blending system, it delivers smooth and consistent results for your weight loss smoothies. Multiple blending settings cater to different ingredients and preferences, making it a versatile addition to your kitchen.


  1. Breville BBL620 Fresh & Furious BlenderThe Breville BBL620 Fresh & Furious Blender marries convenience with performance. Its 1100-watt motor and Kinetix blade system ensure efficient blending of fruits, vegetables, and superfoods for nutrient-rich smoothies. Pre-programmed settings and an LCD simplify usage, enabling you to create customized blends for your weight loss objectives.

Weight loss


  1. COSORI Blender for Shakes and SmoothiesThe COSORI Blender for Shakes and Smoothies represents a compact yet potent blender ideal for individuals on the move. Featuring an 800-watt motor and sharp stainless steel blades, it effortlessly blends frozen fruits, vegetables, and protein powders, making it perfect for weight loss smoothies. Its portable design and BPA-free materials ensure safe and convenient blending.

Weight loss

  1. Nutri Ninja Personal and Countertop BlenderThe Nutri Ninja Personal and Countertop Blender offer versatility in blending options, enabling you to create single servings or larger smoothie batches. Its Auto-iQ technology and 1200-watt motor extract nutrients to deliver nutrient-rich smoothies for your weight loss journey. The included cups with sip and seal lids enhance their on-the-go convenience.


  1. Homgeek Professional BlenderThe Homgeek Professional Blender is engineered for optimal blending performance and versatility. With a 1450-watt motor, variable speed control, and pulse function, it handles a broad range of ingredients to create smooth and creamy weight loss smoothies. Durable blades and BPA-free materials ensure long-lasting use and safety.

In summary, selecting the right power blender is crucial for bolstering your weight loss journey with nutrient-rich smoothies. The aforementioned top 10 power blenders offer an array of features, capacities, and price points to suit diverse preferences and budgets. Whether you favour compact personal blenders or high-performance countertop blenders, Amazon has something for everyone. Invest in a quality power blender today and blend your way to a healthier you!

Why are power blenders essential for weight loss?

Before delving into the specifics of each power blender, let’s understand why these appliances are crucial for anyone on a weight loss journey.

  1. Efficient Nutrient Extraction: Power blenders are designed to break down fruits, vegetables, and other ingredients into a smooth consistency, ensuring optimal nutrient extraction. This is essential for creating nutrient-rich smoothies that support your overall health and weight loss goals.
  2. Versatility: Power blenders come with various settings and features that allow you to customize your blends. Whether you prefer smoothies, soups, sauces, or purees, these blenders can handle a wide range of tasks, making them versatile additions to your kitchen.
  3. Convenience: Many power blenders come with single-serve cups or travel cups, making it convenient to prepare and consume your smoothies on the go. This is particularly beneficial for individuals with busy lifestyles who want to maintain healthy eating habits throughout the day.
  4. Texture Control: With features like variable speed control and pulse functions, power blenders give you control over the texture of your blends. Whether you like your smoothies thick and creamy or light and refreshing, you can achieve the desired consistency with ease.
  5. Durable Design: Most power blenders are built to last, with sturdy construction and durable materials. This ensures that your blender can withstand daily use and continue to deliver consistent results over time.

Now that we understand the importance of power blenders in a weight loss journey, let’s explore each of the top 10 blenders in detail to help you make an informed decision.

Contact us today!!