air fryers

Before You Buy an Air Fryer

20 Factors to Consider Before You Buy an Air Fryer

Air fryers give you healthier versions of our favourite fried foods without sacrificing taste or texture. But before you jump on the bandwagon, here are 20 key factors to consider specifically for American and European kitchens, ensuring you choose the perfect air fryer for your needs.

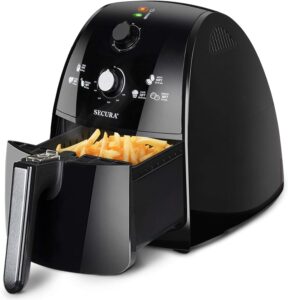
Air fryer

Sizing Up Your Needs:

  1. Capacity: Consider your household size and typical cooking quantities. Choose an air fryer that can comfortably handle the amount of food you usually prepare for meals or gatherings.
  2. Cooking Functions: Look beyond frying! Does the air fryer offer baking, grilling, roasting, and reheating functions to suit your culinary style and desired versatility?
  3. Power Consumption: Energy efficiency matters! Opt for models with lower wattage to minimize electricity costs in your American or European home.
  4. Countertop Real Estate: Check the dimensions of the air fryer to ensure it fits comfortably on your kitchen counter. This is especially important if you have limited countertop space.

Optimizing Performance:

  1. Temperature Range: A wider temperature range allows for greater cooking flexibility. Look for models that reach high temperatures for frying and lower settings for gentler cooking methods.
  2. Cooking Baskets/Trays: Consider the design and capacity of the baskets or trays. Non-stick, easy-to-clean surfaces are ideal, and the size should accommodate your typical portion sizes.

Convenience and Control:

  1. Presets for Busy Cooks: Pre-programmed settings for common dishes can save time and effort, especially for busy lifestyles.
  2. Safety First: Prioritize air fryers with safety features like automatic shutoff and overheat protection. Cool-touch handles are a bonus to prevent accidental burns.
  3. Intuitive Controls: Opt for user-friendly controls with clear digital displays. Easy-to-understand settings make cooking a breeze.

Investing Wisely:

  1. Brand Reputation: Research reputable brands known for quality and reliability. Check customer reviews to gauge user satisfaction and ensure you’re investing in a trusted product.
  2. Extra Versatility: Consider models with additional accessories like baking pans, racks, or skewers. These extras can expand the air fryer’s capabilities and make it even more versatile.
  3. Budget-Friendly: Set a realistic budget based on affordability and desired features. Compare prices and features of different models to find the best value for your money.

Making an Informed Choice:

  1. Read the reviews: Don’t just go by specs! Read customer reviews for insights into real-world experiences with different models.
  2. Noise Level: Consider the air fryer’s noise level during operation. Quieter models are preferable for open-plan kitchens or noise-sensitive environments.
  3. Warranty Coverage: Verify the warranty period and coverage offered by the manufacturer. A comprehensive warranty protects your investment and provides peace of mind.

Cooking Efficiency:

  1. Cooking Time Matters: Research the cooking time required for various recipes in different air fryer models. Faster cooking times are ideal for busy households.
  2. Easy cleaning is key. Look for air fryers with removable, dishwasher-safe parts for hassle-free cleaning and long-lasting performance.
  3. Precise Temperature Control: Consistent and accurate temperature control ensures optimal cooking results for your favourite dishes.

Expanding Your Culinary Horizons:

  1. Recipe Inspiration: Check if the air fryer comes with recipe books, online resources, or cooking guides. These tools can inspire culinary creativity and help you explore a variety of delicious air-fried recipes.

Local Considerations (Remove for American and European audiences):

20. Local Availability: This section is specific to the Nigerian audience and can be removed for the American and European versions.

By carefully considering these 20 factors, you’ll be well-equipped to choose the perfect air fryer for your American or European kitchen. Embrace healthier, more flavorful cooking without sacrificing convenience. From crispy fries and juicy chicken to perfectly baked pastries, an air fryer can be a valuable addition to your culinary adventures!

SHOP: http://primehomegadget.com

FOLLOW: https://www.instagram.com/primevendors/

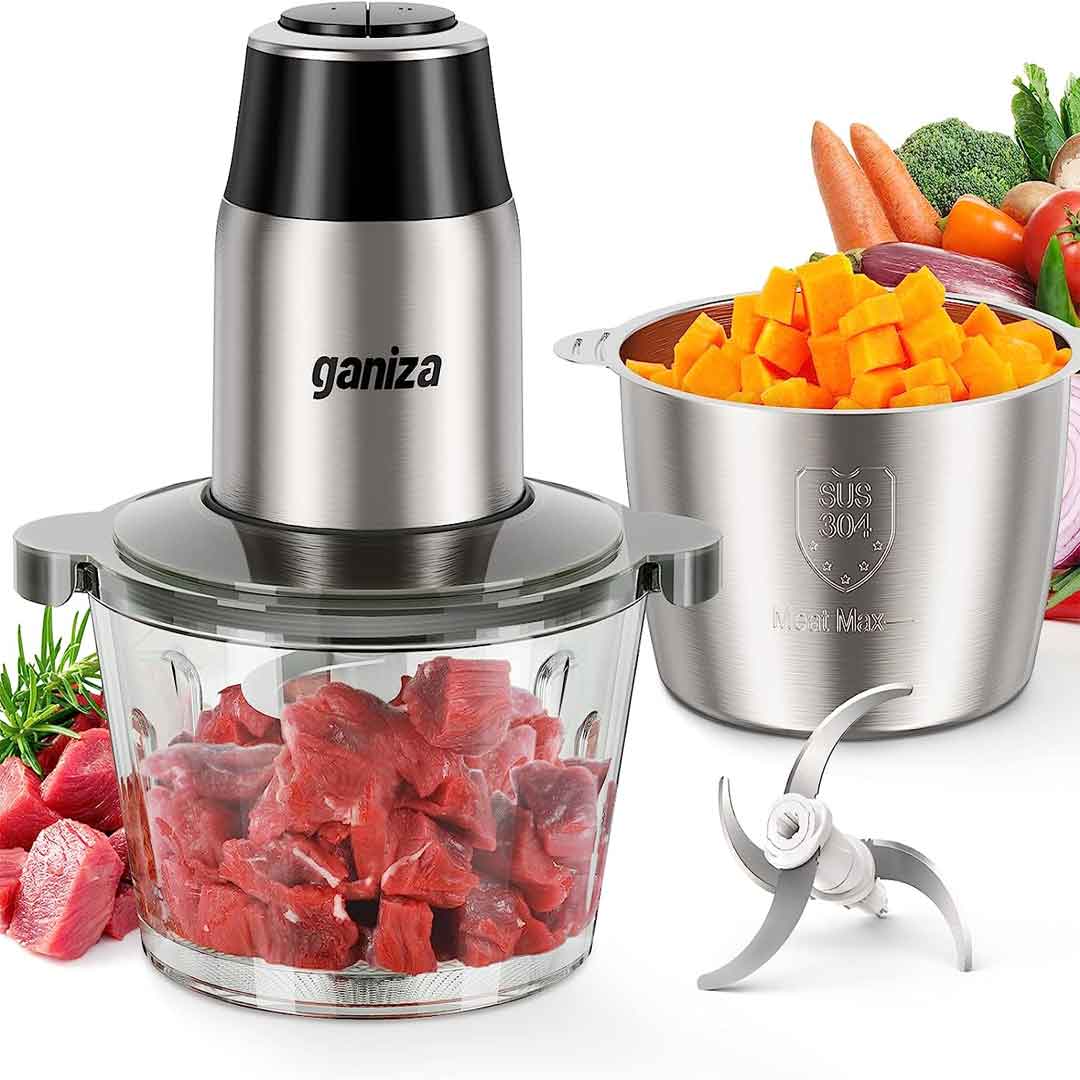
GANIZA Food Processors, Electric Chopper

GANIZA Food Processor: A Time-Saving Kitchen Powerhouse
Do you fear chopping mountains of vegetables for dinner? Or maybe grinding meat for burgers feels like a task? If you’re looking for a way to simplify your food prep routine, the GANIZA Food Processor might be your new best friend in the kitchen.

Multifunctional Marvel

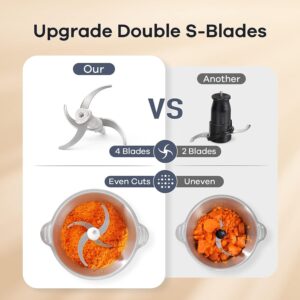
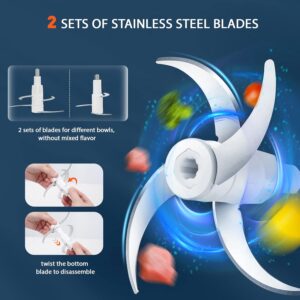
This food processor isn’t a one-trick pony. It boasts a powerful 450W copper motor that handles various kitchen tasks. With two sets of bi-level stainless steel blades, you can:

  • Chop and mince vegetables effortlessly, from delicate herbs to sturdy root vegetables.
  • Grind meat for burgers, meatballs, or even sausage stuffing.
  • Prepare baby food with smooth textures ideal for little eaters.
  • Whip up dips and sauces like salsa or guacamole.
  • Crush nuts for desserts, salads, or homemade nut butter.

Built for Efficiency

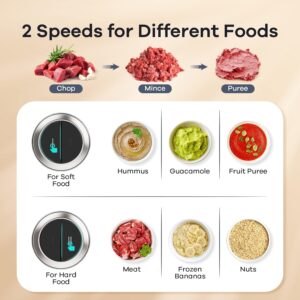
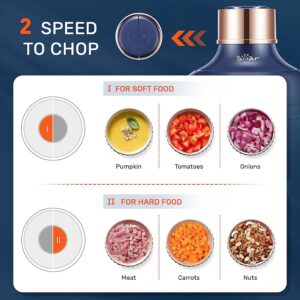
The GANIZA Food Processor comes with two BPA-free bowls: an 8-cup glass bowl for tasks where you can see what’s happening and an 8-cup stainless steel bowl for colder ingredients. Plus, it features two-speed settings, allowing you to tailor the chopping or grinding to the specific food item.

This appliance is designed with convenience in mind. The blades are detachable for easy cleaning, and the simple push-to-start operation makes using it a breeze.

Here’s what users love about the GANIZA Food Processor:

  • Saves time: No more tedious chopping or hand-grinding meat. This food processor gets the job done quickly and effectively.
  • Versatility: With multiple functions and blade options, it handles a wide range of food prep tasks.
  • Easy to clean: The detachable blades and dishwasher-safe bowls make cleanup a breeze.
  • Durable construction: The copper motor and stainless steel blades are built to last.

Is the GANIZA Food Processor Right for You?

If you’re looking for a way to simplify your food prep and enjoy more time in the kitchen creating delicious meals, then the GANIZA Food Processor is definitely worth considering. Its functionality, ease of use, and durability make it a great addition to any kitchen.

Additional points to consider before your purchase:

  • While user reviews mention the power of the motor, some users may prefer a larger capacity for bigger jobs.
  • Consider your budget and compare highlights with other food processor options on the market.

With its combination of power, versatility, and ease of use, the GANIZA Food Processor has the potential to become a valuable asset in your kitchen.


Key Features

GANIZA Food Processor Features:

1. Versatile: Chops, minces, grinds, blends, whips, and crushes.

2. Powerful Motor: 450W copper motor for tough tasks.

3. Double Bowls:

  • 8-cup glass bowl for visibility.
  • 8-cup stainless steel bowl for cold ingredients.

4. Two Sets of Bi-Level Stainless Steel Blades:

  • For chopping/mincing vegetables, meat grinding, and baby food prep.

5. Two-Speed Settings: Tailor power to the food item.

6. Easy to Use: Push-to-start operation.

7. Easy to Clean: Detachable blades and dishwasher-safe bowls.

8. Safe: Automatic shut-off and overheat protection.

9. BPA-Free: Ensures safe food contact.


How to Use the GANIZA Food Processors, Electric Chopper

Conquering the Kitchen with Your GANIZA Food Processor: A Step-by-Step Guide
The GANIZA Food Processor is designed to be user-friendly, and with a little know-how, you’ll be whipping up culinary creations in no time. Here’s a breakdown on how to use it:

1. Assemble the Appliance:

  • Choose the appropriate bowl for your task. The glass bowl allows you to see the progress, while the stainless steel bowl is ideal for colder ingredients.
  • Place the chosen bowl on the motor base, aligning the markings.
  • Attach the desired blade set. Ensure it clicks securely into place.

2. Prep Your Ingredients:

  • Cut larger vegetables or fruits into bits that will fit comfortably in the bowl.
  • For grinding meat, ensure it’s trimmed of excess fat and cut into small cubes.
  • Frozen fruits or vegetables may need some defrosting for easier processing.

3. Power Up and Process:

  • Fill the bowl with your ingredients, ensuring you don’t overload it. Check the user manual for recommended quantities.
  • Place the lid securely on the bowl.
  • Plug in the appliance.
  • Most GANIZA models highlight a push-to-start operation. Simply press the button to begin processing.
  • For some models, you may have two-speed options. Choose “Low” for softer ingredients or delicate tasks like making baby food. Use “High” for tougher ingredients like nuts or meat grinding.
  • If your model has a “Pulse” function, use it for short bursts of chopping, especially for fragile ingredients you want to retain some texture, like salsa or pesto.

4. Time to Stop:

  • For continuous processing tasks, keep an eye on the consistency of your ingredients through the lid (if using the glass bowl).
  • Once you achieve the desired texture, stop the processor.
  • Most models will have a stop button, while some may require you to release the pressure on the start button.

5. Disassemble and Clean Up:

  • Unplug the appliance before dismantling.
  • Carefully detach the lid.
  • Detach the blades by pressing the release button (check your user manual for specific instructions).
  • Empty the bowl.
  • Wash the blades and bowl with warm soapy water. You can also put them in the dishwasher (top rack recommended).
  • Wipe down the motor base with a damp cloth.

Safety Tips:

  • Never operate the food processor without the lid securely secured.
  • Don’t stuff the bowl.
  • Avoid processing very hot ingredients to prevent damage to the appliance.
  • Unplug the appliance before dismantling or cleaning.

By following these steps and checking your user manual for specific model details, you’ll be a GANIZA Food Processor pro in no time!


Tips and Recipes Suitable for the GANIZA Food Processors, Electric Chopper

GANIZA Food Processor: Tips and Recipe Inspiration
The GANIZA Food Processor’s multifunctionality opens doors to a world of culinary possibilities. Here are some tips and recipe ideas to get you started:

Tips:

Pulse vs. Continuous Processing:

  • Use the pulse function for short bursts when you want some texture, like salsa or chopped nuts.
  • Use continuous processing for blending ingredients like baby food or hummus.

Prep Matters: Preparing your ingredients properly ensures smooth processing. Cut vegetables and fruits into similar-sized bits to avoid uneven chopping.

Don’t Overload: Respect the capacity limitations of your bowls. Overfilling can lead to uneven processing or motor strain. Check your user manual for recommended quantities.

Frozen Treats: Frozen fruits can be used to create delicious sorbet or frozen yogurt in your food processor. Just tap them until smooth!

Recipe Inspiration:

  • Fresh and Flavorful Salads: Effortlessly chop vegetables like cabbage, carrots, and peppers for coleslaw or a colorful salad in seconds.
  • Homemade Hummus: Create creamy and delicious hummus from scratch using chickpeas, tahini, olive oil, lemon juice, and garlic.
  • Restaurant-Style Guacamole: Pulse avocados, onions, tomatoes, cilantro, lime juice, and spices for a crowd-pleasing guacamole.
  • Perfect Pesto: Whip up tasteful pesto with fresh basil, pine nuts, garlic, parmesan cheese, and olive oil.
  • Quick and Easy Sauces: From marinara to salsa, the food processor helps create smooth and tasteful sauces in minutes.
  • Baby Food Powerhouse: Prepare healthy and nutritious baby food blends from steamed vegetables, fruits, or cooked meats.
  • Desserts Made Easy: Make pie crusts, crumble toppings, or even nut butter in a flash with the help of your food processor.

Additional Resources:

  • The GANIZA user manual will likely have some recipe suggestions specific to your model.
  • Look online for recipe websites that have filters for “food processor recipes.”
  • Don’t be afraid to venture! The GANIZA Food Processor opens doors to endless recipe possibilities.

With a little creativity and these helpful tips, your GANIZA Food Processor can become your secret weapon in the kitchen, saving you time and effort while creating delicious dishes.


A Cleaning Guide

Keeping your GANIZA Food Processor clean is essential for maintaining hygiene and perfect performance. Here’s a breakdown on how to clean it effectively:

Disassembling for Cleaning:

  • Unplug the appliance: Safety first! Always unplug the food processor before dismantling it for cleaning.
  • Remove the lid: Carefully lift the lid straight up from the bowl.
  • Detach the blades: Most GANIZA models have a release button for the blades. Check your user manual for specific instructions on removing the blades in your model.

Cleaning the Parts:

Blades: Wash the blades with warm, soapy water. You can use a soft bristled brush to remove any stubborn food particles. Be cautious while handling the sharp blades.

Bowl: Wash the bowl with warm, soapy water. Both the glass and stainless steel bowls are dishwasher-safe (place on the top rack recommended).

Lid: Wipe the lid with a damp cloth. You can also wash the lid with soapy water, but avoid submerging the motor base into the water.

Motor Base: Wipe down the motor base with a damp cloth to remove any food remnant. Never submerge the motor base in water or any other liquids.

Drying:

  • Allow all the parts to air dry completely before reconstructing the food processor.
  • You can also use a clean dish towel to pat them dry.

Additional Tips:

  • For tougher stains or food buildup, you can soak the blades and bowl in warm, soapy water for a while before washing them.
  • Don’t use harsh chemicals, abrasive sponges, or scouring pads on any parts of the food processor, as they can damage the surfaces.
  • If your food processor has any nooks or crannies where food particles tend to get lodged, use a cotton wipe dipped in soapy water to clean those areas.

By following these cleaning steps and following the specific instructions in your user manual, you can ensure your GANIZA Food Processor stays clean, hygienic, and functions perfectly for a long time.


What to Avoid when Using the GANIZA Food Processors, Electric Chopper

Here are some things to avoid when using your GANIZA Food Processor to keep it running smoothly and safely:

Don’t Force It:

Overfilling: Resist the urge to stuff too many ingredients into the bowl. Check your user manual for recommended capacities to avoid straining the motor and ensure smooth processing.

Large Chunks: Pre-cut dense vegetables and fruits into manageable pieces before processing, especially for tougher items like root vegetables. This reduces stress on the motor and blades.

Frozen Ingredients: Avoid processing frozen solid ingredients like ice cubes or rock-hard vegetables. These can spoil the blades and strain the motor. Let them melt partially for easier processing.

Hot Ingredients: Hot liquids or ingredients can damage the plastic components of the bowl. Let them cool slightly before processing.

Misusing the Buttons:

  • Continuous Processing for Delicate Chopping: For chores like making salsa or pesto where you want some texture, use the pulse function in short bursts. Continuous processing will turn everything into mush.

General Cautions:

  • Improper Assembly: Ensure all parts are securely attached before starting the motor. This prevents uneven processing and potential safety hazards.
  • Unattended Operation: Never leave the food processor unattended while it’s running. Keep an eye on the consistency of your ingredients and stop the processor when you achieve the desired texture.
  • Wrong Tool for the Job: The GANIZA Food Processor isn’t designed for powerful tasks like mixing dough or grinding large quantities of grains. It’s better suited for chopping, grinding, and blending tasks.
  • Cleaning with Harsh Chemicals: Avoid using abrasive sponges, scouring pads, or harsh chemicals on any part of the food processor, to avoid damaging the surfaces. Stick to warm soapy water and a soft sponge or dishcloth.

By following these tips and following the instructions in your user manual, you can avoid damaging your GANIZA Food Processor and ensure it operates safely and effectively for a long time.

In conclusion, If you’re looking to simplify your food preparation and enjoy more time creating delicious meals, the GANIZA Food Processor is a captivating option. Its powerful motor and multiple blade configurations handle various tasks, from chopping veggies to grinding meat. The user-friendly design with push-to-start operation and dishwasher-safe parts makes it easy to use and clean. Remember to follow the recommended capacities and avoid forcing the appliance for perfect performance and longevity. With a little creativity, this versatile food processor can become your kitchen companion for effortless meal prep adventures.

dehydrators

15 Major Difference with Dehydrators and Air Fryer

Exploring the Culinary Universe: 15 Major Differences Between Dehydrators and Air Fryers

In the world of modern cooking appliances, two contenders stand out for their versatility and ability to transform ingredients into delectable delights: dehydrators and air fryers. While both are powerful tools in the kitchen, they serve distinct purposes and offer unique advantages. Let’s delve into the 15 major differences that set these culinary companions apart, uncovering surprising facts along the way.

1. Primary Function:
– Dehydrators: Designed primarily for removing moisture from foods, preserving their shelf life while retaining nutrients and flavour.
– Air Fryers: Specialize in producing crispy, golden-brown textures using hot air circulation, mimicking the results of deep frying with significantly less oil.

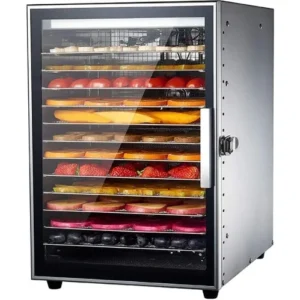
When it comes to food preservation and flavour enhancement, dehydrators are the go-to appliance. They work by circulating warm air around the food at low temperatures, typically between 95°F to 165°F (35°C to 74°C), to gently remove moisture. This process effectively preserves the nutritional content of the food while intensifying its flavour. Dehydrators are commonly used for drying fruits like apples, bananas, and mangoes, creating chewy and concentrated snacks bursting with natural sweetness.

On the other hand, air fryers revolutionize the way we enjoy crispy foods without excessive oil. The magic lies in their rapid air technology, which circulates hot air around the food at high speeds, creating a crispy outer layer while maintaining a moist interior. This method significantly reduces the amount of oil needed compared to traditional deep frying, making air-fried foods healthier without compromising on taste or texture. From crispy fries and chicken wings to crunchy vegetables and even desserts like churros, air fryers offer a guilt-free way to indulge in your favorite fried treats.


dehydrator          Air fryers

2. Versatility:
– Dehydrators: Ideal for creating dried fruits, vegetables, herbs, and jerky, perfect for snacks, trail mixes, and long-term storage.
– Air Fryers: Suited for cooking a wide range of foods, including fries, chicken wings, vegetables, and even desserts like doughnuts and cakes.

One of the key distinctions between dehydrators and air fryers is their versatility in the kitchen. Dehydrators excel at transforming fresh produce into nutritious snacks that are perfect for on-the-go munching or enhancing your culinary creations. You can easily make your own dried fruits such as apricots, raisins, and cranberries, packed with vitamins, minerals, and antioxidants. Additionally, dehydrators are ideal for preserving herbs from your garden, ensuring you have a steady supply of aromatic seasonings year-round.

Air fryers, on the other hand, offer a wide range of cooking possibilities beyond just fried foods. While they excel at creating crispy textures for classics like French fries and chicken nuggets, they also shine in preparing vegetables, meats, seafood, and even desserts. Imagine enjoying perfectly crispy yet tender Brussels sprouts, succulent air-fried salmon fillets, or decadent molten lava cakes, all achieved with minimal oil and maximum flavour.

3. Cooking Time:
– Dehydrators: Typically require extended hours (6–12 hours) to dry foods thoroughly.
– Air Fryers: Cook food relatively quickly, with most dishes ready in 20–30 minutes, making them ideal for busy schedules.

Time is of the essence in today’s fast-paced world, and both dehydrators and air fryers offer efficient cooking solutions suited to different needs. Dehydrators operate at low temperatures over extended periods, ranging from 6 to 12 hours, depending on the type and thickness of the food being dried. While this slow and steady approach ensures thorough dehydration and preservation of nutrients, it requires planning ahead, making it ideal for batch processing or overnight use.

On the contrary, air fryers are designed for speed and convenience, delivering crispy results in a fraction of the time it takes for traditional cooking methods. Most air-fried dishes are ready within 20 to 30 minutes, making them perfect for quick meals or satisfying cravings without a long wait. Whether you’re preparing a weeknight dinner or hosting a last-minute gathering, the rapid cooking capabilities of air fryers save you time and energy without compromising on taste.

4. Texture and Taste:
– Dehydrators: Yield chewy, concentrated flavours ideal for dried fruits and snacks.
– Air Fryers: Produce crispy exteriors while maintaining tender interiors, enhancing the overall taste and mouthfeel.

Texture and taste are paramount in culinary experiences, and both dehydrators and air fryers excel in delivering delightful outcomes. Dehydrators are renowned for creating chewy and intensely flavoured snacks that retain the essence of the original ingredients. Dried fruits like mango slices or apple rings become concentrated bursts of natural sweetness, perfect for snacking, baking, or adding to cereals and granola mixes.

In contrast, air fryers work their magic by achieving the coveted crispy texture associated with deep-fried foods, but with significantly less oil. This innovative cooking method results in golden-brown exteriors that are crunchy and satisfying, while the interiors remain moist and tender. From crispy chicken tenders to crunchy vegetable chips, air-fried dishes boast a delightful contrast of textures that elevate the overall taste experience.

5. Nutrient Retention:
– Dehydrators: Preserve nutrients like vitamins and minerals due to low-temperature drying.
– Air Fryers: Retain nutrients better compared to deep fryers, as they require minimal oil for cooking.

Preserving the nutritional value of foods is a priority for health-conscious individuals, and both dehydrators and air fryers offer advantages in this regard. Dehydrators employ gentle heat and airflow to remove moisture from foods without compromising their nutritional content. This low-temperature drying process helps retain essential vitamins, minerals, and antioxidants present in fruits, vegetables, and herbs, making dried snacks a wholesome choice.

Similarly, air fryers promote healthier cooking by reducing oil consumption while maintaining the desired texture and flavour. Compared to deep frying, which involves submerging food in hot oil, air frying requires only a fraction of the oil, or sometimes none at all, depending on the recipe. This translates to a lower calorie and fat intake, making air-fried foods a preferable option for those seeking healthier alternatives without sacrificing taste or indulgence.

6. Food Preparation:
– Dehydrators: Require slicing foods thinly for even drying.
– Air Fryers: Can accommodate larger pieces of food, reducing preparation time.

Efficiency in food preparation can make a significant difference in the kitchen, and understanding the requirements of dehydrators and air fryers can streamline your cooking process. Dehydrators work best with thinly sliced or uniformly sized pieces of food to ensure even drying. This preparation step is crucial for achieving consistent results and preventing uneven dehydration, especially for fruits, vegetables, and meats.

On the contrary, air fryers offer more flexibility in terms of food size and preparation. They can accommodate larger pieces of food, such as chicken breasts or whole potatoes, reducing the need for extensive slicing or chopping. This convenience not only saves time but also allows for a variety of meal options, from individual servings to family-sized portions, all cooked to perfection with crispy exteriors and juicy interiors.

7. Energy Consumption:
– Dehydrators: Typically consume less energy due to longer drying times.
– Air Fryers: Utilize rapid air technology, requiring more power but cooking food faster.

Energy efficiency is

an important consideration in today’s environmentally conscious world. Both dehydrators and air fryers have distinct energy consumption profiles that cater to different cooking styles and time requirements.

Dehydrators, with their longer drying times ranging from several hours to overnight, are designed to operate at low temperatures consistently. This characteristic results in lower energy consumption compared to appliances that require rapid heating or cooling cycles. While the exact energy usage varies depending on the model and duration of use, dehydrators generally consume less power per hour than air fryers due to their slower and steady operation.

On the other hand, air fryers leverage rapid air technology to cook food quickly and efficiently. The high-speed circulation of hot air ensures even cooking and crispy textures in a fraction of the time required for traditional cooking methods. However, this rapid cooking process may lead to higher energy consumption per hour of use compared to dehydrators. Despite this, the overall energy efficiency of air fryers shines through in their ability to cook meals swiftly, reducing overall kitchen time and energy usage for many households.

8. Storage Space:
– Dehydrators: Generally larger in size, requiring ample counter or storage space.
– Air Fryers: Compact designs make them suitable for smaller kitchens or countertop use.

Kitchen real estate is precious, and the size and design of cooking appliances can greatly impact usability and convenience. Dehydrators, with their trays for spreading out food evenly during drying, tend to be bulkier and occupy more space on countertops or in storage areas. Their larger footprint is ideal for batch processing or preserving larger quantities of food, making them a valuable addition for those with ample kitchen space.

In contrast, air fryers are designed with compactness in mind, featuring a sleek and space-saving design suitable for smaller kitchens or limited countertop areas. Their basket or tray configurations optimize cooking capacity while minimizing the appliance’s overall size. This makes air fryers a practical choice for individuals or families living in apartments, condos, or smaller homes where space optimization is crucial without compromising on cooking capabilities.

9. Cost Consideration:
– Dehydrators: Often more affordable upfront, with a range of models catering to different budgets.
– Air Fryers: Can be pricier, especially high-capacity or feature-rich models, but offer versatility in cooking styles.

Budget plays a significant role in choosing kitchen appliances, and both dehydrators and air fryers offer options across a range of price points to suit diverse financial considerations. Dehydrators, with their simpler designs focused on dehydration functions, are generally more affordable upfront. Entry-level models with essential features can be budget-friendly, making them accessible to those looking to start preserving foods or making homemade snacks without breaking the bank.

On the other hand, air fryers may have a higher initial cost, especially for models with larger capacities or advanced features such as digital controls, preset cooking programs, and additional accessories. However, their versatility in cooking a wide range of foods—from crispy appetizers to main dishes and desserts—adds value and convenience that justify the investment for many households. Furthermore, the potential savings in oil consumption and healthier cooking options contribute to the long-term cost-effectiveness of air fryers.

10. Noise Level:
– Dehydrators: Operate quietly, making them suitable for overnight use.
– Air Fryers: Produce noise due to the fan and heating element, although they are not excessively loud.

Kitchen appliances’ noise levels can impact overall comfort, especially during extended use or nighttime cooking. Dehydrators are known for their quiet operation, with most models producing minimal noise during the drying process. This quiet performance makes them ideal for overnight use, allowing you to set them up before bedtime and wake up to perfectly dried fruits, vegetables, or jerky without disturbances.

On the contrary, air fryers generate some noise due to the fan and heating element working together to circulate hot air and cook food evenly. While the noise level is generally moderate and not excessively loud, it’s worth considering if you prefer a quieter cooking environment. Many users find the noise level of air fryers manageable, especially considering the quick cooking times they offer, allowing for crispy and delicious meals without significant disruptions.

11. Ease of Cleaning:
– Dehydrators: Have removable trays and easy-to-clean components.
– Air Fryers: Require regular cleaning of the basket or tray and internal surfaces.

Maintenance and cleaning are essential aspects of appliance ownership, ensuring longevity and hygienic cooking experiences. Dehydrators are designed with user convenience in mind, featuring removable trays or shelves that are easy to clean and dishwasher-safe in many cases. This design allows for thorough cleaning between uses, preventing residue buildup, and maintaining optimal drying performance.

Air fryers require regular cleaning of their cooking basket or tray, as well as internal surfaces exposed to food and oil splatters during cooking. Most air fryer baskets are non-stick and dishwasher-safe, simplifying the cleaning process. Additionally, wiping down the interior of the air fryer with a damp cloth after each use helps maintain cleanliness and prevents odours. While air fryers may require slightly more frequent cleaning due to cooking oils and food particles, their removable components and straightforward cleaning procedures make maintenance manageable for most users.

12. Cooking Capacity:
– Dehydrators: Can handle large batches of food, making them perfect for preserving seasonal produce or making snacks in bulk.
– Air Fryers: Offer varying capacities, catering to individual servings or family-sized meals.

The cooking capacity of an appliance is crucial, especially for households preparing meals for multiple individuals or occasions. Dehydrators excel at handling large batches of food, making them ideal for preserving seasonal produce or creating snacks in bulk quantities. Whether you’re drying trays of sliced fruits, herbs from your garden, or marinated jerky strips, dehydrators provide ample space and consistent results for batch processing.

Air fryers come in a range of capacities to suit different needs, from compact models suitable for individual servings to larger units capable of preparing family-sized meals. This versatility allows you to choose an air fryer size that aligns with your typical cooking requirements, whether you’re preparing a quick snack for yourself or hosting a dinner party. Consider the cooking capacity that best fits your lifestyle and meal-planning habits when selecting an air fryer.

13. Recipe Adaptability:
– Dehydrators: Recipes are specific to drying foods, with adjustments for temperature and time.
– Air Fryers: Recipes range from traditional fried foods to healthier alternatives, providing culinary creativity.

The versatility of cooking appliances extends to the variety of recipes they can accommodate, allowing for culinary exploration and creativity in the kitchen. Dehydrators focus on recipes tailored to drying foods, with adjustments needed for temperature settings and drying times based on the type of food being processed. From fruit leather and vegetable chips to homemade jerky and dried herbs, dehydrator recipes offer a spectrum of healthy and flavorful options.

Air fryers offer a broader range of recipe possibilities, from classic fried foods like crispy chicken wings and onion rings to healthier alternatives such as air-fried vegetables, seafood, and even desserts. Many air fryer recipes involve minimal oil or utilize healthier cooking techniques, making them appealing to those seeking nutritious yet satisfying meals. The ability to experiment with various seasonings, coatings, and cooking times in an air fryer opens doors to culinary innovation and discovering new favourite dishes.

14. Health Considerations:
– Dehydrators: Promote healthy snacking by preserving nutrients and avoiding added sugars or preservatives.
– Air Fryers: Reduce oil consumption, making them a healthier choice for fried foods without sacrificing taste.


The health-conscious consumer often prioritizes kitchen appliances that support nutritious eating habits without compromising on flavor. Dehydrators play a vital role in promoting healthy snacking by preserving the natural nutrients, vitamins, and minerals present in fruits, vegetables, and herbs. Unlike store-bought dried snacks that may contain added sugars, preservatives, or artificial flavours, homemade dehydrated foods offer a wholesome alternative free from undesirable additives. This makes them an excellent choice for individuals looking to reduce their intake of processed snacks and incorporate more whole foods into their diet.


Air fryers contribute to healthier cooking practices by significantly reducing oil consumption compared to traditional deep frying methods. The hot air circulation technique used in air fryers achieves crispy textures with minimal oil, leading to a lower calorie and fat content in fried foods. This makes air-fried dishes a preferred option for those seeking healthier versions of their favourite fried treats, from crispy chicken tenders and potato wedges to crunchy vegetable chips. By promoting oil-free or oil-reduced cooking, air fryers support a balanced approach to enjoying indulgent foods without compromising on nutritional goals.


15. Culinary Innovation:

– Dehydrators: Enable creativity in making homemade snacks, fruit leathers, and preserving seasonal produce.

– Air Fryers: Inspire culinary experimentation with crispy textures and healthier versions of fried favourites.


Cooking enthusiasts thrive on creativity and experimentation in the kitchen, and both dehydrators and air fryers offer avenues for culinary innovation.


Dehydrators empower users to unleash their creativity by making homemade snacks and preserving seasonal produce at its peak freshness. From crafting fruit leathers and vegetable chips to drying fresh herbs for culinary use, dehydrators open up a world of possibilities for homemade treats and pantry staples. Imagine enjoying a medley of dried fruits in trail mix, adding homemade dried tomatoes to pasta dishes, or creating flavorful herb blends for seasoning various dishes—all made possible with a dehydrator’s versatility.


Air fryers ignite culinary exploration by providing a healthier approach to classic fried favourites while maintaining crave-worthy textures. The ability to achieve crispy exteriors without excess oil extends beyond traditional fried foods to include innovative recipes like air-fried avocado fries, crispy tofu bites, and even dessert creations like air-fried cinnamon sugar doughnuts. This versatility encourages home cooks to reimagine familiar dishes in healthier ways, using less oil and incorporating nutrient-rich ingredients for delicious results.


In conclusion, the 15 major differences between dehydrators and air fryers highlight their unique features, functions, and culinary capabilities. While dehydrators excel in preserving foods’ natural nutrients, creating homemade snacks, and extending shelf life, air fryers offer speedy cooking times, crispy textures, and healthier alternatives to deep-fried foods. Understanding these distinctions empowers individuals to make informed choices based on their cooking preferences, dietary goals, and kitchen space considerations. Whether you’re drying fruits for snacking, air-frying vegetables for a nutritious meal, or experimenting with new recipes, both dehydrators and air fryers serve as invaluable assets in modern kitchens, unlocking endless culinary possibilities.

SHOP: http://primehomegadget.com

FOLLOW: https://www.instagram.com/primevendors/

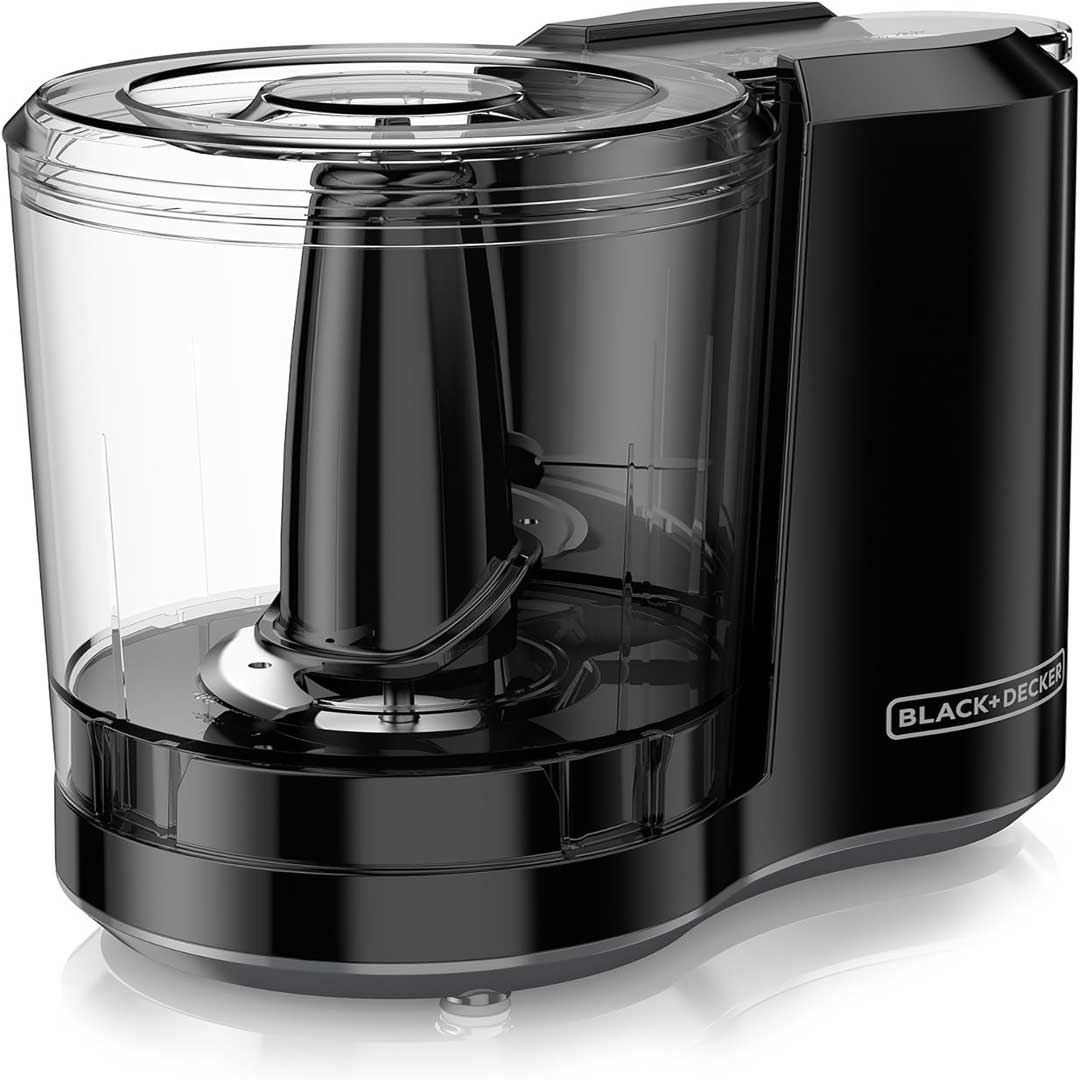
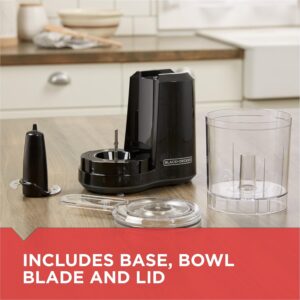
BLACK+DECKER 3-Cup Electric Food Chopper

Make Meal Prep a Breeze with the BLACK+DECKER 3-Cup Food Chopper (HC300B)
Chopping vegetables can be a wearisome chore, slowing you down in the kitchen. If you’re looking for a quick and easy way to handle this task, then the BLACK+DECKER 3-Cup Electric Food Chopper (HC300B) might be your new best friend! This compact and simple appliance is a great addition to any kitchen, offering a simple solution for chopping, mincing, and preparing different varieties of ingredients.

Small but Mighty

This little chopper is optimal for everyday tasks like whipping up dips, salsas, dressings, breadcrumbs, and more. It’s ideal for those who live alone or in small households, or for anyone who wants to avoid breaking out the bulky food processor for smaller jobs.

Simple One-Touch Operation

This food chopper is all about convenience. With its one-touch pulse operation, you have complete control over the chopping process. Simply press the button in short bursts for a coarse chop, or hold it down for a finer consistency. No complex settings or dials to worry about – just effortless chopping at your fingertips.

Sharp Performance

Equipped with a stay-sharp stainless steel blade, the HC300B handles tough ingredients with ease. You can trust this blade to deliver even results, time and time again. Plus, the dishwasher-safe design makes cleanup a breeze – simply toss the detachable parts in the dishwasher for easy cleaning.

Here’s a quick recap of the BLACK+DECKER 3-Cup Food Chopper’s key features:

  • Compact 3-cup capacity – ideal for small kitchens and everyday tasks
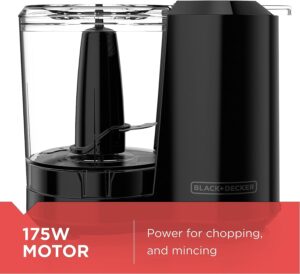
  • Powerful 175-watt motor for effective chopping
  • One-touch pulse operation for easy control
  • Stay-sharp stainless steel blade for consistent results
  • Dishwasher-safe removable parts for easy cleaning

Beyond the Basics

The HC300B isn’t just for chopping vegetables. Here are a few other ways you can use this multifunctional kitchen tool:

  • Grind nuts and seeds for homemade nut butters, pesto, or salad toppings.
  • Create fresh breadcrumbs from leftover bread.
  • Pulse fresh herbs for tasteful sauces and marinades.
  • Prepare baby food effortlessly.

Overall, the BLACK+DECKER 3-Cup Food Chopper (HC300B) is a great option for anyone who wants to refine food prep in the kitchen. Its compact size, user-friendly design, and powerful motor make it an essential tool for home cooks of all levels.


Key Features

Here’s a quick rundown of the features mentioned in the blog post:

  • Compact size: 3-cup capacity, perfect for small kitchens and everyday tasks.
  • Easy to use: One-touch pulse operation for simple control over chopping coarseness.
  • Powerful motor: 175-watt motor for effective chopping of various ingredients.
  • Sharp blades: Stay-sharp stainless steel blade ensures consistent chopping performance.
  • Easy cleaning: Dishwasher-safe detachable parts for effortless cleanup.

Additional features not mentioned in the blog:

  • Ergonomic design: May include a soft grip handle for comfortable use (depending on the model).
  • Safety features: May have a safety locking lid to prevent accidental operation (depending on the model).
  • Oil holes: May have a lid with small holes for adding oil during food processing, like making dressings (depending on the model).


How to Use your BLACK+DECKER 3-Cup Food Chopper (HC300B)

Here’s how to use the BLACK+DECKER 3-Cup Food Chopper (HC300B):

1. Prepare your ingredients:

  • Wash and cut your ingredients into pieces that will fit comfortably in the chopper bowl. Pre-cutting larger vegetables like carrots or potatoes will ensure they chop evenly.

2. Assemble the chopper:

  • Place the blade assembly in the bottom of the chopper bowl. Make sure it’s securely attached (check the manual if needed).
  • Add your chopped ingredients to the bowl.

3. Chop with control using the pulse function:

  • Attach the lid to the bowl securely. There might be a locking mechanism depending on the model, so ensure it’s properly locked for safe operation.
  • Plug in the chopper.
  • Use the one-touch pulse operation to chop your ingredients. Here’s how the pulse function typically works:

> Short pulses will result in a coarser chop. Give the motor short bursts (think fractions of a second) to get the desired texture.

> Holding down the button for longer pulses will create a finer mince.

4. Stop when you reach the desired consistency:

  • Constantly monitor the chopping process through the clear bowl (if available) to avoid over-chopping.
  • Once you’ve achieved the desired consistency, release the pulse button and unplug the chopper.

5. Empty the chopped ingredients and clean:

  • Carefully detach the lid and blade assembly.
  • Transfer the chopped ingredients to a bowl or container.
  • The BLACK+DECKER 3-Cup Chopper (HC300B) typically has dishwasher-safe removable parts (bowl, lid). Check the manual for specific cleaning instructions for your model. You can wash the blade assembly by hand using warm soapy water, but be cautious of the sharp blades.

Safety Tips:

  • Always unplug the chopper before dismantling or cleaning.
  • Never put your fingers near the blades while the chopper is plugged in.
  • Don’t process hot liquids in the chopper bowl.
  • Make sure the lid is properly secured before operating the chopper.

By following these steps, you can use your BLACK+DECKER 3-Cup Food Chopper safely and efficiently to simplify your food prep chore in the kitchen!


Tips and Recipes Suitable for the BLACK+DECKER 3-Cup Electric Food Chopper

Tips and Recipes for the BLACK+DECKER 3-Cup Food Chopper (HC300B)
The BLACK+DECKER 3-Cup Food Chopper (HC300B) is a handy tool for speeding up food prep. Here are some tips and recipe ideas to get the most out of your chopper:

Tips:

  • Pulse, don’t hold: Use the pulse function to achieve the desired consistency. Holding down the button for too long can turn your ingredients soft.
  • Pre-cut large or hard ingredients: For best results, pre-cut larger or harder vegetables like carrots, potatoes, or nuts into bits that fit comfortably in the bowl.
  • Chop soft and hard ingredients separately: If your recipe involves both soft and hard ingredients, chop them separately to avoid over-processing the softer ones.
  • Use the chopper for repetitive tasks: Chopping herbs, garlic, or onions can be tiresome. This chopper is perfect for these repetitive tasks, freeing you up for other parts of your recipe.
  • Make your own breadcrumbs: Refresh old bread by pulsing it into breadcrumbs for breading, stuffing, or topping casseroles.
  • Grind spices: You can grind small quantities of spices like peppercorns or cumin seeds in the chopper.
  • Think beyond savory: The chopper isn’t just for vegetables. Use it to make fresh fruit salsas, dips, or even baby food.
  • Oil for dressings: Some models have lids with oil holes, allowing you to drizzle oil while pulsing ingredients for dressings or sauces.

Recipes Suitable for the Chopper:

Fresh and flavorful:

  • Pico de Gallo: Throb together tomatoes, onions, cilantro, lime juice, and jalapenos (optional) for a quick and refreshing salsa.
  • Herb Pesto: Mix fresh basil, pine nuts, garlic, parmesan cheese, and olive oil for a delicious pesto sauce for pasta or sandwiches.
  • Guacamole: Chop avocado, onions, cilantro, lime juice, and tomatoes for a classic guacamole.

Easy and delicious dips:

  • Hummus: While a traditional hummus recipe might call for a food processor, you can use the chopper to make a smaller batch of hummus with chickpeas, tahini, olive oil, lemon juice, and garlic.
  • Whipped Feta Dip: Mix crumbled feta cheese, olives, olive oil, lemon juice, and oregano for a creamy and tasteful dip perfect with pita bread or vegetables.

Time-saving shortcuts:

  • Garlic Paste: No more mincing! Simply throw garlic cloves in the chopper for a quick and easy garlic paste for your recipes.
  • Chopped Nuts for Baking: Use the chopper to chop nuts for cookies, cakes, or salads.
  • Breadcrumbs: Reprocess leftover bread into fresh breadcrumbs for breading or topping casseroles.

Remember, these are just a few ideas to get you started. With a little creativity, you can use your BLACK+DECKER 3-Cup Food Chopper to tackle a variety of food prep tasks in the kitchen.

A Cleaning Guide

The BLACK+DECKER 3-Cup Electric Food Chopper (HC300B) is dishwasher safe, but for a more complete picture, here’s a detailed cleaning tip:

Easy Cleaning with a Dishwasher

The beauty of the HC300B is its dishwasher-safe parts. After chopping your ingredients, simply dismantle the unit (check the manual for proper disassembly if needed). The bowl, lid, and blade can be placed on the top rack of your dishwasher for a thorough cleaning.

For a Hand-Washing Option

If you prefer to wash by hand, you can do so with warm, soapy water. Just be sure to unplug the appliance first! Gently wash the bowl, lid, and blade with a dishcloth or sponge. For any stubborn food bits, you can use a soft-bristled brush.

Drying: After washing by hand or dishwasher, be sure to dry all the parts completely with a clean dishcloth before storing the appliance. This will help prevent rust and the growth of bacteria.

Remember: Never submerge the base of the motor unit in water! Wipe it down with a damp cloth if needed.


What to Avoid When Using the BLACK+DECKER 3-Cup Electric Food Chopper

Here are some things to avoid when using the BLACK+DECKER 3-Cup Electric Food Chopper (HC300B):

Exceeding Capacity:

  • Don’t overload the chopper. The 3-cup capacity is there for a reason. Chopping too much food at once can strain the motor and lead to uneven results. It can also make it harder to achieve the desired consistency for your ingredients.

Wrong Ingredients:

  • The HC300B isn’t meant for super hard ingredients. Avoid using it for things like very hard nuts, coffee beans, or ice cubes. These can spoil the blade and potentially overload the motor.

Hot Ingredients:

  • Let hot ingredients cool down before chopping them in the HC300B. The heat can warp the plastic bowl and potentially damage the appliance.

Continuous Use:

  • The HC300B is designed for pulsed operation. Don’t hold down the button for a long period of time. This can overheat the motor and shorten the longevity of the appliance. Take short bursts with the pulse control for perfect results.

Improper Assembly:

  • Always ensure the chopper is properly constructed before use. An improperly assembled chopper can leak, malfunction, or even cause injury. Check the user manual for proper assembly instructions.

Forcing the Lid:

  • If the lid doesn’t fit easily, don’t force it. There might be food particles stuck or the chopper might not be assembled correctly. Check for any blockages and reconstruct if necessary.

By following these tips, you can ensure your BLACK+DECKER 3-Cup Electric Food Chopper (HC300B) operates safely and effectively for a long time.

In conclusion, the HC300B by BLACK+DECKER is a win for small kitchens and quick chopping tasks. Its one-touch pulse and dishwasher-safe parts make food preparation easy. Just remember to avoid overloading and stick to softer ingredients for optimal outcome.

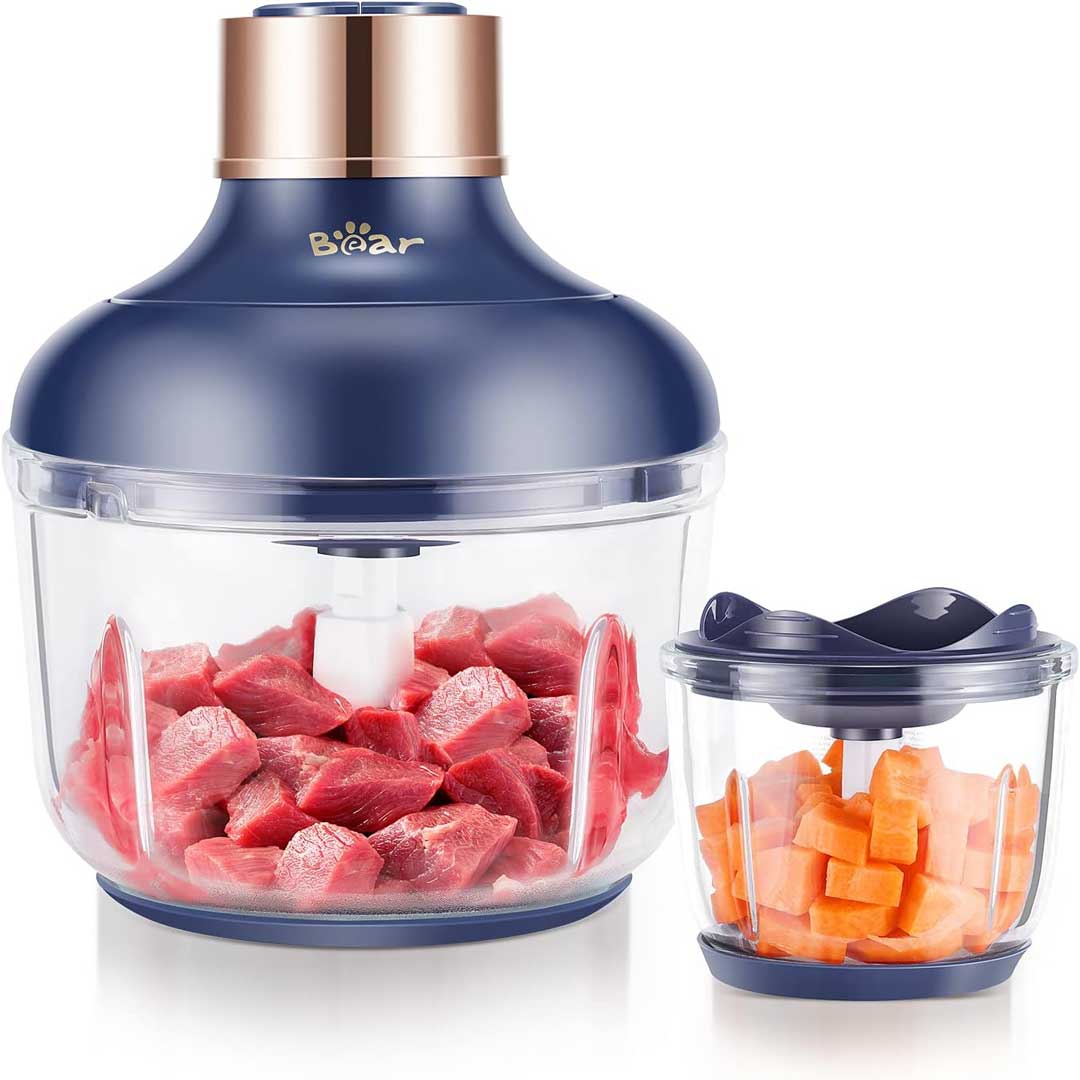
Bear Electric Food Processor Chopper

Bear Food Processor: Unleash Your Inner Chef with Effortless Chopping!
Looking to refine your meal prep and conquer kitchen duties with ease? Look no further than the Bear Food Processor! This versatile appliance is your one-stop shop for chopping, grinding, and blending different kinds of ingredients.

Power and Performance:

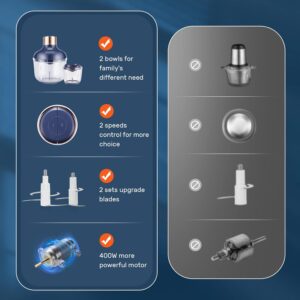
This mighty machine packs a punch with a 400-watt motor, making it proficient at handling both soft and hard ingredients. Whether you’re shredding cheese, mincing vegetables, or grinding meat, the Bear Food Processor handles the job effortlessly.

Double the Bowls, Double the Convenience:

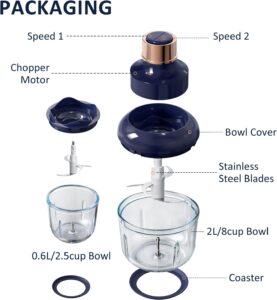
This food processor comes equipped with not one, but two BPA-free glass bowls! The large 8-cup bowl offers ample capacity for family meals and set cooking, while the smaller 2.5-cup bowl is perfect for prepping smaller portions or chopping herbs and spices. Plus, the clear glass construction allows you to monitor your ingredients as you process them.

Versatility at Your Fingertips:

With two sets of sharp stainless steel blades, this food processor provides lasting versatility. Use the chopping blades for tasks like onions, vegetables, nuts, and cheese. Switch to the S-blades for finer grinding, perfect for creating meat pastes, breadcrumbs, or baby food.

Effortless Control, Delicious Results:

The user-friendly design features a simple 2-speed control knob. Choose the low setting for delicate tasks like chopping fruits and vegetables, or switch to the high setting for tougher ingredients like nuts and hard cheeses.

Cleaning Up a Breeze:

The dishwasher-safe parts make cleanup a breeze! Simply fling the blades and bowls into the dishwasher and relax – the Bear Food Processor takes care of the rest.

More Than Just Chopping:

This food processor isn’t just for chopping vegetables! It can be your secret weapon for creating dips, sauces, salsas, and even homemade nut butters. Plus, it lets you whip up perfectly smooth baby food for your little one.

The Bear Food Processor: Your Kitchen Companion

With its powerful motor, double bowls, versatile blades, and user-friendly controls, the Bear Food Processor is a beneficial addition to any kitchen. It saves you time and effort, allowing you to focus on the joy of cooking and creating delicious meals for your family.

Ready to unlock a world of culinary possibilities? Invest in the Bear Food Processor today!


 Key Features

Bear Food Processor: Feature Breakdown
Here’s a quick breakdown of the key features of the Bear Food Processor, identifying the benefits for potential buyers:

Double Bowl System:

  • 8-cup bowl: Ideal for meal prep and processing large quantities of ingredients.
  • 2.5-cup bowl: Optimal for smaller tasks like chopping herbs, spices, or preparing baby food.
  • BPA-free glass bowls: Allow easy monitoring of ingredients during processing.

Powerful Performance:

  • 400-watt motor: Handles a variety of ingredients with ease, from soft fruits to hard cheeses and nuts.
  • Effortless chopping, grinding, and puréeing: Saves time and reduces the use for prep work manually.

Versatile Blades:

Two sets of stainless steel blades:

  • Chopping blades for vegetables, nuts, cheese, etc.
  • S-blades for finer grinding of meat, breadcrumbs, or baby food.

Offers a variety of functions: Meets different food preparation needs.

Simple 2-Speed Control:

  • Low setting: Ideal for brittle tasks like chopping fruits and vegetables.
  • High setting: It is perfect for tougher ingredients like nuts and hard cheeses.
  • User-friendly control knob: It ensures ease of operation for any skill level.

Easy Cleaning:

  • Dishwasher-safe parts: Blades and bowls can be cleaned in the dishwasher without wasting time and effort.
  • Reduces post-processing cleanup.

Additional Benefits:

  • Time-saving: Minimizes food prep time compared to manual chopping and grinding.
  • Versatility: Creates dips, sauces, salsas, nut butters, and baby food.
  • Compact and convenient: Stores easily on your countertop.

This highlight breakdown provides potential buyers with a clear understanding of the Bear Food Processor works and benefits it offers.


How to Use the Bear Electric Food Processor Chopper

Conquering the Kitchen with Your Bear Food Processor: A Step-by-Step Guide
The Bear Food Processor is your key to effortless food prep! Here’s a step-by-step guide to get you started and unleashing your inner chef:

Before You Begin:

1. Wash the Parts: Wash the bowl and blades with warm soapy water before your first use. Dry them thoroughly before attaching.

2. Choose Your Bowl: Select the suitable bowl size based on your recipe. The 8-cup bowl is perfect for larger batches, while the 2.5-cup bowl is perfect for smaller tasks.

3. Pick Your Blade: Select the blade set that best fits your needs. The chopping blades are designed for vegetables, nuts, cheese, etc., while the S-blades are for finer grinding of meat, breadcrumbs, or baby food.

Assembly and Operation:

1. Place the Bowl: Securely position the chosen bowl onto the motor base, positioning the markings.

2. Attach the Blades: Carefully insert the chosen blade set into the center shaft of the bowl, ensuring it clicks securely into place.

3. Add Your Ingredients: Place your prepared ingredients into the bowl. Remember, don’t overload the processor for perfect results. Check your user manual for recommended quantities.

4. Secure the Lid: Put the lid firmly on top of the bowl, matching the tabs with the slots on the motor base.

Chopping and Processing:

1. Power Up: Plug the appliance into a power outlet and select your desired speed using the control knob.

2. Pulse or Hold: For tasks requiring short bursts, use the “pulse” function by repeatedly pressing the button. For continuous processing, hold down the button.

3. Process Until Desired Consistency: Briefly pulse or hold the button until your ingredients reach the desired consistency. Avoid over-processing, especially with softer ingredients.

After Use:

1. Turn Off and Unplug: Always turn off the appliance and unplug it from the power outlet before dismantling.

2. Disassemble Carefully: Carefully detach the lid, then remove the blades by holding the plastic center shaft and twisting the blade set counter-clockwise.

3. Cleaning Up: Wash the blades and bowls with warm soapy water. You can also toss them in the dishwasher (top rack recommended). Wipe down the motor base with a damp cloth.

Tips and Tricks:

  • Pre-cut larger vegetables or fruits for easier processing, especially when using the smaller bowl.
  • Pulse chopping is perfect for achieving a chunky salsa or retaining some texture in your ingredients.
  • Use the short pulse function to prevent over-processing softer ingredients like herbs or cooked vegetables.
  • Shred cheese using short pulses to avoid grinding it.
  • For tasks requiring a smooth consistency, like baby food or dips, hold down the button and process for a longer duration.

Safety Reminders:

  • Never operate the appliance without the lid properly secured.
  • Keep hands and utensils away from the blades while the processor is in operation.
  • Unplug the appliance before dismantling or cleaning.

With this guide and a little practice, you’ll be a Bear Food Processor pro in no time! Enjoy creating delicious and healthy meals with the smallest effort.


Tips and Recipes Suitable for your Bear Electric Food Processor Chopper

Bear Food Processor: Tips, Tricks, and Recipes to Unlock Its Potential
Your Bear Food Processor is a multifunctional kitchen companion waiting to be explored! Here are some tips, tricks, and recipe ideas to help you get the most out of it:

Tips and Tricks:

  • Master the Pulse: Don’t underrate the power of the “pulse” function. It’s optimal for achieving a coarse chop for vegetables in salsa or salad, or for maintaining some texture in dips and chutneys.


  • Embrace Short Pulses for Soft Ingredients: Learned from chopping herbs the hard way? Use short pulses for soft ingredients like cooked vegetables or fresh herbs to avoid turning them soft.


  • Grate Cheese Like a Pro: Short pulses are your friend for cheese grating! This prevents the cheese from turning into a powdery mess.


  • Don’t Overload: The Bear Food Processor is powerful, but resist the urge to overload the bowl. This can lead to uneven processing and strain the motor. Check your user manual for recommended quantities for each task.


  • Prepping Makes Perfect: For faster and more effective processing, especially when using the smaller bowl, pre-cut larger vegetables or fruits into manageable bits.


  • Thaw and Drain: For grinding meat, ensure it’s to some extent thawed and any excess moisture is drained to achieve the best results.


  • Unlock Hidden Talents: Your Bear Food Processor can do more than just chop and grind! Use it to make homemade nut butters, breadcrumbs, or even falafel.

Recipes to Put Your Bear Food Processor to the Test:

  • Fresh and Flavorful Pico de Gallo: Throb together chopped tomatoes, onions, cilantro, jalapenos (optional), and lime juice for a quick and Rich salsa.


  • Creamy Homemade Hummus: Roast chickpeas in the oven for added flavor, then mix them in the processor with tahini, lemon juice, olive oil, and garlic for a delicious and healthy dip.


  • Restaurant-Style Guacamole: Skip the pre-made stuff! Pulse together avocados, red onion, tomatoes, cilantro, lime juice, and spices for a fresh and chunky guacamole.


  • Effortless Pesto Perfection: Fresh basil, pine nuts, garlic, parmesan cheese, and olive oil come together in the Bear Food Processor for a vibrant and flavorful pesto sauce for pasta or sandwiches.


  • Delectable Dips and Spreads: From creamy spinach and artichoke dip to chunky black bean and corn salsa, the possibilities are endless. Try out with your favorite ingredients and seasonings!


  • Baby Food Bonanza! The Bear Food Processor is a lifesaver for parents! Steam or cook your favorite fruits and vegetables, then blend them in the processor for a smooth and healthy baby food.

Bonus Tip: Use online resources! Many recipe websites and blogs offer delicious recipes specifically designed for food processors. Explore and discover new ways to use your Bear Food Processor!

With a little creativity and these helpful tips, your Bear Food Processor can become your go-to kitchen gadget for effortless meal prep and creating delicious dishes. Happy cooking!

A Cleaning guide

Keeping your Bear Food Processor clean is easy with its dishwasher-safe parts! Here’s a breakdown of the cleaning process:

Before You Begin:

  • Unplug the appliance: Always ensure the Bear Food Processor is unplugged before detaching and cleaning.

Disassemble:

  • Remove the Lid: Lift the lid straight up and set it aside.
  • Detach the Blades: Hold the plastic center shaft of the blade set firmly. Carefully twist the blade set counter-clockwise to remove it from the bowl.

Cleaning the Parts:

  • Blades and Bowls: These are the dishwasher-safe parts! Place them on the top rack of your dishwasher for a thorough clean. On the other hand, you can wash them by hand with warm, soapy water.
  • Motor Base: Wipe down the motor base with a damp cloth to remove any food debris. Do not immerse the motor base in water or dishwasher.

Drying:

  • After washing, allow all parts to air dry completely before reattaching the Bear Food Processor. This helps prevent moisture build-up and potential malfunctions.

Additional Tips:

  • For stubborn food residue, you can pre-soak the blades and bowls in warm, soapy water before washing them.
  • If you notice any staining on the plastic parts, you can try wiping them down with a solution of baking soda and water to remove stains.
  • Avoid using harsh chemicals or abrasive sponges on any part of the Bear Food Processor, as this can damage the components.

Maintaining Peak Performance:

  • Regularly clean your Bear Food Processor after each use to prevent food build-up and ensure optimal performance.
  • If you notice any dulling of the blades after frequent use, you may consider replacing them for continued smooth and effective processing.

By following these simple cleaning steps, you’ll keep your Bear Food Processor functioning perfectly and ready to handle any food prep task in the kitchen!


What to avoid while using the Bear Electric Food Processor Chopper

Here are some things to avoid while using your Bear Food Processor to ensure safety, prevent damage to the appliance, and achieve the best results:

Safety Precautions:

  • Never operate without the lid: The lid acts as a safety barrier and prevents ingredients from splattering during processing. Always ensure the lid is securely fastened before turning on the appliance.


  • Keep hands and utensils away from blades: This is a general safety rule for any appliance with sharp blades. Avoid reaching into the bowl while the processor is running, and use the feeding chute if adding ingredients during processing.


  • Unplug before disassembling or cleaning: Always unplug the appliance from the power outlet before detaching it for cleaning or replacing blades.

Preventing Damage to the Appliance:

  • Don’t overload the bowl: The Bear Food Processor has a capacity limit. Surpassing this can strain the motor and damage the appliance. Check your user manual for recommended quantities for different tasks.


  • Process in short bursts for hard ingredients: For tough ingredients like nuts or hard cheeses, use the pulse function in short bursts. Continuous processing for a long period of time can put a strain on the motor.


  • Don’t chop very hot ingredients: The heat can damage the plastic components of the bowl and blades. Allow hot ingredients to cool slightly before processing.


  • Avoid processing liquids: The Bear Food Processor is not designed for blending liquids. It’s better suited for chopping, grinding, and blending solid ingredients. For blending tasks, consider using a blender.

Achieving Optimal Results:

  • Don’t over-process soft ingredients: Use short pulses for soft ingredients like herbs or cooked vegetables to avoid turning them soft.


  • Pre-cut large or hard ingredients: Especially when using the smaller bowl, pre-cutting larger vegetables or fruits into manageable pieces can improve processing effectively and avoid putting too much strain on the motor.


  • Thaw and drain meat before grinding: For grinding meat, ensure it’s partially softened and any excess moisture is drained to achieve the best texture and prevent the motor from being overworked.

By following these tips, you can safely operate your Bear Food Processor, avoid damaging the appliance, and achieve the best possible results for your food prep tasks.

In conclusion, invest in the Bear Food Processor and unlock a world of culinary convenience! This multifunctional appliance handles chopping, grinding, and blending tasks with ease, saving you time and effort in the kitchen. Remember to use it safely and keep it clean, and you’ll be a food prep pro in no time!

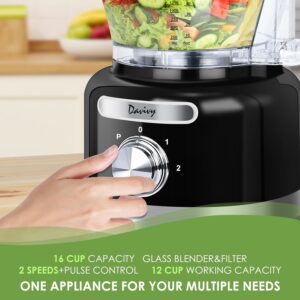
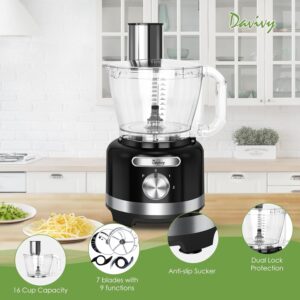
Davivy 16 Cup Multifunction 9-in-1 Food Processor

Davivy 16-Cup Food Processor: A Multifunctional Kitchen Powerhouse?
Looking to optimize your kitchen prep and release your inner chef? The Davivy 16-Cup Food Processor might be the answer. This 9-in-1 versatile appliance promises to handle a variety of tasks, from chopping vegetables to mixing dough. But does it live up to the hype? Let’s explore the features and see if this food processor is the perfect addition to your kitchen counter.

Features:

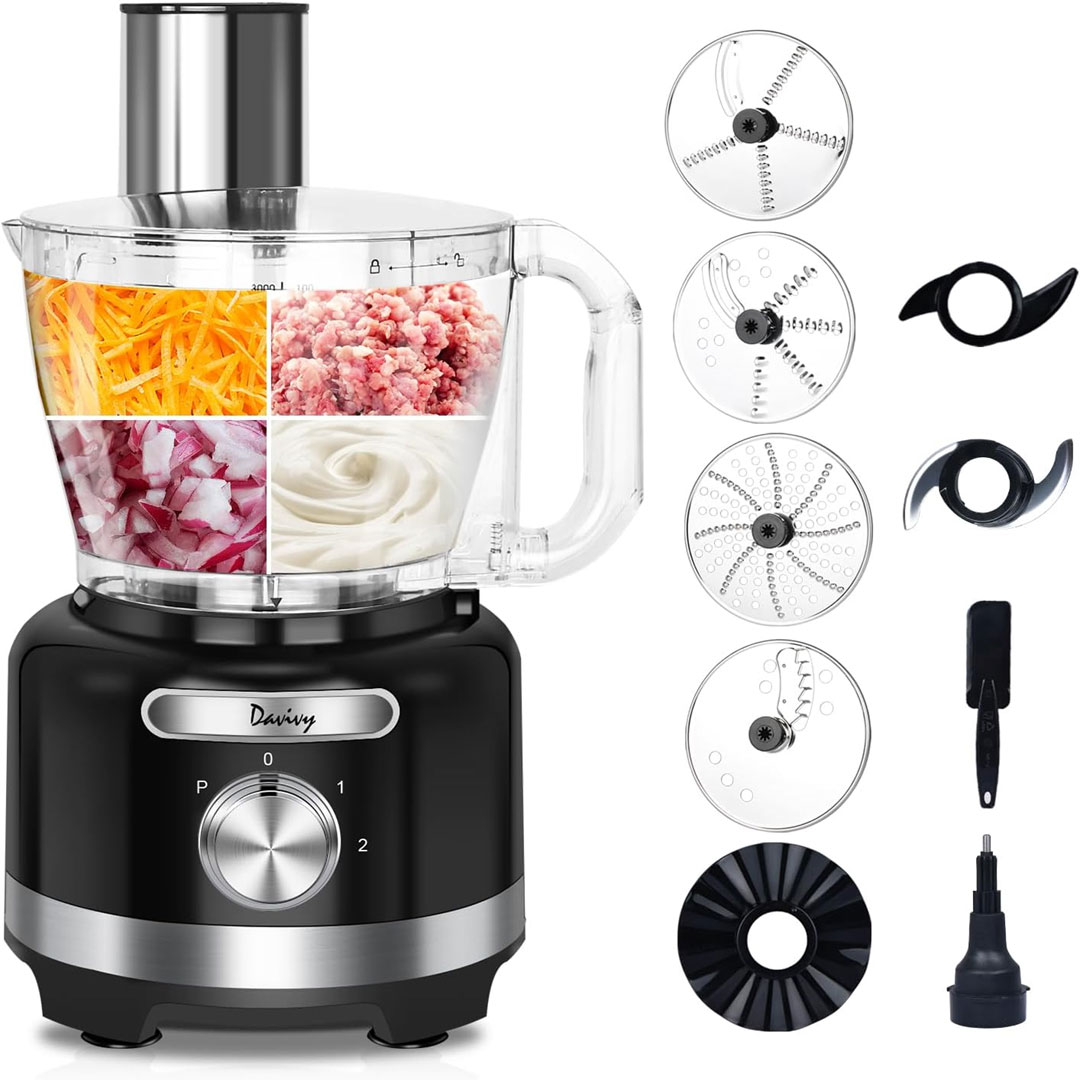
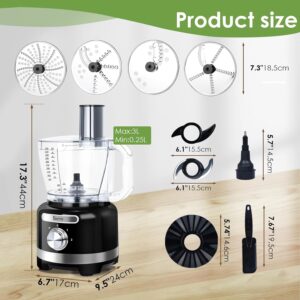
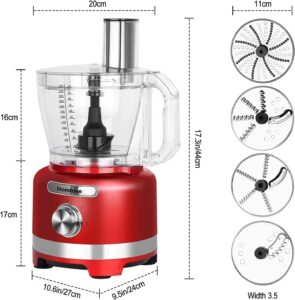
  • Large Capacity: With a spacious 16-cup (3.8L) processing bowl, the Davivy 16-Cup Food Processor can tackle large batches of ingredients, perfect for meal prepping or feeding a crowd.
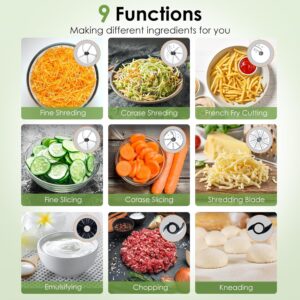
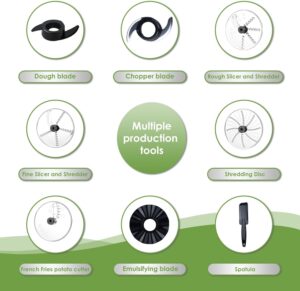
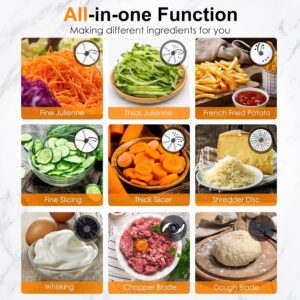
  • Multiple Functions: This food processor boasts 9 functions in one appliance. It can chop, mince, puree, slice, shred, mix dough, and emulsify (think mayonnaise!), and even grind spices and coffee (with the included grinder accessory).
  • Easy to Use: The Davivy 16-Cup Food Processor features simple controls and replaceable attachments for easy operation and cleaning.
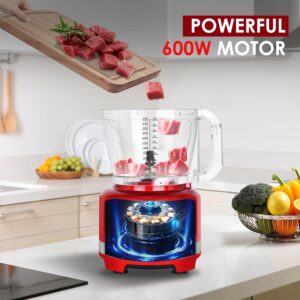
  • Powerful Motor: Equipped with a 600-watt motor, this food processor should be able to handle most food processing tasks with ease.
  • Dishwasher-Safe Parts: Cleanup is a breeze with dishwasher-safe bowls, blades, and attachments.

Potential Benefits:

  • Versatility: The Davivy 16-Cup Food Processor can potentially replace several single-function kitchen appliances, saving you counter space and money.
  • Time-Saving: Chopping, slicing, and shredding by hand can be tedious. This food processor can significantly reduce your prep time.
  • Effortless Food Prep: This appliance can make food preparation easier, especially for those with limited hand strength or proficiency.

Things to Consider:

  • Limited Reviews: There are currently not many reviews available for the Davivy 16-Cup Food Processor, making it difficult to scale user experience and long-term longevity.
  • Power Consumption: A 600-watt motor might not be as powerful as some high-end food processors. Consider your processing needs to see if this motor is sufficient.
  • Noise Level: Food processors can be noisy. There is no information available about the noise level of this specific model.

The Verdict

  • The Davivy 16-Cup Food Processor offers a fascinating offer: a feature-packed appliance at a potentially affordable price. However, with the lack of extensive user reviews, it’s difficult to say for certain if it delivers on its promises.

Here’s what we recommend:

  • Do your research: Look for reviews from esteemed sources to get a better understanding of the product’s performance and durability.
  • Consider your needs: Think about the tasks you’ll be using the food processor for most often. Does this appliance offer the functions you need?
  • Compare to similar products: See how the Davivy 16-Cup Food Processor piles up against other food processors in terms of features, price, and user reviews.

By carefully considering these factors, you can decide if the Davivy 16-Cup Food Processor is the right fit for your kitchen.


How to Use the Davivy 16 Cup Multifunction 9-in-1 Food Processor

Unleashing the Davivy 16-Cup Food Processor: A Step-by-Step Guide
The Davivy 16-Cup Food Processor promises to be a Proficient kitchen companion. But with its multiple functions and accessories, using it for the first time might seem Disconcerting. Here’s a breakdown to get you started:

Preparation:

1. Read the manual: This might seem obvious, but the manual will provide specific instructions and safety precautions for using your Davivy Food Processor.

2. Wash the parts before first use: Wash the bowl, lid, blades, and any attachments you plan to use with warm, soapy water. Rinse and dry them thoroughly.

General Steps:

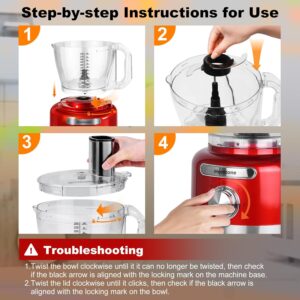
1. Choose your attachment: Depending on the task at hand, select the appropriate blade or attachment. The manual should have a guide for which attachment to use for a particular function (chopping, slicing, etc.).

2. Assemble the food processor: Put the bowl on the motor base and secure it according to the manual’s instructions. Then, attach the chosen blade or attachment to the lid and lock it securely onto the bowl.

3. Prepare your ingredients: Cut larger ingredients into bits that will fit comfortably in the feed chute. This will help prevent jamming and ensure consistent processing.

4. Add ingredients to the bowl: Don’t glut the bowl. Start with a smaller quantity for the first time and add more as needed. Check the manual for recommended quantities for different functions.

5. Power on!: Plug in the food processor and turn it on using the control panel. The manual should explain the different settings and their uses (pulse, continuous processing, etc.).

6. Process your ingredients: Use the pulse function for short bursts for tasks like chopping or grinding. For continuous processing, like blending, hold down the appropriate button until the desired consistency is reached.

7. Turn it off: Once you’ve accomplished the desired results, turn off the food processor and unplug it before detaching.

Tips:

  • Use the pulse function for more control over the chopping or grinding process. Short bursts prevent over-processing.
  • Don’t process hot liquids in the food processor. Let them cool slightly first.
  • For tasks like mixing dough, use the pulse function in short bursts to avoid overheating the motor.
  • Clean the food processor thoroughly after each use. Check the manual for proper cleaning instructions for the bowl, blades, and attachments.

By following these steps and familiarizing yourself with the manual, you’ll be well on your way to mastering your Davivy 16-Cup Food Processor and creating culinary masterpieces in your kitchen!

Tips and Recipes Suitable for your Davivy 16 Cup Multifunction 9-in-1 Food Processor

Davivy 16-Cup Food Processor: Tips and Recipe Ideas to Unlock Its Potential
The Davivy 16-Cup Food Processor boasts a variety of functions, making it a versatile tool for home cooks. Here are some tips and recipe ideas to help you get the most out of this appliance:

Tips:

  • Master the Attachments: Each attachment is designed for a definite purpose. Use the manual’s guide to ensure you’re using the right attachment for the task at hand. This will optimize performance and prevent dulling the blades.
  • Prep is Key: Preparing your ingredients by cutting them into similar-sized bits ensures even processing. This is especially important for functions like chopping and slicing.
  • Embrace the Pulse Function: The pulse function offers more control, especially for tasks like chopping vegetables or grinding spices. Short bursts prevent over-processing and preserve texture.
  • Don’t Overload: Resist the urge to stuff the bowl. Start with smaller sets, especially when working with new ingredients or functions. This helps prevent jamming and motor strain.
  • Clean Up is a Breeze: Most parts are dishwasher-safe, making cleanup a breeze. However, consult the manual for specific cleaning instructions for each attachment.

Recipe Ideas:

  • Chopping/Mince:
  • Salsa Fresca: Pulse chopped tomatoes, onions, cilantro, jalapenos (optional) for a vibrant and flavorful salsa.
  • Homemade Veggie Burgers: Effortlessly chop vegetables like mushrooms, peppers, and onions for delicious veggie burger patties.
  • Fresh Pesto: Pulse together garlic, pine nuts, Parmesan cheese, and fresh basil leaves for a flavorful pesto sauce.

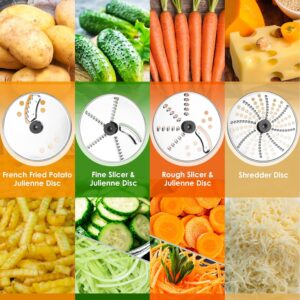
Slicing/Shredding:

  • Coleslaw: Shred cabbage and carrots for a quick and refreshing coleslaw side dish.
  • Potato Salad: Effortlessly slice potatoes for potato salad or hash browns.
  • Zucchini Noodles: Use the spiralizing accessory(if included) to create healthy and trendy zucchini noodles.

Doughing:

  • Pizza Dough: Skip the hand-mixing! This food processor can handle the task of creating pizza dough in minutes.
  • Pie Crust: Prepare flaky and delicious pie crust using the dough function.
  • Cookies and Pastries: The food processor can help blend ingredients for cookie dough, scones, or other pastry recipes.

Other Functions:

  • Hummus: Use the pulse function to create smooth and creamy homemade hummus.
  • Guacamole: Quickly whip up fresh guacamole by blending avocados, lime juice, onions, and cilantro.
  • Salad Dressings: Combine oil and vinegar with your favorite herbs and spices for homemade salad dressings.

These are just a few ideas to get you started. With its versatility, the Davivy 16-Cup Food Processor can handle a wide range of recipes, helping you save time and effort in the kitchen. Don’t be afraid to experiment and explore new culinary creations!

Additional Tips:

  • Look for online recipe resources specifically designed for food processors. Many websites offer recipe ideas with recommended attachment usage and processing times.
  • Once you’re comfortable with the basics, explore more challenging recipes that use Davivy’s versatility.
  • Remember, practice makes perfect! The more you use your food processor, the more comfortable and confident you’ll become in the kitchen.

A Cleaning Guide

Keeping Your Davivy 16-Cup Food Processor Sparkling Clean
The Davivy 16-Cup Food Processor simplifies food prep, but doesn’t let cleanup become a task. Here’s a guide to maintaining your appliance and ensuring it stays clean for future culinary adventures:

General Cleaning:

1. Unplug the appliance: Safety first! Always unplug your food processor before detaching it for cleaning.

2. Disassemble the food processor: Remove the lid, bowl, blades, and any attachments you used. Check the manual for proper detaching instructions.

3. Bowl and Lid: Wash the bowl and lid with warm, soapy water. You can use a soft sponge or dishcloth for scrubbing. Rinse thoroughly and dry completely before reassembling. Some manuals may recommend putting the bowl and lid on the top rack of your dishwasher for easy cleaning. Double-check your manual for specific dishwasher instructions.*

4. Blades and Attachments: Blades can be particularly sharp, so handle them with care. Wash them carefully with warm, soapy water. You can use a soft brush to clean any food remnants stuck around the blades. Rinse thoroughly and pat them dry completely before reassembling. Never submerge the motor base in water or dishwasher.*

Deep Cleaning:

For tougher stains or odors, you can periodically give your food processor a more thorough cleaning:

  • Wipe down the motor base: Use a damp cloth to wipe down the exterior of the motor base. Do not use abrasive cleaners or submerge the base in water.
  • Deodorize: If there are any lingering odors, you can try wiping down the bowl and lid with a solution of equal parts water and vinegar. Rinse thoroughly and ensure it is completely dried.

Additional Tips:

  • Clean immediately after use: Don’t let food remnant dry on the blades or attachments. This will make cleaning more tough and can also lead to staining.
  • Avoid harsh chemicals: Stick to gentle dish soap and warm water. Harsh chemicals can damage the appliance’s components.
  • Let parts dry completely before storing: Ensure all parts are completely dry before storing the food processor to prevent mold or mildew growth.

By following these cleaning guidelines, you can keep your Davivy 16-Cup Food Processor in spotless condition and ensure it continues to be a valuable asset in your kitchen.

What to Avoid while Using your Davivy 16 Cup Multifunction 9-in-1 Food Processor

Don’t Put a Damper on Your Cooking! Things to Avoid While Using Your Davivy 16-Cup Food Processor

The Davivy 16-Cup Food Processor can be a lifesaver in the kitchen, but to ensure its longevity and effective performance, there are a few things to keep in mind:

Food Processing Faux Pas:

  • Overfilling the Bowl: Resist the urge to stuff the bowl with ingredients. Start with smaller sets, especially when working with new ingredients or functions. This helps prevent jamming and motor strain. The manual should have recommended quantities for different tasks.
  • Processing Hot Liquids: The Davivy 16-Cup Food Processor isn’t designed for handling hot liquids. Let them cool slightly before processing to avoid damaging the appliance.
  • Wrong Attachment for the Job: Each attachment is designed for a specific purpose. Using the wrong one can lead to rough processing, dull blades, or even damage the appliance. Check the manual for the recommended attachment for each task (chopping, slicing, etc.).
  • Forgetting the Pulse Function: The pulse function offers more control, especially for delicate tasks like chopping vegetables or grinding spices. Short bursts prevent over-processing and preserve texture. Don’t just hold down the “on” button and walk away!

Safety Precautions:

  • Sharp Blades, Handle with Care: The blades are sharp! Be careful when handling them during assembly, detaching, and cleaning.
  • Unplug Before Disassembling: Always unplug the food processor before taking it apart for cleaning to avoid accidental activation.
  • Don’t Submerge the Motor Base: The motor base should never be dipped in water or placed in the dishwasher. Wipe it down with a damp cloth for cleaning.
  • Misuse and Abuse: Don’t use the food processor for anything other than its designated purposes.

Ingredient Incompatibility:

  • Very Hard Ingredients: The Davivy 16-Cup Food Processor might not be fit for very hard ingredients like whole nuts or ice cubes. These can damage the blades and motor. If unsure, check the manual for recommendations.
  • Excessively Sticky or Wet Ingredients: Very sticky or wet ingredients like thick peanut butter or uncooked whole grains can be difficult for the food processor to handle and may lead to jamming.

By following these simple guidelines, you can avoid common mistakes and ensure safe and effective use of your Davivy 16-Cup Food Processor. Remember, reading the user manual thoroughly is the best way to familiarize yourself with specific recommendations and safety precautions for this appliance.

In conclusion, the Davivy 16-Cup Food Processor offers versatile functions at an attractive price, potentially replacing several kitchen gadgets. Its large capacity and dishwasher-safe parts are convenient. However, the lack of reviews makes long-term durability unsure, and the 600-watt motor might not be the strongest. If you prioritize proven power and reviews, look elsewhere. But for budget-minded cooks seeking versatility, the Davivy could be worth considering.

Breville Sous Chef Pro 16 Cup Food Processor

Breville Sous Chef Pro 16 Cup Food Processor BFP800XL: A Kitchen Powerhouse?
Looking to ditch the knife and chopping board grind? The Breville Sous Chef Pro 16 Cup Food Processor BFP800XL might be your new kitchen best friend. This machine promises to handle all your food prep needs with ease, but does it live up to the hype? Let’s dive in and take a look.

Spacious Capacity and Power

One of the first things that stands out about the Sous Chef Pro 16 is its size. With a huge 16-cup (3.8L) capacity work bowl, it can tackle large sets of ingredients, ideal for family meals or entertaining. The 1200-watt motor provides enough power to chop, puree, shred, and mix with ease, so you don’t have to worry about stalling it down with tough duties.

Versatility is King

The Sous Chef Pro 16 isn’t a one-trick pony. It comes with different kinds of discs and blades, offering a range of functions:

  • Slicing disc: Adjustable from paper-thin to thick cuts, for perfectly smooth slices of vegetables and fruits.
  • Shredding disc: Makes easy work of cheese, potatoes, and more.
  • French fry disc: Ideal for homemade fries, that are crispy on the outside and fluffy on the inside.
  • Dough blade: Mix bread dough effortlessly, saving you time and arm ache.
  • And more: Additional accessories may be available for purchase, like a julienne disc or a dicing kit.

Convenience Features

The Sous Chef Pro 16 boasts some features that make it a user-friendly equipments:

  • Large feed chute: Minimizes the need for pre-cutting most fruits and vegetables.
  • Double processing bowls: A large 16-cup bowl for big jobs, and a smaller 2.5-cup bowl for those smaller chopping duties.
  • LCD display: Shows timer functions and helps keep track of processing time.
  • Dishwasher-safe parts: Makes cleanup a breeze (although always double-check the manual for specific instructions).

Is it Right for You?

The Breville Sous Chef Pro 16 is a powerful and multifunctional food processor that can save you a lot of time and effort in the kitchen. If you’re someone who cooks often, in large groups, or enjoys trying out new recipes, this could be a great investment.

However, keep in mind its size and price tag. This is a significant appliance that takes up counter space, and it comes with a premium price compared to some more basic food processors.

Final Verdict

The Breville Sous Chef Pro 16 Cup Food Processor BFP800XL is a high-quality appliance that offers power, multifunctionality, and convenience. If you’re looking for a kitchen workhorse to handle all your food prep needs, this could be a great option. But, if you’re a casual cook or limited on space and budget, a more basic food processor might suit you better.


Key Features

Breville Sous Chef Pro 16 Cup Food Processor BFP800XL: Feature Breakdown
The Breville Sous Chef Pro 16 Cup Food Processor BFP800XL boasts a range of features designed to make food prep a breeze. Here’s a quick brief of the key highlights:

Capacity and Power:

Large Capacity: 16-cup (3.8L) work bowl allows processing big sets of ingredients.

Powerful Motor: 1200-watt motor tackles tough tasks like chopping nuts or mixing dough.

Versatility:

  1. Multiple Discs and Blades:
  • Slicing disc (adjustable thickness)
  • Shredding disc (for cheese, potatoes, etc.)
  • French fry disc (for homemade fries)
  • Dough blade (for effortless bread dough mixing)
  • Additional accessories available (julienne disc, dicing kit, etc.)

Convenience Features:

  • Large Feed Chute: Minimizes pre-cutting of most fruits and vegetables.
  • Dual Processing Bowls: Large 16-cup bowl for big jobs, and a smaller 2.5-cup bowl for smaller duties.
  • LCD Display: Shows timer functions and processing time.
  • Dishwasher-safe Parts: Easy cleanup (always check the manual for specific instructions).

How to Use your Breville Sous Chef Pro 16 Cup Food Processor

Here’s a general guide on how to use the Breville Sous Chef Pro 16 Cup Food Processor BFP800XL:

Before You Start:

1. Read the Manual: This is vital for ensuring safe and proper use. The manual will have specific instructions on using each attachment and for different functions.

2. Wash and Dry Parts: Make sure all the blades, discs, and bowls are clean and dry before reattaching the food processor.

Assembly:

1. Attach the Work Bowl: Put the work bowl on the motor base and twist it clockwise until it locks securely.

2. Insert the Blade or Disc: Choose the Suitable Blade or disc for your task. Place it on the drive shaft in the work bowl, Making sure it sits flat.

3. Lock the Lid: Place the lid on the work bowl and turn the top section clockwise to lock it into place.

Using the Food Processor:

1. Prepare Your Ingredients: Cut bigger fruits and vegetables into bits that can fit comfortably through the feed chute.

2. Pulse or Process: The Sous Chef Pro 16 offers two processing options:

  • Pulse: Use the pulse function for tasks where you want more control over the chop, like achieving a coarse or fine chop. Short bursts of pulsing give you more accuracy.
  • Process: Use the process function for continuous chopping, shredding, or kneading.

3. Use the Feed Chute: Add your ingredients gradually through the feed chute while the processor is running.

4. Timer (Optional): The LCD display allows you to set a timer for processing. This is helpful for tasks that require Constant processing time, like mixing dough.

After Use:

  • Turn Off and Unplug: Always turn off the food processor and unplug it before detaching.
  • Disassemble: Take off the lid and work bowl. Remove the blade or disc carefully, as they will be sharp.
  • Cleaning: Wash the blades, discs, and bowls with warm soapy water. You can put most parts in the dishwasher (refer to the manual for specifics). Wipe down the motor base with a damp cloth.

Safety Tips:

  • Never operate the food processor without the lid securely locked in place.
  • Always handle the blades and discs with care, as they are very sharp.
  • Don’t overload the work bowl. Process ingredients in batches if necessary.
  • Don’t use the food processor for hot liquids. Let them cool before processing.
  • Unplug the machine before making an attempt to clean it.

Additional Tips:

  • Check the manual for specific instructions on using each attachment and for different recipes.
  • Pulse briefly for a coarse chop and longer for a finer chop.
  • Use the small bowl for tasks requiring smaller quantities.

By following these guidelines, you can safely and efficiently use your Breville Sous Chef Pro 16 Cup Food Processor to optimize your food prep tasks in the kitchen.


Tips and Recipes Suitable for the Breville Sous Chef Pro 16 Cup Food Processor

Tips and Tricks for Your Breville Sous Chef Pro 16:

  • Master the Pulse: This is your friend for achieving the perfect texture. Pulse chopping vegetables gives you more control over the final consistency, whether you want a coarse salsa or a smooth blend.
  • Embrace the Mini Bowl: Don’t underestimate the small bowl! It’s perfect for chopping herbs, garlic, nuts, or processing smaller quantities of ingredients.
  • Pre-cut Wisely: While the feed chute is generous, pre-cutting bulky vegetables like potatoes or large onions will ensure more even processing and prevent jamming.
  • Shred Like a Pro: Use the reversible shredding disc. The larger holes facing up create a coarser shred, perfect for coleslaw. Turn it over for finer shreds for cheese or potatoes.
  • French Fry Fanatic? The French fry disc is a game-changer for homemade fries. Use russet potatoes cut into even sticks and avoid congesting the feed chute for ideal crispy results.
  • Doug Does: The dough blade is a lifesaver for bakers. Simply toss your bread dough ingredients in the bowl and let the machine do the mixing. No more sweaty palms!
  • Cleanup Champion: Take advantage of the dishwasher-safe parts! This makes cleaning a breeze (always double-check the manual for specific instructions).

Recipes Perfect for the Sous Chef Pro 16:
Main Courses:

Homemade Hummus: Whip up a creamy group of hummus in minutes using the mini bowl and pulse function. Ideal for pita bread and veggie dippers.

Slaw Sensations: Use the shredding disc to create colorful slaws for tacos or sandwiches. Try out with different vegetables like cabbage, carrots, and bell peppers.

Falafel Fun: Pulse chickpeas, herbs, and spices in the large bowl to create the base for delicious falafel.

Pizza Perfection: The dough blade makes homemade pizza dough a breeze.

Sides and Snacks:

Guacamole Glory: Pulse avocados, lime juice, onions, and cilantro in the mini bowl for a fresh and coarse guacamole.

Salsa Sensation: Use the pulse function to create your favorite salsa recipe, from coarse pico de gallo to a smooth restaurant-style salsa.

Quick Pickles: Thinly slice vegetables using the slicing disc and transform them into sharp pickles in minutes.

Dipping Delights: Prepare a different kind of dips and spreads using the food processor, from baba ghanoush to creamy spinach and artichoke dip.

Desserts:

Pie Crust Magic: The dough blade lets you create brittle pie crusts in no time. Simply pulse together flour, butter, and water for a perfect pastry base.

Nut Butter Nirvana: Make your own peanut butter, almond butter, or cashew butter in the mini bowl. Customize the texture with the pulse function.

Cake Batter Blitz: Skip the hand mixer! Use the food processor to mix dry cake ingredients and cream butter and sugar for a smooth and soft batter.

These are just a few ideas to get you started. With the Breville Sous Chef Pro 16 Cup Food Processor, the possibilities are endless! Remember to check your manual and explore recipe websites for even more inspiration.

A Cleaning Guide

Keeping your Breville Sous Chef Pro 16 Cup Food Processor clean is vital for maintaining its performance and hygiene. Here’s a breakdown of the cleaning process:

Before You Begin:

  • Unplug the machine: Always ensure the food processor is unplugged before detaching and cleaning.
  • Consult the manual: Double-check the Breville manual for specific cleaning instructions for any accessories you might have.

Disassembly:

  • Remove the lid and work bowl: Twist the top section of the lid counter-clockwise to unlock it, then lift it off the work bowl.
  • Take out the blade or disc: Carefully detach the blade or disc from the drive shaft in the work bowl. Remember, these parts are sharp, so handle them with caution.

Cleaning the Parts:

Blades and discs: Wash these parts by hand with warm, soapy water. You can use a soft bristled brush to remove any food particles stuck on the blades. Never submerge the blades or discs completely in water.

Work bowl and lid: These parts are dishwasher safe (top rack only). However, it’s recommended to occasionally hand wash them, especially for stubborn food remnants.

Motor base: Wipe down the motor base with a damp cloth to remove any spills or splatters. Do not submerge the motor base in water or any other liquids.

Drying:

  • Air dry all parts completely before reattaching the food processor. This will prevent any moisture build-up that could lead to mold growth. You can also use a clean dish towel to pat them dry.

Additional Tips:

  • To remove stubborn food remnants from the work bowl, you can fill it with warm soapy water and let it soak for a while before washing.
  • For particularly tough cleaning jobs, you can add a few drops of white vinegar to the soapy water.
  • Never use harsh chemicals, abrasive cleaners, or scouring pads on any part of the food processor. These can damage the surfaces.

By following these cleaning steps, you can ensure your Breville Sous Chef Pro 16 Cup Food Processor stays clean, hygienic, and functions perfectly for a long time.

What to avoid while Using the Breville Sous Chef Pro 16 Cup Food Processor

Here are some things to avoid while using your Breville Sous Chef Pro 16 Cup Food Processor to prevent damage, injury, and ensure smooth operation:

Don’t Overload:

  • Respect the capacity: The 16-cup bowl is spacious, but resist the urge to overstuff it. This can strain the motor and lead to uneven processing.
  • Process in batches: For large quantities, work in sets to ensure the food processor performs perfectly.

Wrong-Sized Ingredients:

  • Pre-cut wisely: While the feed chute is generous, pre-cutting cumbersome vegetables or fruits into manageable bits helps prevent jamming and ensures even processing.

Putting in the Wrong Things:

  • No hot liquids: The food processor isn’t designed for handling hot liquids. Let them cool completely before processing to avoid damaging the bowl or motor.
  • Frozen ingredients: Avoid processing frozen solid ingredients or ice cubes. The blades are not meant for such heavy-duty use and can become dull or break.
  • Unsuitable tasks: The food processor isn’t a replacement for everything. Avoid using it for tasks like grinding spices or blending smoothies. These are better suited for a dedicated spice grinder or blender.

Forgetting Safety:

  • Pulse with care: While the pulse function is great for achieving desired textures, be mindful not to continuously pulse for long periods. This can overheat the motor.
  • Sharp blades: Remember, the blades are very sharp. Handle them with care during assembly, detaching, and cleaning to avoid cuts.
  • Never operate without the lid: Always ensure the lid is securely locked in place before turning on the food processor to prevent injuries and spillages.

General Misuse:

  • Don’t force it: If the food processor struggles to process something, stop and check for any blockages or if the ingredients are too large. Forcing it can damage the motor.
  • Take breaks: Large batches or continuous processing can strain the motor. Check the manual for recommended usage times and allow the machine to rest periodically to prevent overheating.
  • Not reading the manual: The manual is your friend! It contains valuable information on using specific attachments, recommended processing times for different ingredients, and proper care instructions.

By following these tips, you can avoid common pitfalls and ensure your Breville Sous Chef Pro 16 Cup Food Processor serves you well for a long time.

In conclusion, the Breville Sous Chef Pro 16 is a powerful food processor with a large capacity and several attachments. It can be a great time-saver in the kitchen, but its size and price tag make it a better fit for serious cooks than occasional ones. If you cook a lot and want an all-round tool, this could be a worthwhile investment.

Homtone 16 Cup Food Processor

Homtone 16 Cup Food Processor: A Time-Saving Kitchen Hero?

Looking to spend less time preparing and more time enjoying delicious meals? The Homtone 16 Cup Food Processor might be your new kitchen hero. This equipment boasts a large capacity, diverse functions, and user-friendly features, aiming to facilitate your food prep routine.

Here’s a closer look at what the Homtone 16 Cup Food Processor offers:

  • Spacious Capacity: With a 16-cup bowl, this food processor can handle large amounts, making it perfect for families or those who love to entertain.
  • French Fry Cutter: This is a special feature you don’t find on all food processors. It lets you create restaurant-style french fries at home in seconds.
  • Multiple Functions: The Homtone handles various food prep tasks, including shredding, slicing, doughing, emulsifying, and meat and vegetable chopping. This diversity can significantly reduce your confidence in multiple kitchen tools.
  • Variety of Blades: Equipped with 7 blades, this food processor provides options for coarse and fine chopping, shredding, and slicing.
  • Simple Operation: Three speeds and a pulse function allow for accurate control over the processing power.
  • Safety Features: The Homtone is designed with double locking protection to ensure the machine operates only when properly attached.

Potential Benefits:

  • Saves Time: By activating chopping, shredding, and other tasks, this food processor can significantly cut down on prep time.
  • Effortless Food Prep: No more manually chopping vegetables or mixing dough. This equipment does the hard work for you.
  • Versatility: With its diverse functions and blades, the Homtone can replace several single-use kitchen gadgets, saving on counter space.
  • Large Capacity: Perfect for meal prepping or feeding a crowd.

Things to Consider:

  • Power: At 600 watts, this food processor might not be as powerful as some high-end models. Consider the types of tasks you’ll be using it for to determine if the motor is strong enough.
  • Noise Level: Food processors can be noisy. If noise is a concern, you might want to research sound levels before purchasing.
  • Number of Blades: While 7 blades provides versatility, some users might find them overwhelming.
  • Cleaning: While the parts are advertised as dishwasher-safe, detaching and cleaning multiple blades can be a task for some.

In general, the Homtone 16 Cup Food Processor appears to be a well-equipped appliance for home cooks who want to simplify their food prep. Its large capacity, multiple functions, and user-friendly features make it a rival for busy kitchens. However, consider your needs and preferences regarding power, noise level, and ease of cleaning before making a purchase. Reading customer reviews online can also provide essential awareness into real-world experiences with this food processor.


Key Features

Homtone 16 Cup Food Processor: Feature Rundown

  • The Homtone 16 Cup Food Processor packs a bunch of features designed to optimize your food prep adventures. Here’s a quick review:

Capacity:

  • Generous 16-cup bowl tackles large batches, ideal for families and entertaining.

French Fry Cutter:

  • Unique feature lets you whip up restaurant-worthy french fries in a flash.

Multifunctional Marvel:

  • Handles different kinds of tasks: shredding, slicing, doughing, emulsifying, meat and vegetable chopping. Replaces several single-use tools.

Blades Galore:

  • Equipped with 7 blades for coarse and fine chopping, shredding, and slicing. Provides versatility for different food prep needs.

Simple Operation:

  • Three speeds and a pulse function provide precise control over processing power. Easy to use for beginners.

Safety First:

  • Double locking protection ensures the machine operates only when properly attached, promoting safe use.

Additional Features:

  • Wide food chute allows adding ingredients without pre-chopping everything.
  • Extraction cup feet keep the processor stable on your countertop.
  • Advertised as dishwasher-safe for easy cleaning (although some users might prefer handwashing for blades).

Before You Buy:

  • Consider the 600-watt motor’s strength to ensure it handles your intended tasks.
  • Research noise levels if noise is a concern in your kitchen.
  • 7 blades offer flexibility, but some might find them extreme.
  • Analyze cleaning ease, especially if handwashing multiple blades seems overwhelming.

How to Use your Homtone 16 Cup Food Processor

1. Assemble the Food Processor:

  • Wash and dry all parts before constructing.
  • Check for any diagrams or instructions included with your Homtone for proper placement of the bowl, lid, and blade.

2. Prepare Ingredients:

  • Cut larger fruits and vegetables into bits that can easily fit the feed chute. This prevents clogging. The Homtone’s wide chute might allow adding some ingredients whole (consult manual for size).

3. Choose the Right Blade:

  • The Homtone’s 7 blades offer various options. If you have the manual, check it to identify the appropriate blade for your desired result (chopping, shredding, slicing, etc.) If not, search online for a Homtone 16 Cup Food Processor blade guide.

4. Secure the Lid and Lock:

  • Make sure the lid is properly locked in place for safe operation. Check the Homtone’s specific locking mechanism (twist-lock or latch system).

5. Power On and Select Function:

  • Plug in the food processor and turn it on.
  • The Homtone offers three speeds and a pulse function. Choose the setting based on the task and desired consistency:

Low speed – Soft ingredients or blending.

Medium speed – General chopping, shredding, and slicing.

High speed – Tougher ingredients.

Pulse function – Short bursts for coarse chops or delicate ingredients.

6. Process the Food:

  • Use the food pusher to gently guide ingredients down the feed chute. Avoid forcing large lumps or overloading the processor.

7. Turn Off and Unplug:

  • Once processing is complete, turn off the food processor and unplug it before detaching.

Homtone Specific Tips:

  • French Fry Cutter: This attachment might require specific instructions. Look for a manual or online resources for proper usage.
  • Pulse Function: Use it for more control, especially for fine ingredients.
  • Don’t Overprocess: Stop the processor when your food reaches the desired consistency to avoid squishy results.

Cleaning:

  • Check the Homtone’s cleaning instructions, especially for dishwasher-safe parts.
  • Be careful with the blades; handwashing might be preferred to avoid dulling them.

Safety Reminders:

  • Never operate the food processor with a dull or spoilt blade.
  • Always keep your hands clear of the feed chute while the processor is running.
  • Unplug the food processor before detaching or cleaning.

By following these steps and considering the Homtone’s features, you should be able to use your food processor efficiently. If you locate a manual or specific instructions online, that will provide the most precise details for your model.

Tips and Recipes Suitable for Homtone 16 Cup Food Processor

Tips and Tricks for Using Your Homtone 16 Cup Food Processor:

  • Master the Blades: Each blade attachment serves a specific purpose. Get familiar with what each one does to achieve the ideal results. Check the manual or manufacturer’s website for detailed instructions.
  • Pulse vs. Process: The pulse function is your friend, especially when starting out or chopping fine ingredients. Short pulses give you more control over the final consistency.
  • Size Matters: Pre-cut larger vegetables and fruits to fit comfortably in the feed chute. This ensures even processing and prevents clogging.
  • Frozen is Fine: The Homtone can handle some frozen ingredients. Partially frozen meat makes grinding easier, and frozen fruits are great for making quick sorbets or healthy treats.
  • Don’t Overfill: Repel the urge to stuff the bowl. Start with smaller sets and add more as needed to avoid overloading the motor and ensure even processing.
  • Liquid Love: Use a little liquid, like water or oil, when processing dry ingredients like flour or nuts. This helps create a smoother consistency and prevents the blades from becoming dull.
  • Clean Up Crew: Don’t let leftover bits dry in the bowl. Detach the food processor as soon as possible after use and submerge the blades in warm, soapy water before placing them in the dishwasher (check the manual for dishwasher-safe components).

Recipes for Your Homtone Food Processor:

Homestyle Coleslaw:

Using the shredding disc, this food processor makes quick work of a mountain of cabbage and carrots for a classic coleslaw.

Restaurant-Style Salsa:

Salsa is a breeze with the Homtone. The chopping blade can handle tomatoes, onions, peppers, and cilantro in seconds.

Homemade Pizza Dough:

Skip the pre-made crusts! The Homtone’s dough blade lets you whip up fresh pizza dough in no time.

Creamy Hummus:

The Homtone surpass at making smooth dips and blends. Use the chopping blade to create a restaurant-quality hummus from chickpeas, tahini, olive oil, lemon juice, and garlic.

Perfect Pesto:

Fresh pesto is so easy with the Homtone. The food processor makes light work of grinding pine nuts, garlic, parmesan cheese, and fresh basil leaves into a tasteful sauce.

Dreamy Whipped Cream: Using the blending attachment, you can whip up heavy cream in seconds for decadent desserts or toppings.

These are just a few ideas to get you started. With its versatility, the Homtone 16 Cup Food Processor can be your partner in creating countless delicious dishes. Explore online recipe resources and cookbooks to discover even more possibilities!


A Cleaning Guide

Following safe cleaning practices will help your Homtone 16 Cup Food Processor last for years to come. Here’s a breakdown of the cleaning process:

Disassemble: Unplug the appliance before detaching. Check your user manual for specific instructions, but typically, you can detach the lid, bowl, and blade attachment from the motor base.

Bowl and Lid: The BPA-free bowl and lid are dishwasher safe on the top rack. For harder messes or to avoid lingering odors, you can also wash them with warm, soapy water.

Blades: The blades are also dishwasher safe (top rack), but hand washing is recommended to prevent dulling. Soak the blades in warm, soapy water to loosen any food particles. Use a soft brush to gently clean around the blades, taking care to avoid sharp edges. Never soak the motor base in water.

Motor Base: Wipe down the motor base with a damp cloth to remove any food scraps. Don’t use harsh chemicals or abrasive cleaners, as they can damage the surface.

Drying: Make sure all components are completely dry before attaching the food processor. This helps prevent the growth of mold or mildew. You can leave the parts air dry on a clean dish towel or drying rack.

Additional Tips:

  • Clean the food processor immediately after use to prevent food particles from drying and becoming caked on.
  • If you notice any bleaching on the plastic parts, you can try wiping them down with a solution of baking soda and water.
  • The manual may have specific instructions for dealing with stubborn stains or odors.

By following these simple cleaning tips, you can keep your Homtone 16 Cup Food Processor looking and functioning its best for years to come.

What to Avoid when Using the Homtone 16 Cup Food Processor

Here are some things to avoid when using your Homtone 16 Cup Food Processor to prevent damage, injury, or processing mishaps:

  • Overfilling: Avoid overloading the bowl with too many ingredients. Start with smaller batches and add more as needed. This ensures equal processing and prevents the motor from overloading.
  • Hot Ingredients: The Homtone isn’t designed for processing hot liquids or very hot ingredients. Let hot ingredients cool before processing to avoid deforming the plastic components or damaging the motor.
  • Hard or Frozen Foods: While the Homtone can tackle some frozen items, avoid processing extremely hard or frozen foods like ice cubes or frozen solid ingredients. These can put a strain on the motor and potentially damage the blades. Partially freeze meat for grinding, but melt frozen fruits and vegetables before processing for most recipes.
  • Bony Meats: The Homtone isn’t fit for processing large bones or very tough cuts of meat. These can damage the blades and potentially cause the motor to halt. Cut meat into smaller pieces and remove any large bones before processing.
  • Sticky or Stringy Ingredients: The Homtone may strive with very sticky or wispy ingredients like raw egg whites or uncooked whole cuts of meat. These can gum up the blades and make cleaning difficult.
  • Processing for Too Long: Pulse or chop in short bursts for most chores. Continuously processing for long periods can overheat the motor and damage the appliance.
  • Improper Assembly: Ensure all components are securely fastened before operating the food processor. Double-check that the lid is locked and the blade attachment is correctly inserted according to the manual’s instructions.
  • Wrong Tool for the Job: While versatile, the Homtone has extents. Don’t use it for tasks better suited for other appliances, like grinding coffee beans (use a coffee grinder) or blending hot liquids (use a blender).
  • Forcing the Machine: If the motor struggles or the food processor seems clogged, turn it off immediately. Don’t try to force it to work. Unplug the appliance, resolve the issue (like adding more liquid or processing in smaller batches), and then restart.

By following these precautions, you can get the most out of your Homtone 16 Cup Food Processor and avoid potential injuries or damage to the appliance.

In conclusion, the Homtone 16 Cup Food Processor is a proficient kitchen gadget for home cooks. It chops, slices, shreds, and more, with a big bowl to handle family-sized meals. To keep it running smoothly, use the right blades and clean it well after each use. With a little care, this food processor can become a kitchen essential.

Cuisinart Elemental 13-Cup Food Processor

Cuisinart Elemental 13-Cup Food Processor: Master of Chopping, Dicing, and More! (with Spiralizer Bonus)
Looking to step up your food prep game? The Cuisinart Elemental 13-Cup Food Processor with Spiralizer and Dicer (White) might be your new kitchen hero. This multifunctional appliance boasts a powerful motor and a range of attachments that can handle almost any food prep task imaginable.

Big Bowl, Big Potential

The first thing that stands out about this Cuisinart is the massive 13-cup work bowl. This means you can grate mountains of cheese, chop vegetables for a crowd, or blend enough soup for a whole party. Plus, there’s a handy 4-cup inner bowl for smaller jobs.

Beyond Chopping: Dicing, Spiralizing, and More!

This food processor goes way beyond just chopping. It comes with a dicing disc that creates even cubes perfect for salads, stews, or stir-fries. The real star of the show might be the spiralizer attachment, which lets you transform vegetables into nutritious, veggie noodles.

Power and Control

The 550-watt peak power motor ensures that Cuisinart can handle tedious tasks without breaking a sweat. The wide-mouth feed tube makes adding ingredients easy, and the included pushers keep your fingers safe. Plus, variable speeds and a pulse setting give you complete control over the food processing process.

Easy Cleaning

Cleanup is a breeze with the dishwasher-safe parts (blades excluded, of course). The SealTight Advantage System helps prevent leaks during processing, keeping your kitchen clean.

Is it Right for You?

This Cuisinart is a great choice for anyone who loves to cook and wants to save time and effort in the kitchen. The large capacity and several attachments make it perfect for families or those who entertain frequently. However, if you have limited counter space or only do light food pre-cook, a smaller food processor might be a better fit.

Final Verdict

The Cuisinart Elemental 13-Cup Food Processor with Spiralizer and Dicer is a powerful and multifunctional appliance that can handle different kinds of food prep tasks. With its large capacity, multiple attachments, and easy cleaning, it’s a great choice for busy home cooks.


Key Features

Here are the features of the Cuisinart Elemental 13-Cup Food Processor with Spiralizer and Dicer (White):

Large Capacity: 13-cup work bowl with a 4-cup inner bowl for both large and small jobs.

Multiple Attachments: Comes with stainless steel chopping/mixing blade, dough blade, small and large S-blades, dicing disc, reversible shredding disc (fine/medium), adjustable slicing disc (0-7mm), and a spiralizer attachment.

Powerful Motor: 550-watt peak power motor for handling tedious ingredients.

Easy Control: Electronic touchpad with High/Low/Off/Pulse settings and revealing blue LED lights.

Safe to Use: Supreme wide-mouth feed tube with small, medium, and large pushers.

Easy Cleaning: Dishwasher-safe parts and SealTight Advantage System to prevent leaks.

How to Use your Cuisinart Elemental 13-Cup Food Processor

While I can’t give you the full instruction manual here, I can walk you through the general steps of using the Cuisinart Elemental 13-Cup Food Processor with Spiralizer and Dicer. It’s always advised to check the full manual that comes with the appliance for detailed instructions and safety information.

General Steps:

  1. Wash and Prep: Wash and dry all ingredients before processing. Cut large items into bits small enough to fit the feed tube.
  2. Choose Your Attachment: Depending on your task (chopping, dicing, shredding, etc.), choose the appropriate blade or disc attachment. Check the manual for instructions on how to set up each attachment.
  3. Assemble the Processor: Place the work bowl on the motor base and lock it into place. Add the chosen attachment and secure it with the lid.
  4. Add Ingredients: Place your chopped ingredients into the feed tube. You can use the different sized pushers depending on the ingredient size.
  5. Start Processing: Select your desired speed setting (High, Low, or Pulse) using the control panel.
  • Pulse: Use the pulse function for short bursts of processing for tasks like chopping nuts or getting a coarse chop on vegetables.
  • High/Low: Use the High setting for tasks like mincing cheese or blending soups. Use Low for softer ingredients or tasks requiring more control.

6. Process Until Desired Consistency: Use the pulse function or hold down the High/Low button depending on your chosen setting, until your ingredients reach the desired consistency.

7. Stop and Empty: Turn off the processor and unplug it before unlocking the lid and removing the work bowl.

For Spiralizing:

  1. Follow steps 1-3 above.
  2. Attach the spiralizer attachment with your chosen disc (ribbon or spaghetti) as stated by the manual’s instructions.
  3. Prepare your vegetables according to the manual’s recommendations (firm vegetables like zucchini or sweet potatoes work best).
  4. With the processor on, feed the prepared vegetable through the feed tube using the pusher. The vegetable will be spiralized as it comes out of the smaller opening.

Cleaning:

  1. Unplug the processor before detaching.
  2. Check the manual for instructions on detaching the blades and discs.
  3. Wash the work bowl, lid, pusher, and most attachments in the dishwasher.
  4. Wipe down the motor base with a damp cloth. Never submerge the motor base in water.
  5. Hand wash the blades and discs with soapy water. Be very careful when handling sharp blades!

Safety Tips:

  • Always unplug the processor before attaching or detaching attachments, cleaning, or after use.
  • Never put your fingers near the blades while the processor is running. Use the pushers to feed ingredients.
  • Don’t overload the processor bowl. Process food in groups if necessary.
  • Don’t process hot liquids.

For detailed instructions and safety information, consult the manual that comes with your Cuisinart Elemental 13-Cup Food Processor.


Tips and Recipes Suitable for the Cuisinart Elemental 13-Cup Food Processor

Tips and Tricks for Your Cuisinart Elemental 13-Cup Food Processor:

  1. Pulse for Perfection: Don’t just hold down the button! Use the pulse function for tasks like chopping vegetables or nuts. This gives you more control over the final consistency and prevents over-processing.
  2. Prep is Key: Dicing your ingredients before using the food processor saves time and ensures even processing. Cut large vegetables or fruits into similar-sized bits before feeding them through the chute.
  3. Freeze for Easier Grating: Try freezing hard cheeses like parmesan for 30 minutes before mincing. This will make them easier to grate and prevent them from clustering together.
  4. Make Perfect Pie Dough: Use the pulse function to mix the dry ingredients for pie dough. Then, with the motor running on low, slowly add wet ingredients until the dough just comes together. Avoid over-processing for a crispy topping.
  5. Leftover Makeover: Renew leftover cooked vegetables or roasts by pulsing them in the food processor for use in soups, stews, or fillings.
  6. Homemade Hummus in Minutes: The dicing attachment makes quick work of preparing chickpeas for hummus. You can also use the processor to whip up other dips and spreads.
  7. Quick and Easy Salads: Skip the chopping! Use the shredding disc to dice cabbage for coleslaw or carrots for a salad in seconds. The dicing kit is ideal for creating uniform cubes for different kinds of salad ingredients.
  8. Healthy Veggie Noodles: The spiralizer attachment turns vegetables into fun and healthy noodle alternatives. Perfect for zucchini noodles (zoodles!), sweet potato noodles, or even beet noodles!

Recipes Perfect for Your Cuisinart Elemental
Main Courses:

  • Homemade Veggie Burgers: Pulse vegetables like mushrooms, onions, and lentils in the food processor to create the base for delicious veggie burgers.
  • Quick and Easy Salmon Salad: Poach or bake salmon, then use the food processor to mince it for a tasteful salad.
  • Creamy Tomato Bisque: Blend cooked tomatoes and vegetables in the food processor for a smooth and creamy bisque.

Sides:

  • Coleslaw: Use the shredding disc to dice cabbage and carrots for a classic coleslaw.
  • Homemade Guacamole: The food processor makes quick work of whipping up fresh guacamole.
  • Restaurant-Style Pico de Gallo: Pulse together chopped tomatoes, onions, cilantro, and jalapenos for a refreshing salsa.

Desserts and Snacks:

  • Homemade Pizza Dough: Use the dough blade to quickly mix ingredients for a delicious homemade pizza dough.
  • Healthy Fruit Sorbet: Freeze your favorite fruits, then throb them in the food processor for a refreshing and healthy sorbet.
  • Nut Butters from Scratch: The food processor is perfect for creating your own nut butters from scratch. Try out with different nuts and flavors for a customized treat.

These are just a few ideas to get you started. With its versatility, the Cuisinart Elemental 13-Cup Food Processor can be a lifesaver in the kitchen, helping you create delicious and nutritious meals quickly and easily. Be sure to check the cookbooks and online resources for even more recipe inspiration!


A Cleaning Guide

Following the instructions in the manual is the safest way to clean your Cuisinart Elemental 13-Cup Food Processor, but here’s an overall breakdown:

Safety First!

  • Unplug the processor before detaching any parts.

Disassemble:

  • Check the manual for specific instructions on detaching the blades and discs. Some attachments may lock in place and require a specific release mechanism.

Cleaning the Parts:

  • Dishwasher Safe: The work bowl, lid, pusher, and most attachments are dishwasher safe (top rack recommended).
  • Motor Base: Wipe down the motor base with a damp cloth. Never submerge the motor base in water or any other liquids.
  • Blades and Discs: Hand wash the blades and discs with soapy water. Be very careful when handling sharp blades!

Drying:

  • After washing, thoroughly dry all parts before reconstructing the processor.

Additional Tips:

  • For stubborn food remnants, you can drench the blades and discs in soapy water before washing.
  • The SealTight Advantage System should help prevent leaks during processing, reducing the cleaning required on the motor base.

Refer to the Manual:

Remember, this is an overall guide, and it’s always best to check the manual that comes with your specific Cuisinart model for detailed cleaning instructions. The manual will have specific information on which parts are dishwasher safe and any special cleaning recommendations for certain attachments.


What to Avoid when Using the Cuisinart Elemental 13-Cup Food Processor

Here are some things to avoid when using your Cuisinart Elemental 13-Cup Food Processor:

Safety Precautions:

  • Never put your fingers near the blades: Always use the pushers provided to feed ingredients into the machine. The blades are very sharp and can cause serious injury.
  • Don’t overload the bowl: Process food in groups if necessary. Flooding the bowl can strain the motor and make it difficult to achieve even processing.
  • Don’t process hot liquids: The processor is not designed to handle hot liquids and could crack or become damaged.
  • Unplug before cleaning or disassembling: This is essential to prevent accidental startup and injury.

Preventing Damage to the Food Processor:

  • Don’t process very hard ingredients: This appliance isn’t meant for super hard ingredients like ice cubes or whole nuts. These can damage the blades and motor.
  • Don’t chop or grind very dry ingredients: Very dry ingredients like flour or spices can put a strain on the motor and may not process well.
  • Avoid using the dicing attachment for soft ingredients: Soft ingredients like cooked vegetables or fruits may turn floppy in the dicing attachment.
  • Don’t force the lid: Make sure the bowl is properly locked in place and all attachments are securely fastened before starting the processor.

Additional Tips:

  • Pulse for better control: Especially for tasks like chopping vegetables or nuts, use the pulse function to avoid over-processing.
  • Prep your ingredients: Cut large vegetables or fruits into similar-sized bits before feeding them through the chute. This ensures balanced processing and reduces stress on the motor.
  • Read the manual: The manual will have specific instructions and limitations for your particular Cuisinart model. Following these will help you get the most out of your food processor and avoid spoiling it.

In conclusion, the Cuisinart Elemental 13-Cup Food Processor is a powerful and feature-packed machine that can handle different kinds of food prep tasks. It’s perfect for those who cook frequently or in large groups thanks to its big capacity and multiple attachments. Remember to follow the manual’s cleaning instructions and avoid overloading the motor to keep this appliance running smoothly for years to come.

Hamilton Beach Food Processor & Vegetable Chopper

Master the Kitchen with the Hamilton Beach Food Processor & Vegetable Chopper (70735)
Do you dream of restaurant-quality chopped vegetables, creamy blends, and fun, healthy zoodles at home? Look no further than the Hamilton Beach Food Processor & Vegetable Chopper (70735)! This multifunctional kitchen appliance is your one-stop shop for all your food prep needs, saving you time and effort while encouraging culinary creativity.

Unleash Your Inner Chef

This powerful food processor boasts a 450-watt motor that tackles any chopping, slicing, shredding, mincing, or blending task with ease. The large 10-cup bowl allows you to process enough ingredients to feed a family or group cook for the week.


Key Features:

4 Versatile Attachments:

  • Stainless Steel S-blade: Chops, mixes, and purees with ease, perfect for dips, sauces, and baby food.
  • Reversible Slicing/Shredding Disc: Allows you to choose from coarse or fine slicing and shredding for vegetables, cheese, and more.
  • Spiral Blade: Create delicious and healthy veggie spirals (zoodles) and ribbons for creative and fun meals.
  • Ribbon Blade: For wider ribbons of vegetables, perfect for salads and creative garnishes.

Large 2.5″ Feed Chute: Fits whole vegetables and blocks of cheese, reducing pre-cutting and saving you time.

Easy-Clean Design: All detachable parts, including the blades and bowl, are dishwasher-safe for effortless cleanup.

2 Speeds + Pulse: Provides control over processing for perfect results every time.

Pour Spout: Allows for easy transfer of dressings, sauces, and purees from the bowl.

Beyond the Basics

This food processor isn’t just about effectiveness; it can also be your partner in culinary exploration. Use the veggie spiralizer to create fun and colorful zucchini noodles (zoodles) for a healthy pasta option. Experiment with different vegetables and cheeses using the slicing and shredding discs to add variety and texture to your salads, casseroles, and stir-fries.

The included recipe guide can spark your creativity and get you started with delicious dishes. Whether you’re a seasoned chef or a kitchen novice, the Hamilton Beach Food Processor (70735) empowers you to create restaurant-worthy meals at home.

With its versatility, power, and ease of use, the Hamilton Beach Food Processor & Vegetable Chopper (70735) is an excellent addition to any kitchen. It’s a time-saving necessity that will take your food prep and cooking to the next level.


How to Use Hamilton Beach Food Processor & Vegetable Chopper

A Step-by-Step Guide to Conquering the Kitchen with Your Hamilton Beach Food Processor (70735): A Step-by-Step Guide
The Hamilton Beach Food Processor & Vegetable Chopper (70753) is your new kitchen hero, ready to handle all your chopping, slicing, shredding, and blending tasks. But with all its bells and whistles, you might be wondering where to begin. Fear not, this guide will walk you through using your food processor like a pro.

Assembling Your Food Processor:

  1. Base and Motor Unit: This is the heart of the machine. Place it on a clean, stable surface.
  2. Work Bowl: Place the large 10-cup bowl securely onto the motor unit. There should be a clicking sound to imply a proper lock.
  3. Choosing Your Attachment: Select the blade or disc you need for your task.
  • S-Blade: Ideal for chopping, mixing, and blending.
  • Reversible Slicing/Shredding Disc: Use the coarse side for thicker slices or shreds, and the fine side for more delicate results.
  • Spiral Blade: Create veggie spirals (zoodles) for a fun and healthy twist.
  • Ribbon Blade: For wider ribbons of vegetables, perfect for salads and creative garnishes.

4. Attaching the Blade/Disc: Gently insert the chosen attachment into the feed tube opening at the top of the bowl. Make sure it matches properly and locks into place.

Safety First!

  • Always ensure the appliance is unplugged before attaching or detaching blades or discs.
  • Sharp blades are no joke! Handle them with care and avoid touching the cutting edges.
  • Never reach into the feed chute while the motor is running. Use the provided pusher to guide ingredients safely.

Let’s Get Processing!

1. Prepare Your Ingredients: Wash and cut your vegetables or cheese into chunks that will easily fit into the feed chute (around 2.5 inches wide).

2. Power Up: Plug in the food processor and choose your speed setting. There’s a low speed for softer ingredients and a high speed for tougher ones. The pulse function offers short bursts of power for more control.

3. Feeding the Machine: With the motor running, use the pusher to gently guide your ingredients down the feed chute. Don’t overload the bowl, process in groups for best results.

4. Stopping and Emptying: Once you’ve achieved your desired consistency, turn off the motor and unplug the machine. Use the latch to unlock and detach the work bowl. Carefully take out the blade or disc and empty the processed ingredients.

Cleaning Up:

  • The best part? Most detachable parts, including the bowl, blades, and discs, are dishwasher-safe! Just place them on the top rack for effortless cleaning.
  • You can also hand wash them with warm, soapy water. But be cautious of the sharp blades!

Tips and Tricks:

  • Pulse the motor in short bursts for chopping vegetables to maintain some texture.
  • Use the S-blade with a small amount of liquid to create smooth blends, like baby food or hummus.
  • Grate hard cheeses using the shredding disc with the motor running on low speed.
  • For best results with the spiralizer attachment, use firm vegetables like zucchini, sweet potato, or beets.

With a little practice, you’ll be a food processor master in no time! This multifunctional appliance can transform your food prep, allowing you to create delicious and healthy meals effortlessly. Now go forth and conquer the kitchen!


Tips and Recipes Suitable for it

Culinary Creativity with Your Hamilton Beach Food Processor (70735): Recipe Ideas

The Hamilton Beach Food Processor & Vegetable Chopper (70735) boasts multiple functions, making it a kitchen companion for several recipe creations. From dips and sauces to main courses and desserts, here are some recipe ideas to get you started:

Chopping & Pureeing:

  • Fresh Pico de Gallo: Pulse diced tomatoes, onions, cilantro, jalapeno, and lime juice for a vibrant and flavorful salsa, perfect for chips or tacos.
  • Homemade Hummus: Create creamy and delicious hummus using chickpeas, tahini, olive oil, lemon juice, and garlic. The food processor makes light work of transforming the chickpeas into a smooth spread.
  • Restaurant-Style Guacamole: Disregard the store-bought stuff! Pulse together ripe avocados, chopped red onion, cilantro, lime juice, and spices for a fresh and chunky guacamole.

Slicing & Shredding:

  • Coleslaw Perfection: Effortlessly chop cabbage and carrots using the slicing/shredding disc for a classic coleslaw side dish. Experiment with different dressings and mix-ins for differences.
  • Quick Veggie Stir-Fry: Mince peppers, onions, and other vegetables in seconds with the slicing disc. This allows for smooth cooking and a beautiful presentation in your stir-fry.
  • Cheesy Potato Pancakes (Latkes): Shred potatoes using the food processor, then mix them with egg, flour, and your favorite cheese for crispy and flavorful latkes.

Spiralizing:

  • Zoodle Primavera: Create zucchini noodles (zoodles) with the spiralizer attachment and toss them with a light and flavorful primavera sauce for a healthy and satisfying vegetarian meal.
  • Sweet Potato Noodles with Black Bean Sauce: Swap traditional pasta with sweet potato noodles made using the spiralizer. Top them with a savory black bean sauce for a protein-packed and delicious dish.
  • Veggie Ribbon Salads: Use the ribbon blade to create colorful ribbons of carrots, beets, or cucumbers. They add a beautiful touch to your salads and provide an exquisite textural contrast.

Beyond the Obvious:

Homemade Pizza Dough: The food processor can handle the task of folding pizza dough! Simply mix flour, yeast, water, and olive oil in the bowl and let the machine do the work.

Fresh Bread Croutons: Turn leftover bread into delicious croutons by thumping it in the food processor to desired crumb size. Season them with herbs and spices for an extra flavor boost.

Nut Butters: Make your own peanut butter, almond butter, or cashew butter using the S-blade. Simply roast your nuts beforehand for the best flavor.

These are just a few ideas to spark your creativity. With the power and versatility of the Hamilton Beach Food Processor (70735), the recipe possibilities are endless! Don’t be afraid to experiment and discover new ways to revolutionize your favorite ingredients into delicious meals.

Additional Tips:

  • Use the included recipe guide that comes with your food processor for more inspiration.
  • Look for online recipe resources specifically designed for food processors.
  • When searching for recipes, consider the size of your food processor bowl (10 cups in this case) and adjust ingredient quantities accordingly.

Happy Cooking!


A Cleaning Guide

Keeping your Hamilton Beach Food Processor (70735) clean is easy and necessary for maintaining its performance and hygiene. Here’s a breakdown of the cleaning process:

The Disassembly:

1. Unplug the appliance: Safety first! Always ensure the food processor is unplugged before detaching any parts.

2. Empty the Bowl: Remove any leftover processed food from the work bowl.

3. Detach the Blade/Disc: Press the lock button on the top of the work bowl to unlock it. Carefully lift the bowl straight up and away from the motor unit. Then, gently take out the blade or disc from the feed tube opening.

Cleaning Options:

1. Dishwasher Safe: The beauty of this food processor is that most detachable parts are dishwasher-safe! This includes the work bowl, lid, pusher, and all the blades and discs. Simply place them on the top rack of your dishwasher for a thorough cleaning.

2. Handwashing: If you prefer handwashing, use warm, soapy water. Caution! The blades are sharp, so handle them with care and wear gloves for added protection.

  • Wash the work bowl, lid, and pusher with soapy water and a soft sponge or dishcloth.
  • For the blades and discs, you can soak them in soapy water for a few minutes to loosen any food particles. Then, wash them gently with a sponge, focusing on areas around the blades or dicing teeth.

3. Motor Unit: Wipe down the motor unit with a damp cloth to remove any food remnant. Do not dip the motor unit in water or any other liquids.

Drying:

  • After washing, allow all parts to air dry completely before reconstructing the food processor. You can also pat them dry with a clean dish towel.

Additional Tips:

  • To remove stubborn food particles, you can use a soft brush to gently scrub around the blades or discs.
  • For a deeper clean, you can sometimes add a few drops of light dish soap and some water to the work bowl, then pulse the motor a few times to loosen any stuck-on food. Empty the soapy water and wash the bowl thoroughly as usual.
  • To prevent staining, especially with colored ingredients like turmeric or beetroot, clean the food processor parts immediately after use.

By following these simple cleaning steps, you can ensure your Hamilton Beach Food Processor (70735) stays fresh, hygienic, and ready to handle all your food prep tasks for a long time.

What to avoid when using your Hamilton Beach Food Processor & Vegetable Chopper

Here are some things to avoid when using your Hamilton Beach Food Processor (70735) to prevent damage, injury, and ensure safe and effective operation:

Safety Precautions:

Sharp Blades: Always handle the blades and discs with care. They are very sharp and can cause serious cuts. Avoid touching the cutting edges and wear gloves for added protection when handling them.

Power Source: Never plug in the appliance or operate it with wet hands. Make sure the cord is not damaged and avoid using the food processor near water sources to prevent electrical dangers.

Overloading: Don’t overload the work bowl with ingredients. This can strain the motor and lead to rough processing. Add ingredients in batches for best results.

Wrong-Sized Ingredients: Avoid forcing large pieces of food that won’t fit comfortably into the feed chute. Pre-cut your ingredients to a size that easily fits the opening to prevent jamming and potential damage to the appliance.

Hot Liquids: The food processor is not designed to handle hot liquids. Let hot ingredients cool down before processing them to prevent bending or cracking the work bowl.

Preserving Performance:

Dry Ingredients Only: This food processor is not intended for processing very wet or liquid ingredients. Stick to chopping, slicing, shredding, and pureeing tasks with a solid or semi-solid consistency.

Frozen Food: Avoid processing frozen ingredients directly in the food processor. Defrosting them first to prevent dulling the blades and straining the motor.

Bones and Hard Pits: The blades are not designed to break through bones or hard pits. Remove these from fruits and vegetables before processing to avoid damaging the blades and potentially causing the motor to overheat.

Continuous Processing: Don’t operate the food processor continuously for extended periods. Take breaks in between to allow the motor to cool down and prevent overheating. Check the user manual for recommended usage times.

Wrong Speeds: Use the appropriate speed setting for the task at hand. The high speed is for tougher ingredients, while the low speed is for softer ones. The pulse function offers short bursts for more control. Using the wrong speed can result in uneven processing or damage to the blades.

Additional Tips:

Read the Manual: Before using your food processor for the first time, take some time to read the user manual that comes with it. This will help you get familiar with all the parts, functions, safety instructions, and recommended uses.

Proper Storage: When not in use, store the food processor with the blades and discs stored safely inside the work bowl. This helps prevent accidental cuts and keeps the parts organized.

By following these tips and using your Hamilton Beach Food Processor (70735) responsibly, you can ensure its lifespan, safe operation, and ideal performance in the kitchen.

In conclusion, the Hamilton Beach Food Processor (70735) is a powerful and multifunctional kitchen tool that saves you time and effort. With its large capacity, multiple attachments, and easy cleaning, it’s ideal for chefs of all levels. Embrace convenience and enjoy delicious homemade meals with this useful appliance.

blenders

10 Key Differences Between Food Processors and Blenders

Blenders   cold press juicer

When it comes to kitchen appliances, food processors and blenders are two must-have items that make cooking and food preparation easier. Although they may initially appear to be similar, they have unique features and serve varied functions to accommodate a range of culinary chores. We’ll go over the top ten distinctions between food processors and blenders in this blog post so you can learn about their distinct features and choose the one that works best for you.

1. Purpose and Functionality

Food Processors:
Purpose: Food processors are designed to streamline various food preparation tasks, offering efficiency and versatility in the kitchen.
Functionality: Food processors excel at tasks such as chopping, slicing, dicing, grating, and mixing ingredients. They are particularly useful for preparing ingredients for recipes that require uniform cuts or blending multiple ingredients together. Additionally, food processors can handle heavier tasks such as kneading dough and making nut butter, offering a wide range of culinary possibilities.

Blenders:
Purpose: Blenders are primarily utilized for creating smooth textures by blending ingredients together, making them essential for preparing a variety of beverages, soups, sauces, and purees.
Functionality: Blenders excel at mixing liquids and soft ingredients to create smooth and homogeneous textures. They are particularly effective for blending fruits, vegetables, ice, and liquids to make smoothies, shakes, soups, sauces, and purees. Blenders offer convenience and speed in achieving desired textures, making them indispensable appliances for many kitchen tasks.


2. Blade Design

One of the noticeable differences between food processors and blenders is their blade design. Food processors typically come with multiple interchangeable blades suited for different tasks, such as a chopping blade, slicing disc, shredding disc, and dough blade. These blades are designed to handle solid and semi-solid ingredients with varying textures.

In contrast, blenders have a single set of sharp blades attached to the bottom of the blending jar. These blades are specifically designed for blending liquids and soft ingredients, creating smooth and homogeneous mixtures.


3. Texture and Consistency

Food processors and blenders produce different finished products in terms of texture and consistency. Depending on the blade used, food processors are excellent for producing coarse or fine textures. For instance, a food processor can be used to achieve finely minced vegetables or chunky sauce.

Conversely, blenders are excellent at producing creamy, smooth textures. Smoothies, smooth soups, and rich sauces are all made possible by them because they thoroughly combine all ingredients into a uniform creation.


4. Liquid Capacity

Generally speaking, blenders hold more liquid than food processors do. Because of this, blenders are perfect for making big quantities of sauces, soups, and drinks. Although they can contain liquids, food processors work best when processing smaller amounts of materials at once.


5. Blender’s Speed and Power

Because of their strong motors, which can quickly break ice, grind fruits and vegetables, and produce smooth mixes, blenders are renowned for their high-speed blending capabilities. Food processors feature strong motors as well, but they run at slower rates and are primarily used for operations like precise chopping, slicing, and mixing.


6. Versatility

Food processors are very adaptable kitchen tools that can be used for a variety of jobs, such as slicing vegetables, kneading bread, shredding cheese, and processing nuts. Their adaptability is increased by the changing blades and attachments, which let you easily complete a variety of recipes.

Although they are mainly used for blending liquids and soft substances, blenders can also be used for other purposes, such as smashing ice, pureeing fruits, and, with the appropriate attachments, grinding some dry components.


7. Size and Footprint

When it comes to size and footprint, blenders are often smaller than food processors and require less counter space. Because of this, blenders are a popular option for people who want to save room in their kitchen or have smaller spaces.

Food processors are typically bulkier and require more storage space because of their larger capacity and flexible functions. Nonetheless, a few modern food processors have elegant designs and offer little storage spaces for their attachments.


8. Control Options

Blenders often have a few speed settings, a pulse function, and not much control over the machine. Blenders are simple to use because of this, especially for jobs that call for constant mixing.

More control choices, such as pulse functions, variable speed settings, and dedicated modes for chopping, pureeing, and kneading, are frequently included with food processors. This degree of control makes it possible to process materials precisely to achieve the right consistency and texture.


9. Cleaning and Maintenance

Both food processors and blenders are relatively easy to clean, with most parts being dishwasher safe. However, food processors may require more attention when cleaning due to their multiple blades, discs, and attachments.

Blenders, with their single-blade design, are usually quicker to clean and maintain. Simply rinsing the blending jar with soap and water or running a cleaning cycle with water and detergent can suffice for most cleaning needs.


10. Cost

The cost of food processors and blenders can vary depending on the brand, model, features, and functionality. Generally, blenders tend to be more affordable than food processors, especially basic models designed for simple blending tasks.

However, high-end blenders with advanced features such as variable speed controls, preset programs, and powerful motors can be quite expensive and comparable in price to mid-range food processors that offer a wide range of functions and attachments.

In brief, although food processors and blenders have many features in common, they are two different kitchen machines with special uses. Depending on your culinary preferences, recipes, and available kitchen space, knowing the distinctions between a food processor and a blender will help you make an informed choice.

To improve your cooking experience and broaden your recipe repertoire, food processors and blenders can be useful additions to your kitchen equipment, regardless of your priorities. These include texture control, convenience of use, adaptability, and capacity for liquid mixing.


SHOP: https://primehomegadget.com/

FOLLOW: https://www.instagram.com/primevendors/

Upgraded Turbocrush Professional Plus Digital Blender BX300

Are you looking for a blender that can handle anything you throw at it? Then the Upgraded Turbocrush Professional Plus Digital Blender BX300 might be your perfect match. This machine blender is designed for serious blending experts and can crush ice, grind fruits and vegetables, and create creamy smoothies easily.

Whether you’re making margaritas, smoothies, sauces, or soups, this commercial blender will guarantee perfectly smooth drinks without unwanted ice or fruit lumps.

It functions as a great multi-purpose blender, perfect for everything from cocktails to spreads and dressings, and boasts plenty of practical, useful qualities to keep your business running smoothly.


Feature Breakdown

Professional Power

2200 Watts Motor: This high-wattage motor tackles even the toughest blending tasks. You can effortlessly crush ice, pulverize frozen fruits and vegetables, and create smooth nut butters.

The BX300 boasts a whopping 2200 watts of professional-grade power. This means it can shred through even the toughest ingredients, making it ideal for frozen drinks, nut butters, and even grinding grains.


Large Capacity

64-Ounce BPA-Free Pitcher: This generous capacity allows you to blend large collections of smoothies, soups, or frozen cocktails, perfect for families or delight. The BPA-free construction ensures safe food contact.

The 64-ounce BPA-free pitcher is perfect for making large quantities of smoothies or soups for the whole family. Whether you just like to meal prep, the BX300 got you covered.


One-Touch Convenience

Digital Control Panel: The user-friendly interface features pre-programmed settings for common blending tasks like smoothies and ice crushing. This facilitates operation and ensures reliable results.

Manual Control Dial: For ultimate blending control, there’s a manual control dial that allows you to adjust speed and power to your desired preference.

The BX300 features a user-friendly digital control panel with pre-programmed settings for smoothies, ice crushing, and more. There’s also a manual control dial for essential blending control.

If you’re looking for a top-of-the-line blender that can handle any blending task, then the BX300 is a great option. However, it’s also a high-priced appliance.


Easy Cleaning

Dishwasher-Safe Blades: The stainless steel blades are detachable for easy cleaning and are dishwasher safe, saving you time and effort.

Simple Pitcher Cleaning: The BPA-free pitcher’s smooth design makes it easy to wipe down by hand or toss in the dishwasher (refer to the manufacturer’s instructions).


Additional Features

Depending on the manufacturer, some models may include a meddle tool for processing thicker ingredients or an extra grinding container for dry ingredients like grains or coffee beans.
Overall, the Upgraded Turbocrush Professional Plus Digital Blender BX300 boasts a powerful motor, a large capacity jug, user-friendly controls, and easy cleaning features, making it a strong rival for your kitchen countertop.


Possible Design Elements

Base Unit: Likely a robust construction with a brushed metal or high-quality plastic base for stability and a sophisticated look.

Motor Housing: May be combined into the base unit effortlessly or have a more Conspicuous housing depending on the overall design aesthetic.

Pitcher: Expected to be a clear BPA-free plastic with a large capacity (64oz) and measurement markings for convenience. The design might favor clean lines and a wider base for stability during blending.

Controls: The digital control panel with pre-programmed settings recommend a modern and user-friendly interface. This could be a touch panel or buttons with an LED display.

Overall Style: Given its high-performance nature, the BX300 is likely to prioritize a modern, functional design that relies towards a professional or high-end kitchen appliance aesthetic.


Here are some additional things to consider:

Color: Without specific information, it’s difficult to say for sure. Black is a common color for high-performance blenders, but there could be other options available.

Material Finishes: Brushed metal accents or a glossy plastic finish are possibilities for the base unit.

Control Panel Design: The layout and button/display design will depend on the manufacturer’s preference.


Finding More Information:

If you’d like to solidify the design and style, searching for the specific model on the manufacturer’s website or authorized retailer sites might provide high-resolution images that display the blender’s design.

Video reviews can also offer a visual perspective on the BX300’s aesthetics.
While specifics are limited, hopefully, this gives you a better idea of what the Upgraded Turbocrush Professional Plus Digital Blender BX300 might look like on your kitchen surfaces.


How to Use

While a physical manual would provide the most accurate instructions, here’s a general guide on how to use the Upgraded Turbocrush Professional Plus Digital Blender BX300 based on its typical features:

Before Using for the First Time:

Wash the pitcher and blades: Most blenders come with instructions on washing the parts before first use. This usually involves washing the pitcher with warm soapy water and rinsing thoroughly. Check the manufacturer’s instructions for dishwasher compatibility of the pitcher and blades.

Construct the blender: Place the pitcher on the motor base, ensuring it clicks securely into place.


Using the Blender:

Add ingredients: Add your desired ingredients to the pitcher, ensuring they stay below the maximum top up line marked on the pitcher.

Choose a setting (if applicable): If your BX300 has pre-programmed settings, select the appropriate button for your recipe (e.g., Smoothie, Ice Crush). These settings will automatically adjust blending speed and period.

Manual control (optional): If your model has a manual control dial, you can modify the speed and power to your preference. Start on a lower setting and gradually increase as needed.

Blend: Turn on the blender by pressing the labeled button or adjusting the dial.

Use the tamper (optional): If your BX300 comes with a meddle tool, use it to push down thick ingredients towards the blades for equal blending, especially when processing frozen ingredients.

Stop blending: Once you’ve achieved the desired consistency, turn off the blender.


Additional Tips:

Cut ingredients into smaller pieces: This will help the blender process them more effectively.

Start on low and gradually increase speed: This helps prevent ingredients from getting stuck and allows the motor to adjust to the load.

Don’t overload the blender: Exceeding the maximum top up line can strain the motor and lead to rough blending.

Add liquids first: This helps create a vortex that pulls ingredients down towards the blades.
Take breaks when blending for longer periods: This allows the motor to cool down and prevents overheating.


Easy and Quick CleanUp

The Upgraded Turbocrush Professional Plus Digital Blender BX300 seems designed for easy cleaning, with dishwasher-safe blades and a potentially user-friendly pitcher design. Here’s a breakdown of the general cleaning process:

Before you begin, always unplug the blender before cleaning.

Cleaning the Pitcher:

Deconstruct the pitcher: Most pitchers remove from the motor base by twisting or lifting. Check your user manual for specific instructions.

Check for dishwasher compatibility: The BX300 likely has a BPA-free plastic pitcher. Look for dishwasher-safe symbols below the pitcher or consult the user manual.

Dishwasher safe: If the pitcher is dishwasher safe, place it on the top rack for cleaning.

Hand wash: If it’s not dishwasher safe, wash the pitcher with warm, soapy water and a soft sponge. You can also fill the pitcher with warm soapy water and blend for 30 seconds to loosen any stuck-on remnant. Rinse the pitcher thoroughly afterward.


Cleaning the Blades:

The BX300 most likely has dishwasher-safe, removable stainless steel blades. Double-check the user manual for confirmation.

Dishwasher safe: Place the blades on the top rack of the dishwasher for cleaning.

Hand wash: If not dishwasher safe, carefully hand wash the blades with warm, soapy water. Use caution as the blades are sharp. You can also fill the pitcher with warm soapy water and blend for 30 seconds to help loosen residue around the blades. Rinse the blades thoroughly afterward.


Cleaning the Base Unit:

1. Wipe down the exterior of the motor base with a damp cloth to remove any spills or splatters.

2. Do not drench the base unit in water.


Drying:

Allow all components to dry completely before reconstructing the blender. You can leave the pitcher and blades on a drying rack or towel dry them.

Additional Tips:

To remove stubborn odors, you can fill the pitcher with equal parts water and white vinegar, and blend for 30 seconds. Let the mixture sit for a few minutes, then empty and wash the pitcher as usual.

Baking soda can also be used to remove tough stains. Make a paste with baking soda and water, and apply it to the stained areas of the pitcher. Let it sit for a few minutes, then scrub with a soft sponge and rinse thoroughly afterwards.
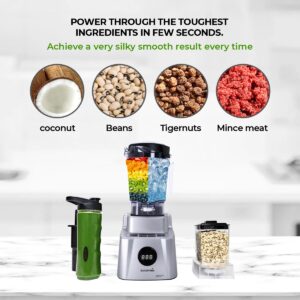


Tips and Recipes

The Upgraded Turbocrush Professional Plus Digital Blender BX300’s powerful motor and large capacity make it suitable for a wide range of recipes. Here are some recipe ideas that can leverage the BX300’s strengths:

Smoothies:

This is a classic use for any blender, and the BX300’s power is perfect for creating creamy and uniform smoothies. You can experiment with a variety of fruits, vegetables, yogurt, protein powder, and nut butter combinations to create endless healthy and delicious options.
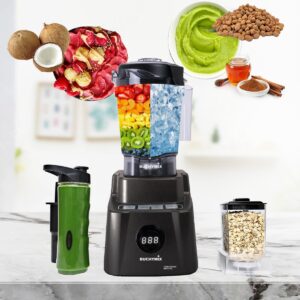


Here are some specific smoothie ideas:

Green Power Smoothie: Mix spinach, kale, banana, mango, pineapple, and coconut water for a vitamin-packed and refreshing drink.

Berry Blast Smoothie: Blend together frozen berries, yogurt, honey, and a splash of milk for a tasty and antioxidant-rich smoothie.

Peanut Butter Protein Smoothie: Use the BX300’s power to pulverize peanut butter into a smooth consistency for a protein-rich smoothie with banana, milk, and cocoa powder.


Frozen Drinks:

The BX300’s ice crushing capabilities make it perfect for creating restaurant-quality frozen cocktails and mocktails. The large capacity allows you to prepare drinks for crowds as well.

Here are some recipe ideas:

Margaritas: Frozen margaritas are a breeze with the BX300. Simply blend tequila, lime juice, orange liqueur, and ice for a perfect summer drink.

Daiquiris: Frozen daiquiris are another refreshing option. Blend rum, lime juice, simple syrup, and ice for an exquisite treat.

Virgin Pina Coladas: For a non-alcoholic option, blend pineapple chunks, coconut milk, cream of coconut, and ice for a tropical satisfaction


Soups and Dips:

The BX300 can be used to create smooth and creamy soups and dips. Its power allows you to blend cooked vegetables and other ingredients into a homogeneous combination.

Here are some recipe ideas:

Tomato Soup: Blend cooked tomatoes, garlic, herbs, and broth for a quick and flavorful homemade soup.

Hummus: The BX300 can handle chickpeas, tahini, olive oil, lemon juice, and garlic easily to create a smooth and delicious hummus.

Cauliflower Soup: Roast cauliflower florets and blend them with broth, spices, and cream cheese for a healthy and delicious soup.


Nut Butters and Spreads:

The BX300’s motor can grind nuts into creamy nut butters. You can test with different types of nuts, such as peanuts, almonds, or cashews, to create homemade nut butters without any added sugar or sodium.

In addition to nut butters, the BX300 can also handle grinding other ingredients for spreads, such as:

  1. Roasted red peppers for a energetic and flavorful spread for sandwiches or crackers.
    2. Fresh herbs with olive oil and garlic for a homemade pesto
    .
    Remember, these are just a few ideas to get you started. With the Upgraded Turbocrush Professional Plus Digital Blender BX300’s power and versatility, the recipe possibilities are endless!
Here are some additional tips for finding recipes suitable for the BX300:

  1. Look for recipes that call for a high-powered blender. These recipes will benefit from the BX300’s ability to crush ice and grind ingredients.

2. Online recipe websites often have filters that allow you to search for recipes based on appliance type. Look for filters for “blender” or “high-powered blender.”

3. Consider the pitcher size when choosing recipes. The BX300’s large 64-ounce pitcher allows you to make large groups of drinks or soups, perfect for entertaining or meal prepping.


What to avoid while using the upgraded Turbocrush professional Plus digital blender

Here are some things to avoid when using the Upgraded Turbocrush Professional Plus Digital Blender BX300 to protect both you and your appliances:

Exceeding Capacity:

The BX300 has a large 64-ounce pitcher, but it’s still important not to overload it. Check the pitcher’s markings for the maximum top up line and avoid exceeding it. Overfilling can strain the motor and lead to uneven blending
.
Hot Liquids:

While the BX300 might handle warm ingredients, avoid blending very hot liquids. The heat can damage the plastic pitcher and potentially warp it. Let hot liquids cool slightly before blending.

Dry Ingredients:

The BX300 isn’t designed for dry grinding. While some models might come with an additional grinding container, check the user manual before using the BX300 for dry ingredients like spices or coffee beans. Using it for dry grinding can damage the blades and potentially shorten the lifespan of the motor.

Hard or Frozen Objects:

The BX300 is powerful, but it’s not meant to crush extremely hard objects like ice cubes straight from the freezer. Break large ice cubes into smaller pieces before blending to avoid putting unnecessary pressure on the motor and blades. Similarly, avoid blending large bits of very hard fruits or vegetables.

Empty Blending:

Never run the blender empty. This can damage the blades and motor. Always add some liquid or ingredients to the pitcher before turning it on.

Continuous Use:

While the BX300 is a powerful blender, avoid using it for longer periods without breaks. Check the user manual for recommendations on appropriate blending times and allow the motor to cool down in between long blending sessions. This will prevent overheating and prolong the life of the appliance.

Improper Cleaning:

Not cleaning the blender properly can lead to build-up, odors, and dull blades. Always follow the manufacturer’s instructions for cleaning the pitcher, blades, and base unit.

Ignoring the Manual:

The user manual is a valuable resource. Take the time to read it thoroughly before using the BX300. The manual will provide specific instructions on using the pre-programmed settings, proper care and cleaning procedures as well.
By following these tips, you can ensure safe and optimal use of your Upgraded Turbocrush Professional Plus Digital Blender BX300.

In conclusion, The Upgraded Turbocrush Professional Plus Digital Blender BX300 appears to be a feature-rich and powerful blender designed for serious blending tasks.

Overall, the Upgraded Turbocrush Professional Plus Digital Blender BX300 is a strong contender for those looking for a powerful and versatile blender.

By weighing the pros, cons, and your specific needs, you can decide if the Upgraded Turbocrush Professional Plus Digital Blender BX300 is the right choice for your kitchen. So what’s the holdup? Order your upgraded Turbocrush professional plus Digital Blender now!

centrifugal juicers, Juicing recipes

What is a centrifugal juicer? Your Comprehensive Guide to Efficient Juice Extraction

The efficiency, speed, and user-friendly nature of centrifugal juicers have propelled them to popularity among health enthusiasts and home juicing enthusiasts alike. If you’re new to the world of juicing or looking to delve deeper into the mechanics of centrifugal juicers, this comprehensive guide is tailored just for you. In this article, we’ll take an in-depth look at centrifugal juicers, exploring their operational principles, benefits, drawbacks, effective usage tips, and guidance on choosing the right juicer for your needs.

  1. Understanding Centrifugal Juicers

Let’s begin with the fundamentals. A centrifugal juicer is a type of juicing appliance designed to extract juice from various fruits and vegetables using centrifugal force. The process involves shredding the produce into a pulp using a high-speed spinning blade and then separating the juice from the pulp through centrifugal motion. The extracted juice is collected in one container, while the pulp is expelled into a separate compartment for convenient disposal.


centrifugal juicers, juicing


2. How Does a Centrifugal Juicer Work?
Understanding the operational mechanism of a centrifugal juicer is crucial to appreciating its efficiency. Let’s break down the process step by step:

  • Feeding the Produce
    The juicing process starts by placing fruits or vegetables into the feeding chute of the juicer. Most centrifugal juicers feature wide chutes capable of accommodating whole or large pieces of produce, reducing the need for pre-cutting and saving time.
  • Shredding and Grinding
    Once the produce enters the chute, it encounters a sharp spinning blade or multiple blades. These blades swiftly shred and grind the produce into a pulp, ensuring efficient extraction of juice from the ingredients.
  • Centrifugal Separation
    As the blade continues to spin at high speed, centrifugal force comes into play. This force pushes the pulp against the sides of a perforated strainer basket, allowing the juice to pass through the strainer and into a collection chamber. Meanwhile, the pulp remains trapped inside the basket.
  • Juice Collection
    The freshly extracted juice flows seamlessly into a separate container attached to the juicer, ready for immediate consumption or further processing in recipes.
  • Pulp Disposal
    Simultaneously, the leftover pulp accumulates in another compartment or container within the juicer. Many modern centrifugal juicers feature automatic pulp ejection systems, making pulp disposal a hassle-free task.

3. Pros and Cons of Centrifugal Juicers
Centrifugal juicers offer several advantages and drawbacks compared to other types of juicers. Let’s delve into these aspects in detail:

  • Pros
    Speed: Centrifugal juicers operate at high speeds, making them ideal for quick juice extraction and perfect for busy individuals with limited time.
    Wide Feeding Chute: The presence of a wide chute reduces prep time as it accommodates whole fruits and vegetables, minimizing the need for chopping or slicing.
    Affordability: Centrifugal juicers are often more budget-friendly compared to masticating or triturating juicers, making them accessible to a wide range of consumers.
    Easy to Clean: Many centrifugal juicers come with dishwasher-safe parts and simple assembly, streamlining the cleaning process and enhancing user convenience.
  • Cons:
    Oxidation: The high-speed spinning action of centrifugal juicers can introduce more oxygen into the juice, leading to quicker oxidation and potential nutrient loss. It’s recommended to consume the juice immediately for optimal freshness.
    Leafy Greens Handling: While centrifugal juicers excel at processing most fruits and firm vegetables, they may struggle with leafy greens like kale or spinach, resulting in lower juice yields.
    Noise Level: Due to their high-speed motors, centrifugal juicers can be noisier during operation compared to slower-speed juicers, such as masticating juicers.
    Limited Juice Yield: Some users may find that centrifugal juicers produce less juice and drier pulp compared to masticating or triturating juicers, especially when juicing leafy greens or softer fruits.

4. Tips for Using a Centrifugal Juicer Effectively
To maximize the performance of your centrifugal juicer and obtain the best results, consider implementing the following tips:

Use Fresh Produce: Opt for fresh, ripe produce to ensure the best-tasting and most nutrient-rich juice.
Alternate Ingredients: To prevent clogging and enhance juice extraction, alternate soft and hard ingredients while juicing.
Immediate Consumption: Consume the freshly extracted juice immediately to retain maximum freshness and nutrient content.
Prompt Cleaning: Rinse and clean your juicer components promptly after use to prevent residue buildup and maintain optimal juicing performance.
Experiment with Recipes: Explore diverse juicing recipes by combining various fruits, vegetables, and herbs to create unique flavour profiles and maximize health benefits.

centrifugal juicers, Juicing recipes

5. Choosing the Right Centrifugal Juicer for You

When choosing a juicer, you should consider the following factors:

1. Motor Power: Make sure to choose a juicer with a powerful motor that can handle a variety of produce effectively.
2. Chute Size: Look for a juicer with a wide feeding chute to accommodate whole fruits and vegetables, reducing prep time.
3. Ease of Cleaning: Prioritize juicers with dishwasher-safe parts and simple assembly for hassle-free cleaning.
4. Brand Reputation: Research reputable brands that are known for producing high-quality centrifugal juicers with reliable performance.
5. User Reviews: Consider reading user reviews and testimonials to gauge customer satisfaction and gather insights into real-world experiences.

Centrifugal juicers are a convenient and efficient way to extract fresh juice at home. By understanding how they work, the benefits and drawbacks they offer, and adopting effective juicing techniques, you can enjoy delicious and nutritious juices that cater to your taste and health goals. So, go ahead and start juicing!

Click here to check out the Top 10 Power Blenders on Amazon for Weight Loss: Your Ultimate Guide

For more juicing tips, recipes, and product recommendations, chat with us on WhatsApp and stay tuned to our blog for regular updates and insights into the world of healthy living. Cheers to vibrant health and flavorful juices!